> ## Documentation Index
> Fetch the complete documentation index at: https://developers.authlete.com/llms.txt
> Use this file to discover all available pages before exploring further.

# Setting up Authlete

> A quick guide to try an OAuth 2.0 authorization flow using Authlete 2.x.

<Note>
  This page is for **Authlete 2.x**. For current (3.0) documentation, see [Getting Started](/get-started/quickstarts/getting-started).
</Note>

<div class="display-4 text-center hero-title">
  Try “OAuth 2.0 Authorization Flow” Using Authlete.
</div>

<div class="container">
  <div class="row">
    <div class="col-md-6">
      <h2>1. Create Your Account.</h2>
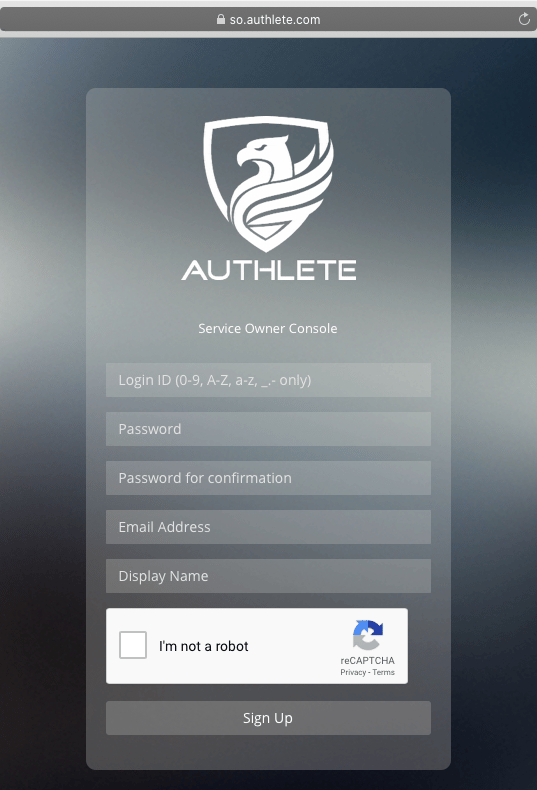
      Fill in [the registration page](https://so.authlete.com/accounts/signup) and click Sign Up.

      <img src="https://mintcdn.com/authlete/Z6xXwx0zbVgSByug/img/developers/getting_started/getting_started_01_en.png?fit=max&auto=format&n=Z6xXwx0zbVgSByug&q=85&s=909161370e28535486687bbfd2c6c5f7" alt="" width="537" height="790" data-path="img/developers/getting_started/getting_started_01_en.png" />
    </div>

    <div class="col-md-6">
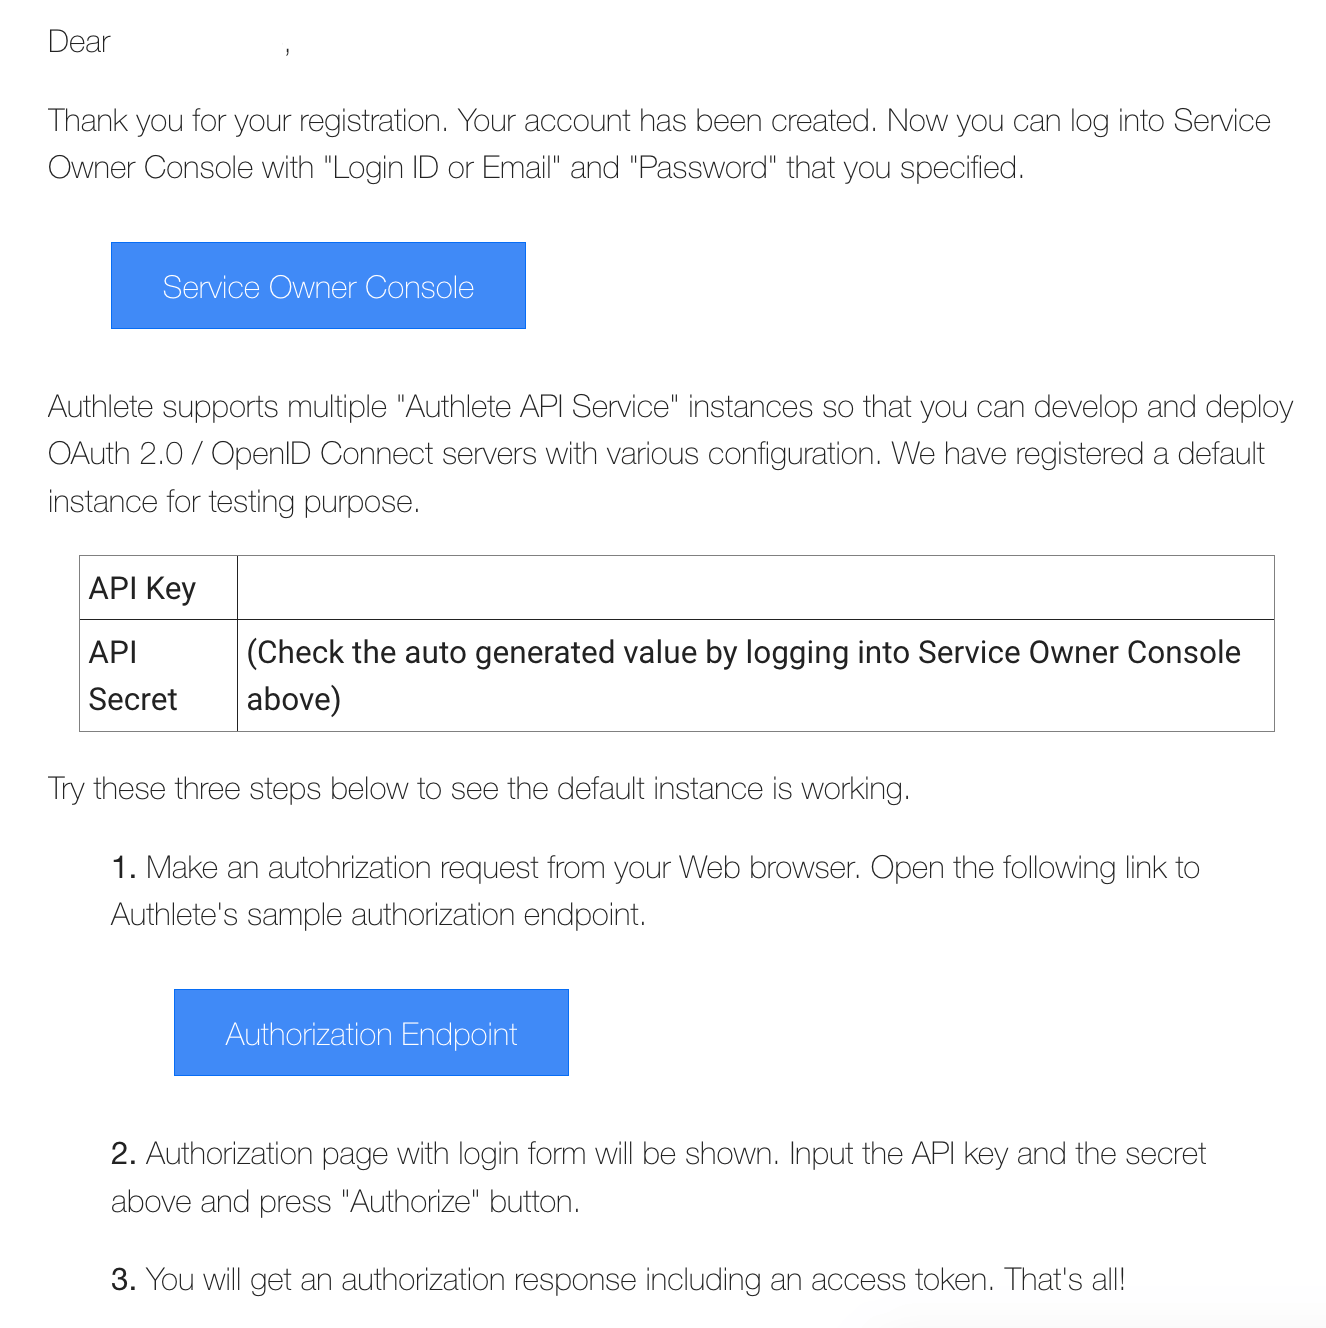
      <h2>2. Check Your Inbox.</h2>
      You will get an email from Authlete, describing instructions on how to try the OAuth 2.0 flow.

      <img src="https://mintcdn.com/authlete/Z6xXwx0zbVgSByug/img/developers/getting_started/getting_started_03_en.png?fit=max&auto=format&n=Z6xXwx0zbVgSByug&q=85&s=b924c0f34a43077cdb08c5cea05b8ab5" alt="" width="1326" height="1328" data-path="img/developers/getting_started/getting_started_03_en.png" />
    </div>
  </div>
</div>

<div class="alert alert-info">
  <div class="container">
    <div class="row pb-4">
      <div class="col-md-12">
        💡
        You can try OAuth 2.0 flow right after the signup. The following settings have been configured:
      </div>
    </div>

    <div class="row">
      <div class="col-md-12">
        <ul>
          <li><strong>An Authlete service instance</strong></li>
          <li><strong>A default OAuth 2.0 authorization endpoint</strong></li>
          <li><strong>Sample client application settings</strong></li>
        </ul>
      </div>
    </div>
  </div>
</div>

{/*
<Note>
**Technical Note**

You can find the API key of your first service and the client ID of your first client application in the email. Also, you can see them in Service Owner Console and Developer Console, respectively. The URLs of the consoles are as follows.


Service Owner Console: `https://so.authlete.com/`


Developer Console: `https://cd.authlete.com//`


You can log in to Developer Console using the API key and secret of the service. Also, you can let other (third-party) developers use Developer Console of your service by implementing a developer authentication callback endpoint to authenticate the developers. Read "Developer Authentication Callback" for details.
</Note>
*/}

<div class="container">
  <div class="row">
    <div class="col-md-12">
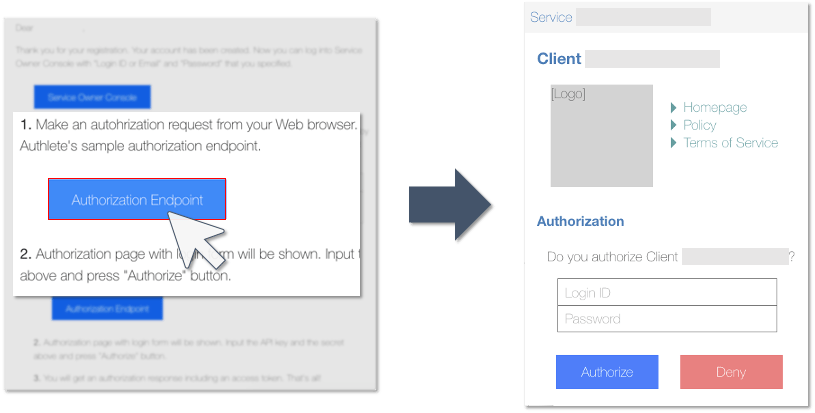
      <h2>3. Click "Authorization Endpoint" Button.</h2>
    </div>
  </div>

  <div class="row">
    <div class="col-md-12">
      You will be navigated to a login page for authentication and authorization.
    </div>
  </div>

  <div class="row">
    <div class="col-md-12">
      <img src="https://mintcdn.com/authlete/Z6xXwx0zbVgSByug/img/developers/getting_started/getting_started_14_en.png?fit=max&auto=format&n=Z6xXwx0zbVgSByug&q=85&s=5227a9f7ba9b333f4ad2eb2df38d37b9" alt="" width="815" height="413" data-path="img/developers/getting_started/getting_started_14_en.png" />
    </div>
  </div>
</div>

<div class="alert alert-info">
  💡
  The "Authorization Endpoint" button in the email will invoke an authorization request (implicit grant flow) from your Web browser to Authlete's default authorization endpoint. The actual URL of the request is:

  `https://api.authlete.com/api/auth/authorization/direct/<SERVICE_API_KEY>?response_type=token&client_id=<SAMPLE_APP_CLIENT_ID>`
</div>

<div class="container">
  <div class="row">
    <div class="col-md-12">
      <h2>4. Enter Login Information.</h2>
    </div>
  </div>

  <div class="row">
    <div class="col-md-7">
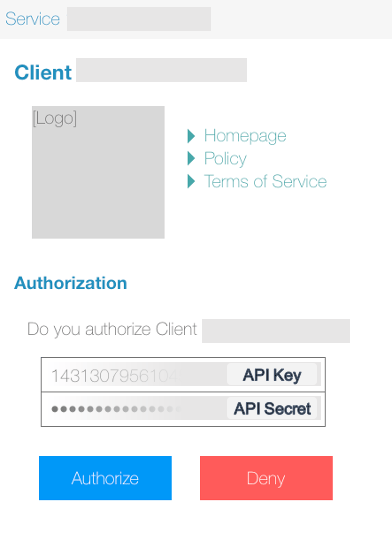
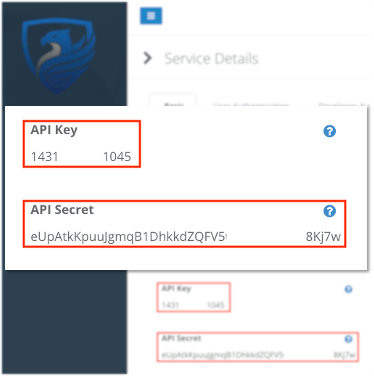
      Use the API key and secret of your Authlete service instance.

      <img src="https://mintcdn.com/authlete/Z6xXwx0zbVgSByug/img/developers/getting_started/getting_started_21_en.png?fit=max&auto=format&n=Z6xXwx0zbVgSByug&q=85&s=01ab169d0e82659ef52290b6d82392bb" alt="" width="392" height="540" data-path="img/developers/getting_started/getting_started_21_en.png" />
    </div>

    <div class="col-md-5">
      <div class="alert alert-warning" role="alert">
        <div class="pb-4">
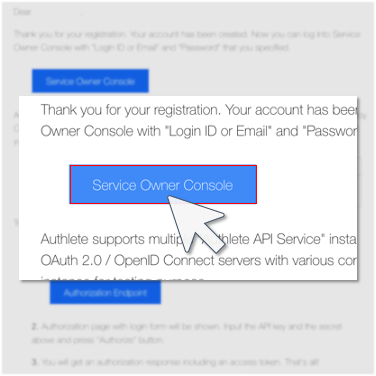
          You can see the API key and secret by logging in to “Service Owner Console.”
        </div>

        <div>
          <ol>
            <li class="pb-4"><strong>Click the button in the email.</strong><img src="https://mintcdn.com/authlete/Z6xXwx0zbVgSByug/img/developers/getting_started/getting_started_24_en.png?fit=max&auto=format&n=Z6xXwx0zbVgSByug&q=85&s=2242113a271cb6fe5d8093977b0182aa" class="img-fluid shadow" width="376" height="376" data-path="img/developers/getting_started/getting_started_24_en.png" /></li>
            <li><strong>Check the API key and secret.</strong><img src="https://mintcdn.com/authlete/Z6xXwx0zbVgSByug/img/developers/getting_started/getting_started_25_en.png?fit=max&auto=format&n=Z6xXwx0zbVgSByug&q=85&s=b6569f57377ef887edd3d8dd5050f1d8" class="img-fluid shadow" width="374" height="376" data-path="img/developers/getting_started/getting_started_25_en.png" /></li>
          </ol>
        </div>
      </div>
    </div>
  </div>
</div>

<div class="alert alert-info">
  <div class="container">
    <div class="row">
      <div class="col-md-12">
        💡
        For testing purposes, the default authorization endpoint authenticates a user with the API key and secret.
      </div>
    </div>
  </div>
</div>

<div class="container">
  <div class="row">
    <div class="col-md-12">
      <h2>5. Click “Authorize” Button.</h2>
    </div>
  </div>

  <div class="row">
    <div class="col-md-5">
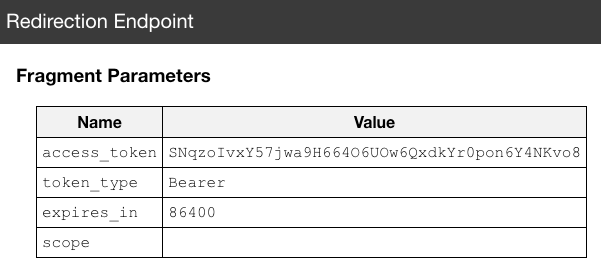
      Your browser will be redirected to the client's redirection endpoint that shows an issued access token.

      You can find the same access token in the fragment part of the destination URL.

      `https://api.authlete.com/api/mock/redirection/<SERVICE_API_KEY>#access_token=SNqzo...&token_type=Bearer&expires_in=86400&scope=`
    </div>

    <div class="col-md-7">
      <img src="https://mintcdn.com/authlete/Z6xXwx0zbVgSByug/img/developers/getting_started/getting_started_22_en.png?fit=max&auto=format&n=Z6xXwx0zbVgSByug&q=85&s=e706b71f52237c88fcf63955ef19f633" alt="" width="601" height="276" data-path="img/developers/getting_started/getting_started_22_en.png" />
    </div>
  </div>
</div>

<div class="alert alert-success text-center">
  <strong>Congratulations! You successfully issued your first access token using Authlete!</strong>
</div>

<div class="container">
  <div class="mx-auto text-center">
    <button class="btn btn-success btn-lg" type="button" data-toggle="collapse" data-target="#nextSteps" aria-expanded="false" aria-controls="nextSteps">
      What to Do Next?
    </button>
  </div>
</div>

<div class="collapse" id="nextSteps">
  <h2>Try “Authorization Code Grant Flow”</h2>

  Try “Authorization Code Grant Flow” in addition to Implicit Grant Flow in the previous section.

  <div class="container">
    <div class="row">
      <div class="col-md-6">
        <strong>1.</strong> Enter the following URL (authorization request) to your Web browser and submit it.

        `https://api.authlete.com/api/auth/authorization/direct/<SERVICE_API_KEY>?response_type=code&client_id=<SAMPLE_APP_CLIENT_ID>`

        This request is the same as the previous one except
        `response_type=code`.
        Replace
        `<SERVICE_API_KEY>` / `<SAMPLE_APP_CLIENT_ID>` to the appropriate values in your environment.
      </div>

      <div class="col-md-6">
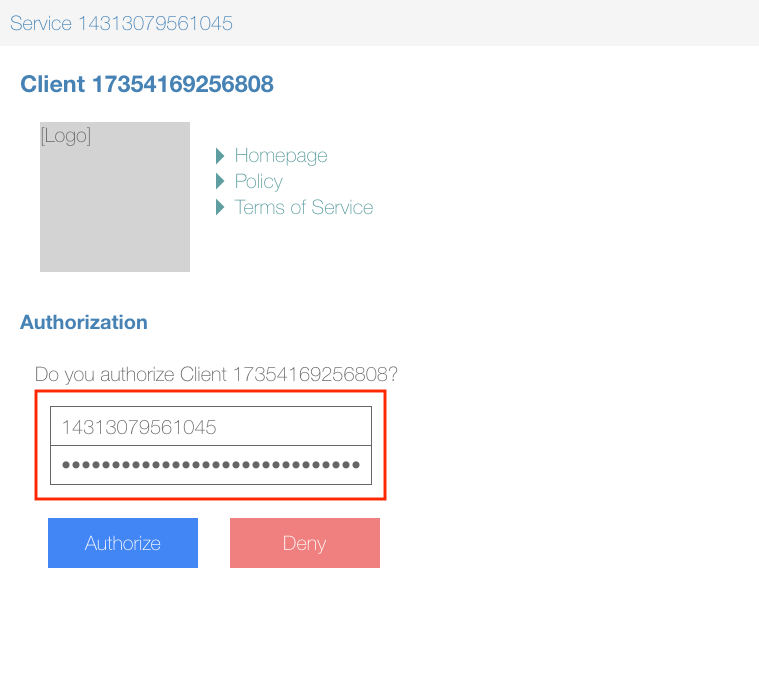
        <strong>2.</strong> You will be navigated to the login page.
        Enter the API key and the secret.

        <img src="https://mintcdn.com/authlete/Z6xXwx0zbVgSByug/img/developers/getting_started/getting_started_31_en.png?fit=max&auto=format&n=Z6xXwx0zbVgSByug&q=85&s=43a31b894eed6d4edc64c8b083aa6fcf" alt="" width="759" height="681" data-path="img/developers/getting_started/getting_started_31_en.png" />
      </div>
    </div>

    <div class="row">
      <div class="col-md-6">
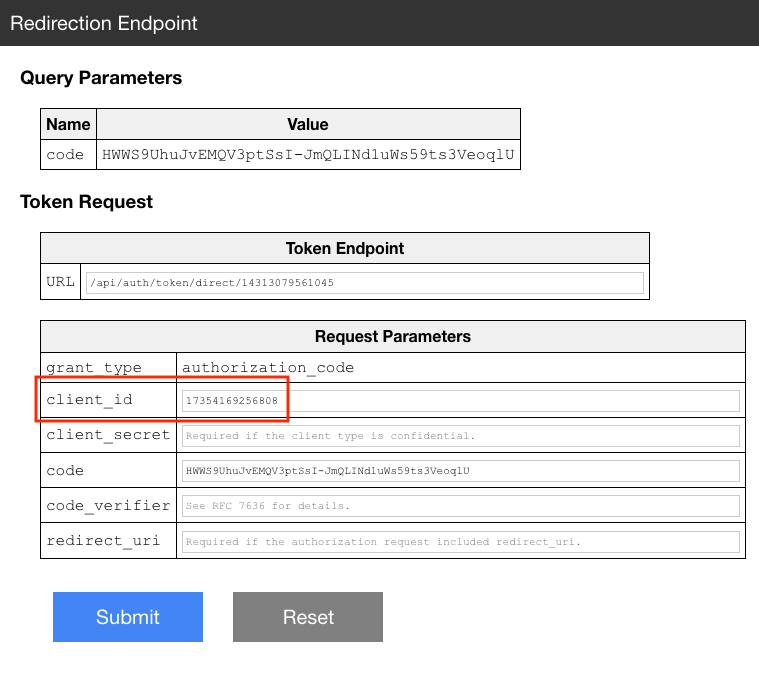
        <strong>3.</strong> Your browser will be redirected to the client's redirection endpoint.
        Enter the value of `SAMPLE_APP_CLIENT_ID` to `client_id` field and click “Submit” button to make a token request.

        <img src="https://mintcdn.com/authlete/Z6xXwx0zbVgSByug/img/developers/getting_started/getting_started_32_en.png?fit=max&auto=format&n=Z6xXwx0zbVgSByug&q=85&s=add43fa3a1e346181c0fedbb1adaaccb" alt="" width="759" height="681" data-path="img/developers/getting_started/getting_started_32_en.png" />
      </div>

      <div class="col-md-6">
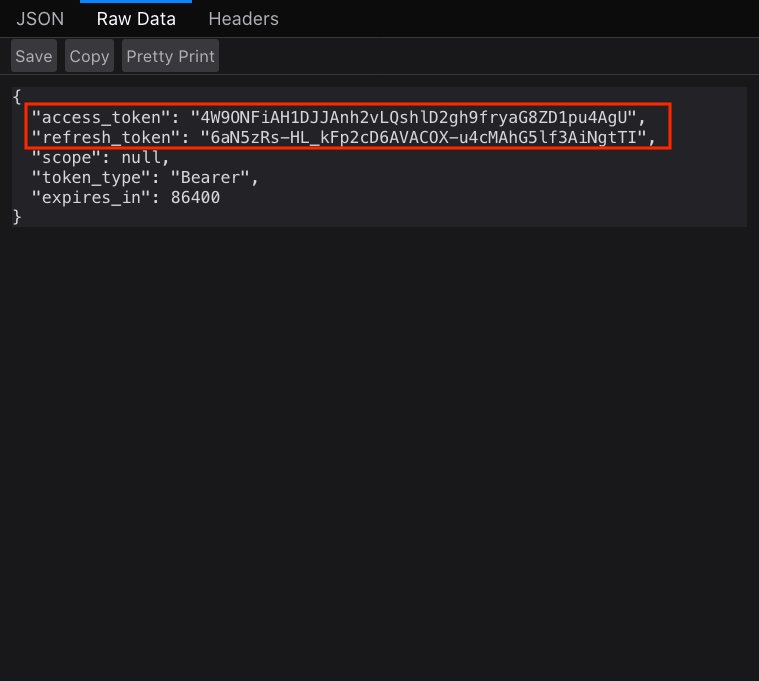
        <strong>4.</strong> Token response (JSON formatted) will be displayed.
        There should be values for `"access_token"` and `"refresh_token"`.

        <img src="https://mintcdn.com/authlete/Z6xXwx0zbVgSByug/img/developers/getting_started/getting_started_33_en.png?fit=max&auto=format&n=Z6xXwx0zbVgSByug&q=85&s=b141bd130c107989f391c8da572b7674" alt="" width="759" height="681" data-path="img/developers/getting_started/getting_started_33_en.png" />
      </div>
    </div>
  </div>

  <h2>Authorization Server Implementations</h2>

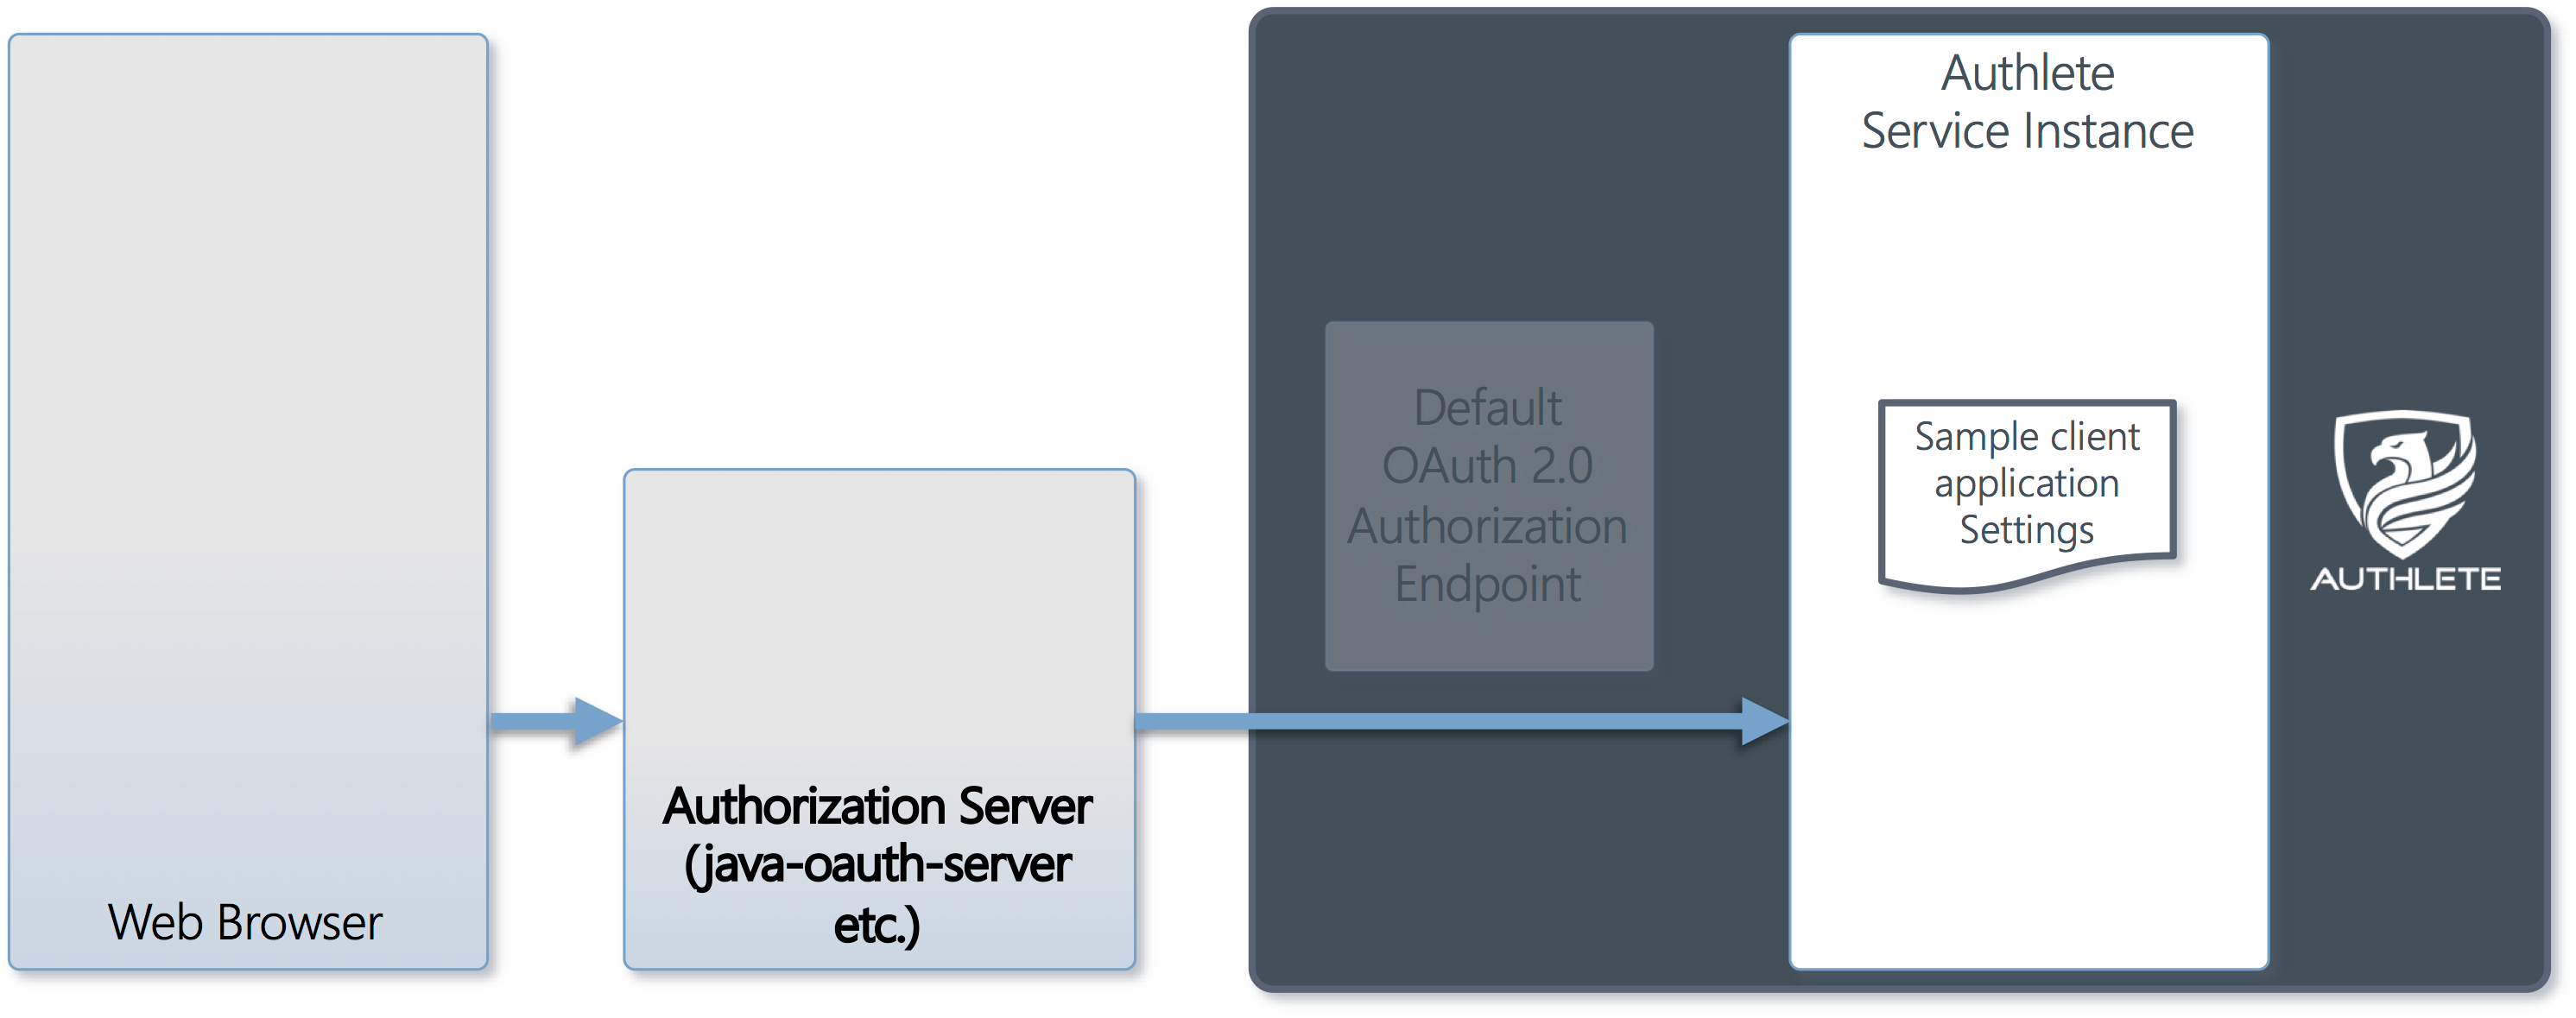
  In the previous section, you tried the flow using the default implementation of authorization endpoint.
  For real deployments, you have freedom of choice to implement your own authorization server using [Authlete Web APIs][api].

  <div class="container">
    <div class="row">
      <div class="col-md-3">
        <strong><a href="https://github.com/authlete/java-oauth-server">java-oauth-server</a></strong> is an open-source authorization server written using Authlete Web APIs. It is the reference implementation in Java and a good starting point for your own authorization server implementation.
      </div>

      <div class="col-md-9">
        <img src="https://mintcdn.com/authlete/Z6xXwx0zbVgSByug/img/developers/getting_started/getting_started_13_en.png?fit=max&auto=format&n=Z6xXwx0zbVgSByug&q=85&s=cee457057b55c3120b65be9770ccaecc" alt="" width="2983" height="1179" data-path="img/developers/getting_started/getting_started_13_en.png" />
      </div>
    </div>
  </div>

  This reference implementation uses Authlete as its backend so that it can eliminate efforts to set up a database server as storage of authorization data (e.g. access tokens), configuration data of the authorization server itself as well as client application settings communicating with the server.

  So you can download and start the authorization server only with a few commands as shown below:

  * [>Java (JAX-RS)](#oauth-server-jaxrs)
  * [Java (Spring)](#oauth-server-spring)
  * [C#](#oauth-server-csharp)
  * [PHP (Laravel)](#oauth-server-laravel)

  <div class="tab-content">
    <div class="tab-pane active" id="oauth-server-jaxrs" role="tabpanel" aria-labelledby="oauth-server-jaxrs-tab">
      <div class="in-tab">
        Please check the [documents](https://github.com/authlete/java-oauth-server) at java-oauth-server for details.
      </div>

      ```text theme={null}
      $ git clone https://github.com/authlete/java-oauth-server.git
      $ cd java-oauth-server
      $ vi authlete.properties
      $ mvn jetty:run
      ```
    </div>

    <div class="tab-pane" id="oauth-server-spring" role="tabpanel" aria-labelledby="oauth-server-spring-tab">
      <div class="in-tab">
        Please check the [documents](https://github.com/authlete/spring-oauth-server) at spring-oauth-server for details.
      </div>

      ```text theme={null}
      $ git clone https://github.com/authlete/spring-oauth-server
      $ cd spring-oauth-server
      $ vi authlete.properties
      $ mvn spring-boot:run
      ```
    </div>

    <div class="tab-pane" id="oauth-server-csharp" role="tabpanel" aria-labelledby="oauth-server-csharp-tab">
      <div class="in-tab">
        Please check the [documents](https://github.com/authlete/csharp-oauth-server) at csharp-oauth-server for details.
      </div>

      ```text theme={null}
      $ git clone https://github.com/authlete/csharp-oauth-server
      $ cd csharp-oauth-server/AuthorizationServer
      $ vi authlete.properties
      $ dotnet run
      ```
    </div>

    <div class="tab-pane" id="oauth-server-laravel" role="tabpanel" aria-labelledby="oauth-server-laravel-tab">
      <div class="in-tab">
        Please check the [documents](https://github.com/authlete/authlete-php-laravel) at authlete-php-laravel for details.
      </div>

      ```text theme={null}
      $ laravel new authorization-server
      $ cd authorization-server
      $ composer require authlete/authlete-laravel
      $ php artisan authlete:authorization-server
      $ vi config/authlete.php
      ```
    </div>
  </div>

  If you implement your own authorization server using Authlete Web APIs, you don't have to implement an [authentication callback endpoint][auth_cb], but instead you are required to customize some source files related to end-user authentication.

  ## Useful Links

  * [Authlete API Tutorials][tutorial]
    * Authlete API Tutorials explain how Authlete APIs work.
  * [Service Owner Console][so]
    * Service Owner Console is a Web console for you to manage services.
  * [Developer Console][cd]
    * Developer Console is a Web console for developer to manage client applications.
  * [Protected Resource][resource]
    * The main purpose to implement OAuth 2.0 is to protect Web APIs by access tokens.
</div>

[api]: https://docs.authlete.com/

[signup]: https://so.authlete.com/accounts/signup

[java_oauth]: https://github.com/authlete/java-oauth-server

[6749]: https://tools.ietf.org/html/rfc6749

[tutorial]: /developers/tutorial

[so]: /developers/so_console

[cd]: /developers/cd_console

[resource]: /developers/definitive_guide/protected_resource

[auth_cb]: /developers/definitive_guide/authentication_callback