 # Prerequisites
Before doing this, you are expected to have knowledge of OpenID Connect and Authlete by running through the following tutorial.
* [OIDC Basics](/get-started/quickstarts/oidc-basics)
You also need to have an Authlete service that has been configured with settings in accordance with FAPI Basics below. Run the instructions ([A complete example walk through](/protocols-and-flows/compliance-profiles/fapi-basics#a-complete-example-walk-through)) in the document to make sure that your Authlete service works properly.
* [Financial-grade API Basics](/protocols-and-flows/compliance-profiles/fapi-basics)
The following software components are used in this tutorial. Prepare your lab environment that can execute them.
* Required for this tutorial
* [authlete/java-oauth-server](https://github.com/authlete/java-oauth-server/): A reference implementation of authorzation server
* [authlete/java-resource-server](https://github.com/authlete/java-resource-server/): A reference implementation of resource server
* Reommended, but you can choose other alternative tools
* [Apache HTTP Server](https://httpd.apache.org/) (hereinafter “Apache”): A reverse proxy for authorization server and resource server
* [curl](https://curl.haxx.se/): An API client
* [OpenSSL](https://www.openssl.org/): A tool to generate private keys and public key certificates
# Configuring an authorization server
In this section, we will cover the following tasks:
* Deploying a java-oauth-server package
* Testing connection
The diagram below illustrates components configured in this section.
A Web browser and curl send requests to an authorization server (java-oauth-server)
whose endpoint is [http://localhost:8080](http://localhost:8080).
# Prerequisites
Before doing this, you are expected to have knowledge of OpenID Connect and Authlete by running through the following tutorial.
* [OIDC Basics](/get-started/quickstarts/oidc-basics)
You also need to have an Authlete service that has been configured with settings in accordance with FAPI Basics below. Run the instructions ([A complete example walk through](/protocols-and-flows/compliance-profiles/fapi-basics#a-complete-example-walk-through)) in the document to make sure that your Authlete service works properly.
* [Financial-grade API Basics](/protocols-and-flows/compliance-profiles/fapi-basics)
The following software components are used in this tutorial. Prepare your lab environment that can execute them.
* Required for this tutorial
* [authlete/java-oauth-server](https://github.com/authlete/java-oauth-server/): A reference implementation of authorzation server
* [authlete/java-resource-server](https://github.com/authlete/java-resource-server/): A reference implementation of resource server
* Reommended, but you can choose other alternative tools
* [Apache HTTP Server](https://httpd.apache.org/) (hereinafter “Apache”): A reverse proxy for authorization server and resource server
* [curl](https://curl.haxx.se/): An API client
* [OpenSSL](https://www.openssl.org/): A tool to generate private keys and public key certificates
# Configuring an authorization server
In this section, we will cover the following tasks:
* Deploying a java-oauth-server package
* Testing connection
The diagram below illustrates components configured in this section.
A Web browser and curl send requests to an authorization server (java-oauth-server)
whose endpoint is [http://localhost:8080](http://localhost:8080).
 ## Configuring java-oauth-server
We will download and configure java-oauth-server.
Detailed instructions are described in [its document](https://github.com/authlete/java-oauth-server#how-to-run).
### Downloading the source
Download java-oauth-server using `git` command.
```shell theme={null}
$ git clone https://github.com/authlete/java-oauth-server.git
```
### Configuration
Edit the following entries in its configuration file, `authlete.properties`.
Put the API key and the secret of your Authlete service that has been configured in accordance with FAPI Basics.
```shell theme={null}
service.api_key =
## Configuring java-oauth-server
We will download and configure java-oauth-server.
Detailed instructions are described in [its document](https://github.com/authlete/java-oauth-server#how-to-run).
### Downloading the source
Download java-oauth-server using `git` command.
```shell theme={null}
$ git clone https://github.com/authlete/java-oauth-server.git
```
### Configuration
Edit the following entries in its configuration file, `authlete.properties`.
Put the API key and the secret of your Authlete service that has been configured in accordance with FAPI Basics.
```shell theme={null}
service.api_key = 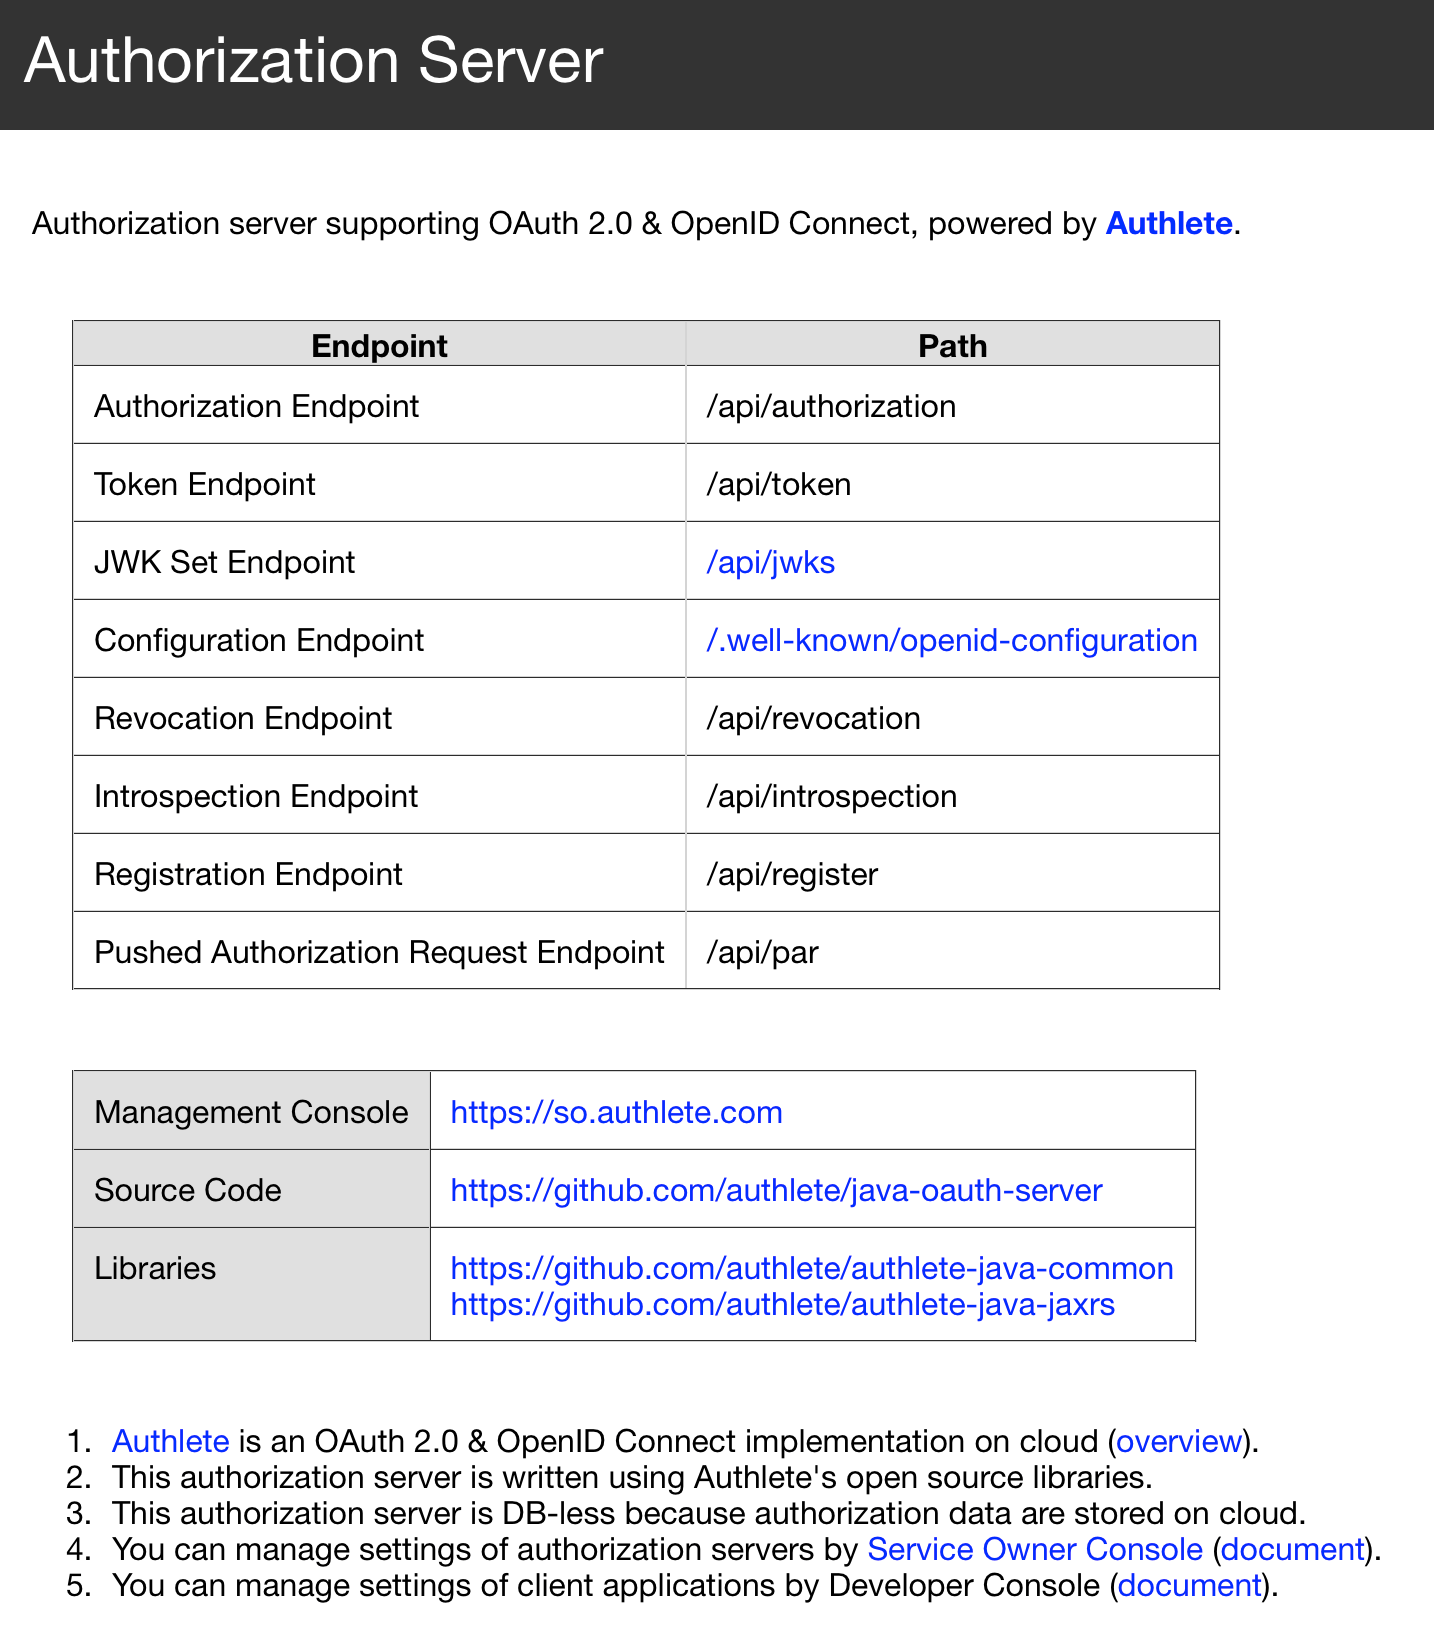 ## Executing FAPI authorization flow (1)
Generate a request object in accordance with [instructions in FAPI Basics](/protocols-and-flows/compliance-profiles/fapi-basics#authentication-context-reference-acr-settings) and craft an authorization request using the object.
The following values are used in this tutorial.
* Payload (replace the value of `client_id` (`1756...3766`) with [yours that has been automatically generated during FAPI Basics](/protocols-and-flows/compliance-profiles/fapi-basics#adding-a-new-authlete-service-with-a-client))
```json theme={null}
{
"redirect_uri":"https://client.example.org/cb/example.com",
"response_type":"code id_token",
"client_id":"1756...3766",
"scope":"openid payment",
"exp":15549730000,
"aud":"https://as.example.com",
"claims":{
"id_token":{
"acr":{
"essential":true,
"values":["urn:example:psd2:sca"]
}
}
},
"nonce":"n-0S6_WzA2Mj"
```
* Signed JWT (use [your signing key that has been generated in FAPI Basics](/protocols-and-flows/compliance-profiles/fapi-basics#request-object-settings) for its signature)
```text theme={null}
eyJr...YifQ.ewoi...iCn0.ztl2...tjAA
```
* Authorization request (replace the values of `client_id` (`1756...3766`) and `request` (`eyJr...YifQ.ewoi...iCn0.ztl2...tjAA`) with yours determined above)
```shell theme={null}
http://as.example.com:8080/api/authorization
?redirect_uri=https://client.example.org/cb/example.com
&scope=openid+payment
&response_type=code+id_token
&client_id=1756...3766
&nonce=n-0S6_WzA2Mj
&request=eyJr...YifQ.ewoi...iCn0.ztl2...tjAA
```
Enter the crafted request string (URL) to your Web browser's location field.
## Executing FAPI authorization flow (1)
Generate a request object in accordance with [instructions in FAPI Basics](/protocols-and-flows/compliance-profiles/fapi-basics#authentication-context-reference-acr-settings) and craft an authorization request using the object.
The following values are used in this tutorial.
* Payload (replace the value of `client_id` (`1756...3766`) with [yours that has been automatically generated during FAPI Basics](/protocols-and-flows/compliance-profiles/fapi-basics#adding-a-new-authlete-service-with-a-client))
```json theme={null}
{
"redirect_uri":"https://client.example.org/cb/example.com",
"response_type":"code id_token",
"client_id":"1756...3766",
"scope":"openid payment",
"exp":15549730000,
"aud":"https://as.example.com",
"claims":{
"id_token":{
"acr":{
"essential":true,
"values":["urn:example:psd2:sca"]
}
}
},
"nonce":"n-0S6_WzA2Mj"
```
* Signed JWT (use [your signing key that has been generated in FAPI Basics](/protocols-and-flows/compliance-profiles/fapi-basics#request-object-settings) for its signature)
```text theme={null}
eyJr...YifQ.ewoi...iCn0.ztl2...tjAA
```
* Authorization request (replace the values of `client_id` (`1756...3766`) and `request` (`eyJr...YifQ.ewoi...iCn0.ztl2...tjAA`) with yours determined above)
```shell theme={null}
http://as.example.com:8080/api/authorization
?redirect_uri=https://client.example.org/cb/example.com
&scope=openid+payment
&response_type=code+id_token
&client_id=1756...3766
&nonce=n-0S6_WzA2Mj
&request=eyJr...YifQ.ewoi...iCn0.ztl2...tjAA
```
Enter the crafted request string (URL) to your Web browser's location field.
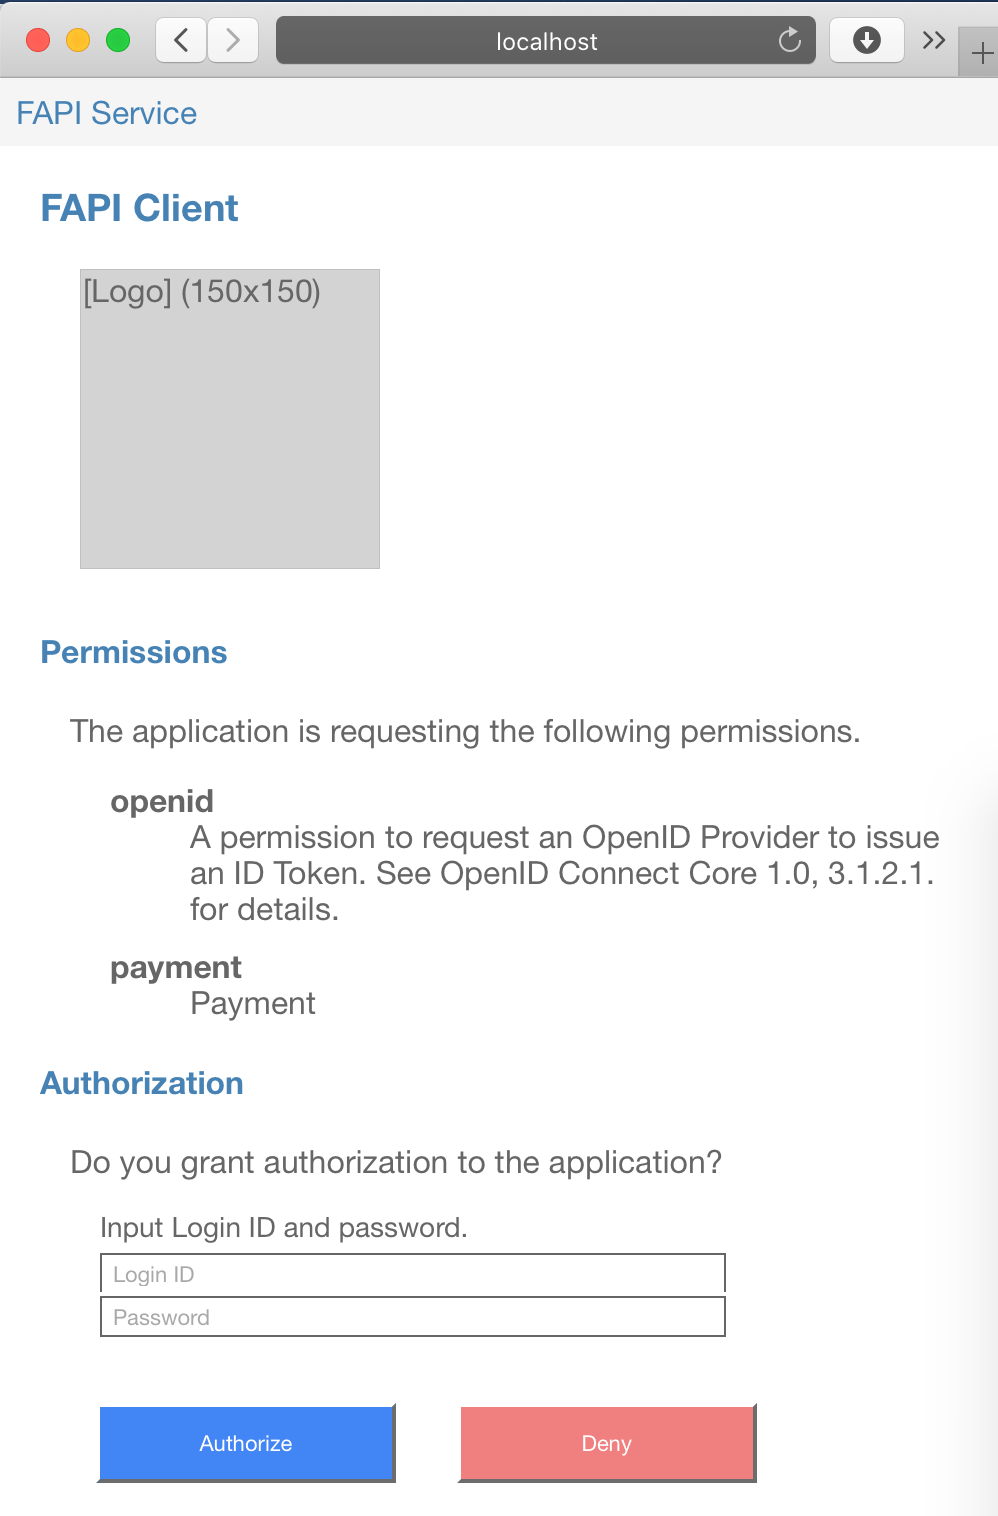
 An authorization page should be displayed.
Enter `john` / `john` to Login ID / Password fields and click Authorize button.
An authorization page should be displayed.
Enter `john` / `john` to Login ID / Password fields and click Authorize button.
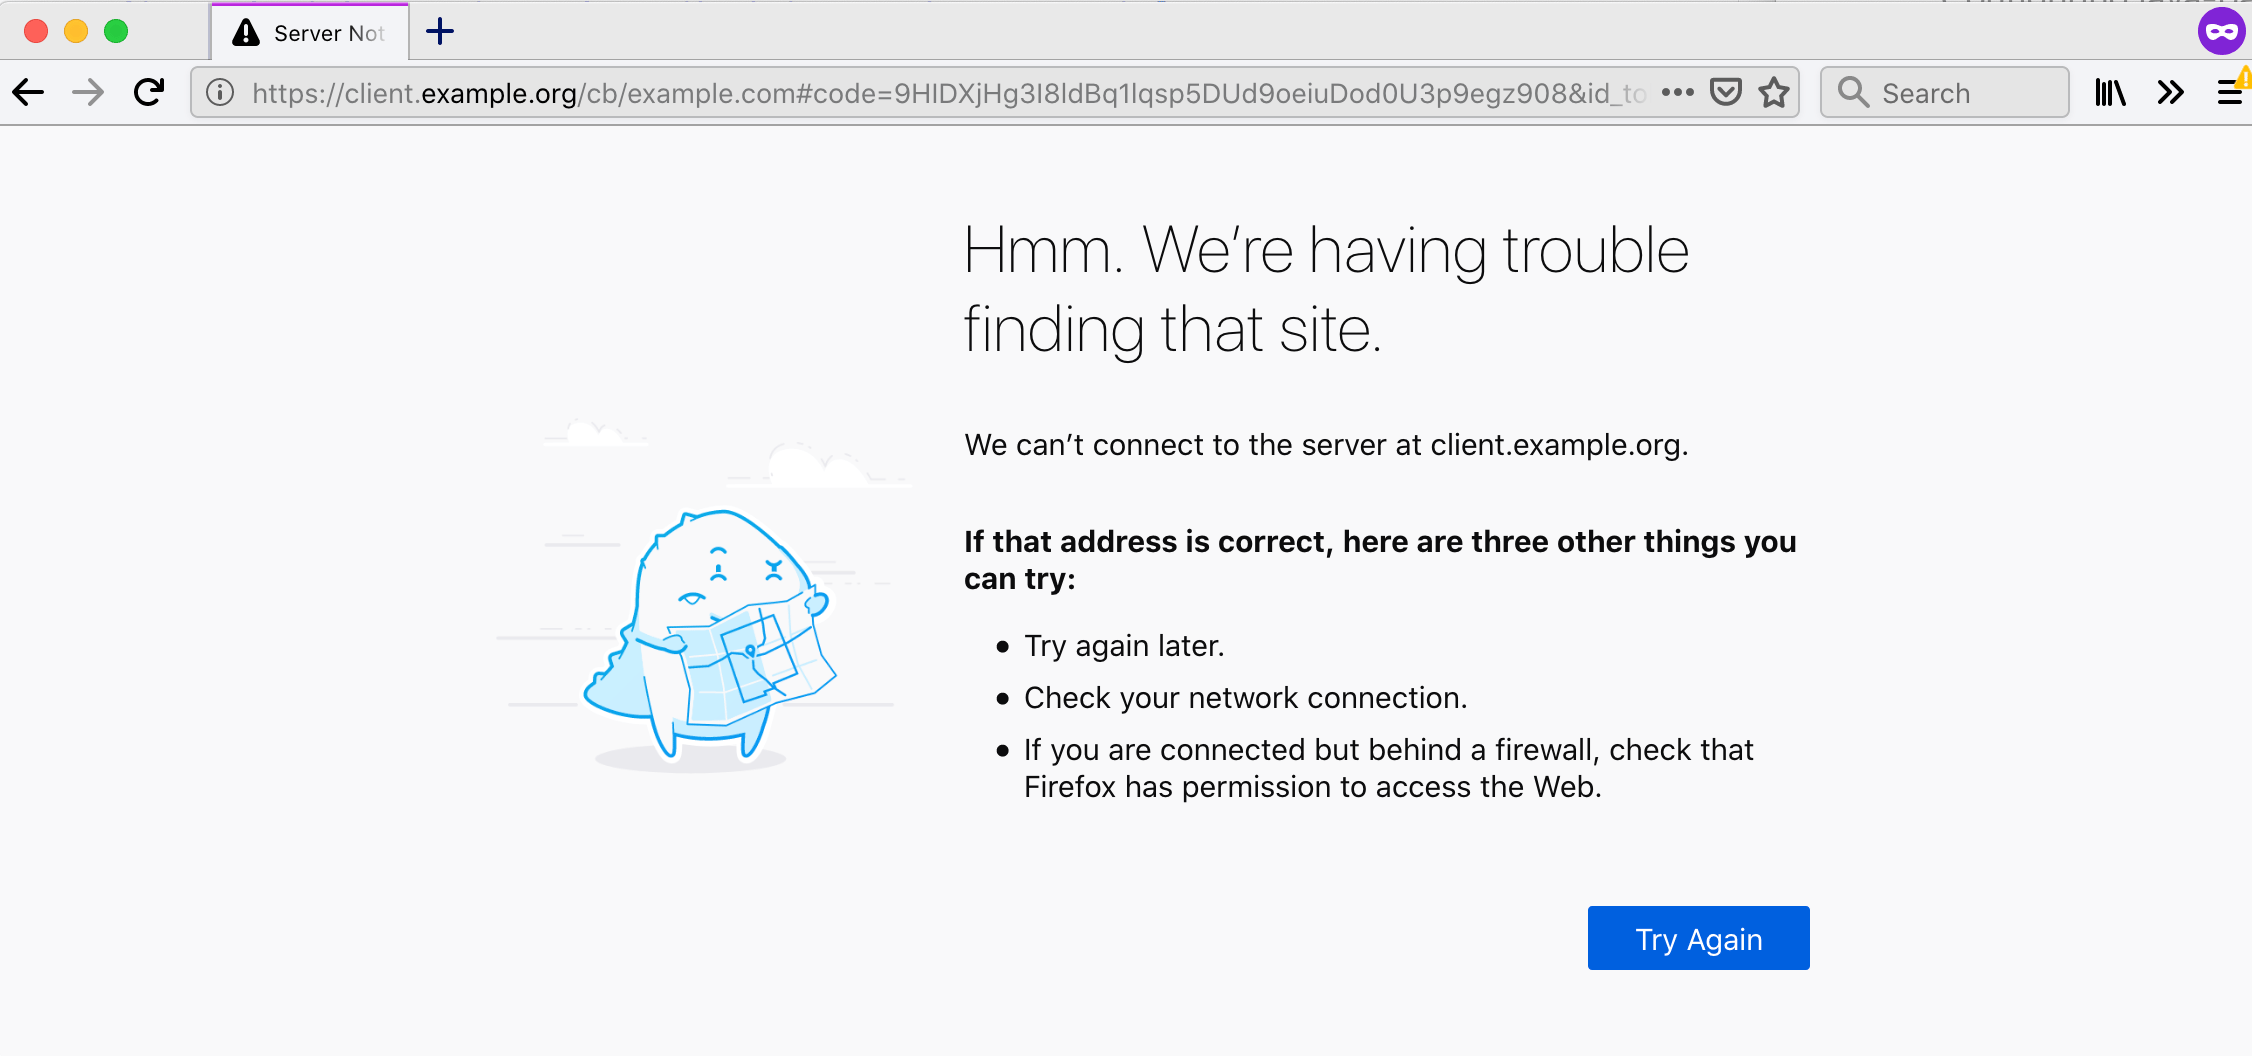
 Your Web browser will attempt (and fail) to connect `https://client.example.org/cb/example.com/#code=...` and show an error page stating that the host `client.example.org` doesn't exist.
 ### Authorization response
Copy the URL of the error page like below.
```html theme={null}
https://client.example.org/cb/example.com#code=0Io2....sdkQ&id_token=eyJr...YifQ.eyJz...aiJ9.-EPu...Dkkw
```
Extract `code` parameter in the URL.
```shell theme={null}
code=0Io2...sdkQ
```
### Token request
Let's craft a token request that contains the value of `code` (`0Io2...sdkQ` for example)
and send it to java-oauth-server's token endpoint (/api/token).
In this section, we will try to do client authentication using `client_id` / `client_secret` as follows.
Replace values of these parameters with yours that have been automatically generated during FAPI Basics.
### Authorization response
Copy the URL of the error page like below.
```html theme={null}
https://client.example.org/cb/example.com#code=0Io2....sdkQ&id_token=eyJr...YifQ.eyJz...aiJ9.-EPu...Dkkw
```
Extract `code` parameter in the URL.
```shell theme={null}
code=0Io2...sdkQ
```
### Token request
Let's craft a token request that contains the value of `code` (`0Io2...sdkQ` for example)
and send it to java-oauth-server's token endpoint (/api/token).
In this section, we will try to do client authentication using `client_id` / `client_secret` as follows.
Replace values of these parameters with yours that have been automatically generated during FAPI Basics.
This tutorial uses curl, but you can use other equivalent tools.
```shell theme={null}
$ curl -s -X POST http://localhost:8080/api/token \
-u '1756...3766:EXE7...UxHg' \
--data-urlencode 'grant_type=authorization_code' \
--data-urlencode 'redirect_uri=https://client.example.org/cb/example.com' \
--data-urlencode 'code=0Io2...sdkQ'
```
### Token response
You will receive a token response like this:
```json theme={null}
{
"error_description": "[A244308] Because the feature of certificate-bound
access tokens is enabled, the client must establish a mutual TLS connection
to the token endpoint.",
"error": "invalid_request",
"error_uri": "https://docs.authlete.com/#A244308"
}
```
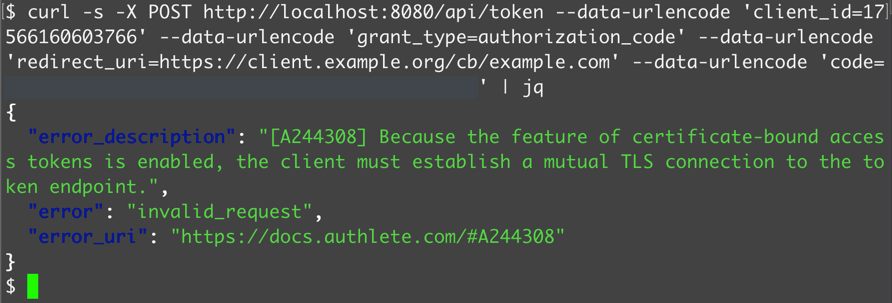 That means:
* java-oauth-server was unable to extract any client certificates from the token request as no mutual TLS connection has been established between the client (`curl` command in this tutorial) and java-oauth-server
* Thus java-oauth-server didn't include any client certificates in a request to Authlete's
([/auth/token API](http://docs.authlete.com/#auth-token-api))
* So Authlete couldn't issue any certificate-bound access tokens and made a response with [A244308 error](https://docs.authlete.com/#A244308)
That means:
* java-oauth-server was unable to extract any client certificates from the token request as no mutual TLS connection has been established between the client (`curl` command in this tutorial) and java-oauth-server
* Thus java-oauth-server didn't include any client certificates in a request to Authlete's
([/auth/token API](http://docs.authlete.com/#auth-token-api))
* So Authlete couldn't issue any certificate-bound access tokens and made a response with [A244308 error](https://docs.authlete.com/#A244308)
Authlete's error response examples described in this tutorial include
`"error_description"` and `"error_uri"`.
You can omit them by configuring Authlete service settings.
See [an article in Authlete Knowledge Base](/configuration-reference/service-settings/service-management) for details.
In the next section, we will add a reverse proxy to accept client certificates from clients to solve the error.
# Enabling TLS for the authorization server
In this section, we will cover the following tasks:
* Configuring a reverse proxy
* Configuring a client
The diagram below illustrates components configured in this section.
In the previous section, both Web browsers and clients connect directly to java-oauth-server ([http://localhost:8080](http://localhost:8080)).
The destination will be switched to Apache ([https://as.example.com:8443](https://as.example.com:8443)) that resides in front of the server as a reverse proxy.
On the client side, curl will attempt to connect to Apache using a client certificate to get authenticated.
 ## Configuring a reverse proxy (1)
### FQDN settings
Add the following entry to `/etc/hosts`
so that both Web browsers and clients can find Apache to be installed in your lab environment, using `as.example.com` as FQDN.
```text theme={null}
127.0.0.1 as.example.com
```
### Installing Apache
Install Apache in your lab environment.
## Configuring a reverse proxy (1)
### FQDN settings
Add the following entry to `/etc/hosts`
so that both Web browsers and clients can find Apache to be installed in your lab environment, using `as.example.com` as FQDN.
```text theme={null}
127.0.0.1 as.example.com
```
### Installing Apache
Install Apache in your lab environment.
This tutorial uses [Homebrew](https://brew.sh/index_ja) on MacOS to install Apache, but you can use other equivalent installation methods and/or reverse proxy software.
```shell theme={null}
$ brew install httpd
```
This tutorial uses `/usr/local/etc/httpd` directory as the primary location of Apache's configuration files.
### Preparing a server certificate
This tutorial uses a self-signed certificate to make configuration steps simpler.
It is not appropriate for production use.
Creating a private key and a public key certificate
Create an RSA private key and a public key certificate for Apache, using `openssl` command.
This tutorial uses OpenSSL, but you can use other equivalent tools.
```shell theme={null}
$ openssl req -x509 -newkey rsa:2048 \
-keyout server.key -out server.crt
-days 3650 -sha256 -nodes \
-subj '/C=JP/ST=Tokyo/L=Chiyoda-ku/O=Server/CN=as.example.com'
Generating a 2048 bit RSA private key
..........................+++
....+++
writing new private key to 'server.key'
-----
```
Two files, `server.key` (a private key) and `server.crt` (a public key certificate) are created.
Deploying the private key and the public key certificate
Deploy these two files to arbitrary location in your lab environment. This tutorial copies them under `/usr/local/etc/httpd` directory. ```shell theme={null} $ sudo cp -p server.key server.crt /usr/local/etc/httpd/. Password: ``` ### Configuring TLS for Apache
Content of Apache's configuration files may be different from the example below, due to installation methods.
Adjust them for your lab environment.
httpd.conf
We will configure basic Apache settings to: * Disable listening port 8080 (as java-oauth-server uses it) * Enable mod\_proxy and mod\_ssl related modules (to get Apache working as a reverse proxy and accepting TLS connection) Actual changes to the configuration file, `httpd.conf` are as follows. TLS related settings are to be included from another file (`extra/httpd-ssl.conf`). ```diff theme={null} $ diff /usr/local/etc/httpd/httpd.conf.orig \ /usr/local/etc/httpd/httpd.conf 52c52 < Listen 8080 --- > #Listen 8080 92c92 < #LoadModule socache_shmcb_module lib/httpd/modules/mod_socache_shmcb.so --- > LoadModule socache_shmcb_module lib/httpd/modules/mod_socache_shmcb.so 131c131 < #LoadModule proxy_module lib/httpd/modules/mod_proxy.so --- > LoadModule proxy_module lib/httpd/modules/mod_proxy.so 134c134 < #LoadModule proxy_http_module lib/httpd/modules/mod_proxy_http.so --- > LoadModule proxy_http_module lib/httpd/modules/mod_proxy_http.so 150c150 < #LoadModule ssl_module lib/httpd/modules/mod_ssl.so --- > LoadModule ssl_module lib/httpd/modules/mod_ssl.so 524c524 < #Include /usr/local/etc/httpd/extra/httpd-ssl.conf --- > Include /usr/local/etc/httpd/extra/httpd-ssl.conf ```extra/httpd-ssl.conf
Please be advised that the following settings of TLS are insufficient
for production use. These settings are intended to enable mutual TLS just for this tutorial.
In this tutorial, we configure TLS and reverse proxy settings to:
* Use as.example.com as its server name (while its listening port (8443) unchanged)
* Meet the FAPI provisions (by using TLS 1.2 and limited sets of cypher suites)
* Include a client certificate in X-Ssl-Cert header (so that /api/token endpoint of java-oauth-server can extract the value and include it in a request to Authlete API (/auth/token API), if it is set in the request from the reverse proxy)
* Work as a reverse proxy that forwards requests accepted at [https://as.example.com:8443/](https://as.example.com:8443/) to [http://localhost:8080/](http://localhost:8080/) (java-oauth-server)
Changes to the configuration file, `extra/httpd-ssl.conf` are as follows.
```diff theme={null}
$ diff /usr/local/etc/httpd/extra/httpd-ssl.conf.orig \
/usr/local/etc/httpd/extra/httpd-ssl.conf
125c125
< ServerName www.example.com:8443
---
> ServerName as.example.com:8443
289a290,302
> SSLEngine on
> SSLProtocol TLSv1.2
> SSLCipherSuite -ALL:ECDHE-RSA-AES256-GCM-SHA384:DHE-RSA-AES256-GCM-SHA384:ECDHE-RSA-AES128-GCM-SHA256:DHE-RSA-AES128-GCM-SHA256
> SSLCertificateKeyFile "/usr/local/etc/httpd/server.key"
> SSLCACertificateFile "/usr/local/etc/httpd/server.crt"
> SSLVerifyClient optional_no_ca
> SSLOptions +StdEnvVars +ExportCertData
> SSLCompression off
> RequestHeader set X-Ssl-Cipher "%{SSL_CIPHER}e" env=SSL_CIPHER
> RequestHeader set X-Ssl-Cert "%{SSL_CLIENT_CERT}e" env=SSL_CLIENT_CERT
> ProxyPreserveHost on
> ProxyPass "/" "http://localhost:8080/"
> ProxyPassReverse "/" "http://localhost:8080/"
```
### Starting Apache
Start the Apache using `apachectl` command.
```shell theme={null}
$ apachectl start
```
Once it's started, connect to [https://as.example.com:8443](https://as.example.com:8443) using your Web browser and confirm if the content is the same as [http://localhost:8080](http://localhost:8080), the top page of java-oauth-server.
In the next section, we wlll prepare a private key and a public key certificate for a client (curl) that makes a token request.
## Settings for a client
### Preparing a client certificate
In this tutorial, we will use a self-signed certificate to make configuration steps simpler.
It is not appropriate for production use.
Creating an RSA private key and a public key certificate
Execute `openssl` command as follows to create a private key and a public key certificcate. ```shell theme={null} $ openssl req -x509 -newkey rsa:2048 \ -keyout client.key -out client.crt -days 3650 -sha256 -nodes \ -subj '/C=JP/ST=Tokyo/L=Chiyoda-ku/O=Server/CN=client.example.org' Generating a 2048 bit RSA private key ..........................+++ ....+++ writing new private key to 'client.key' ----- ``` Two files, `client.key` (a private key) and `client.crt` (a public key certificate) are created. We will use them to make token requests with curl. ## ### Authorization request and response Make an authorization request in the same way as [Executing FAPI authorization flow (1)](#executing-fapi-authorization-flow-1).
You can use either [http://localhost:8080/api/authorization](http://localhost:8080/api/authorization) (the same as above) or
[https://as.example.com:8443/api/authorization](https://as.example.com:8443/api/authorization) (Apache) as an authorization endpoint.
Extract a value of `code` parameter from an authorization response. The value in this tutorial is as follows.
```text theme={null}
7Y5h...zp_4
```
### Token request
Craft a token request and send it to the token endpoint of java-oauth-server (/api/token).
The different parts from the previous example ([Executing FAPI authorization flow (1)](#executing-fapi-authorization-flow-1))
are:
* Endpoint URL: using `https://as.example.com:8443` instead of `http://localhost:8080`
* Client authentication method: using the private key (`client.key`) and the public key certificate (`client.crt`) instead of `client_secret`
Thus the `curl` command to be executed is like below.
(replace the values of `client_id` and `code` with appropriate ones in your lab environment)
```shell theme={null}
$ curl --insecure -X POST https://as.example.com:8443/api/token \
--key client.key --cert client.crt \
--data-urlencode 'client_id=1756...3766' \
--data-urlencode 'grant_type=authorization_code' \
--data-urlencode 'redirect_uri=https://client.example.org/cb/example.com' \
--data-urlencode 'code=7Y5h...zp_4'
```
### Token response
You should receive a token response like below.
```json theme={null}
{
"access_token": "nbN3...LAU8",
"refresh_token": "SWUu...V8_w",
"scope": "openid payment",
"id_token": "eyJr...YifQ.eyJz...qIn0.GPJr...STPQ",
"token_type": "Bearer",
"expires_in": 86400
}
```
Now you have successfully got an access token (`nbN3...LAU8` for example) through mutual TLS connection. In the backstage, Authlete has made the access token bound to the client certificate.
In the next section, we will attempt to make an API request with an access token to a resource server.
# Configuring a resource server
In this section, we will cover the following tasks:
* Deploying a java-resource-server package
* Testing connection
The diagram below illustrates components configured in this section.
 ## Configuring java-resource-server
We will download and configure java-resource-server.
Instructions are described in [its document](https://github.com/authlete/java-resource-server#how-to-run).
### Downloading the source
Download java-resource-server using `git` command.
```shell theme={null}
$ git clone https://github.com/authlete/java-resource-server.git
```
### Configuration
Edit the following entries in its configuration file, `authlete.properties`.
Put the API key and the secret that are
[the same values as specified for java-oauth-server](#configuring-java-oauth-server).
```shell theme={null}
service.api_key =
## Configuring java-resource-server
We will download and configure java-resource-server.
Instructions are described in [its document](https://github.com/authlete/java-resource-server#how-to-run).
### Downloading the source
Download java-resource-server using `git` command.
```shell theme={null}
$ git clone https://github.com/authlete/java-resource-server.git
```
### Configuration
Edit the following entries in its configuration file, `authlete.properties`.
Put the API key and the secret that are
[the same values as specified for java-oauth-server](#configuring-java-oauth-server).
```shell theme={null}
service.api_key = 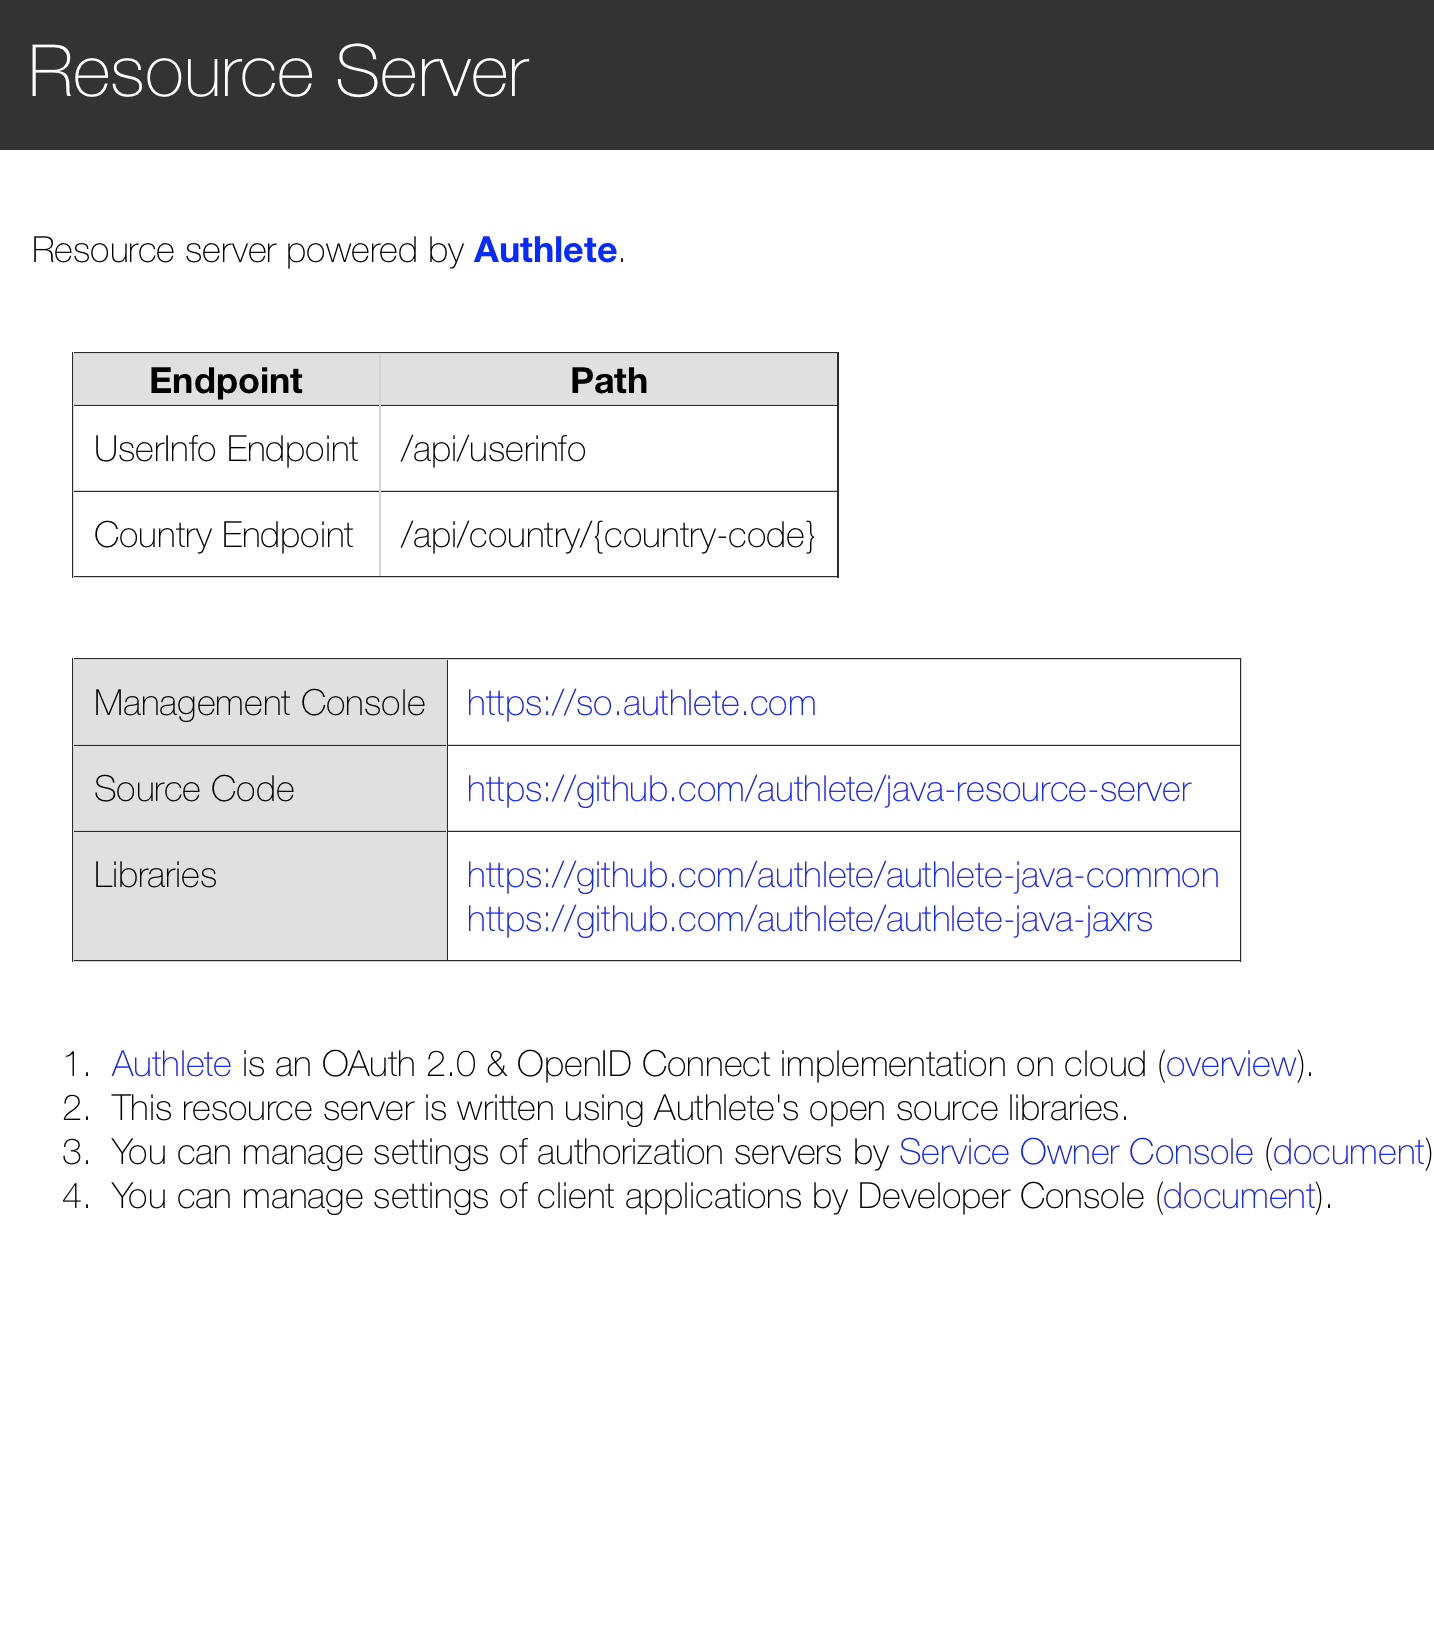 ## Executing an API request (1)
Let's try to make an API request with an access token to "[Country Endpoint](https://github.com/authlete/java-resource-server/blob/master/README.md#country-endpoint)" of java-resource-server, using `curl` command.
The access token can be obtained by doing the flow described in [Executing FAPI authorization flow (2)](#executing-fapi-authorization-flow-2). In this tutorial, the
following value is used.
```text theme={null}
6Ivp...LiM4
```
Make a request with the access token specified in `Authorization` header.
The examples below show the request and the subsequent response.
`-v` option is added to `curl` command so that it can enable verbose output especially header information.
```shell theme={null}
$ curl -v -X GET http://localhost:8081/api/country/JP \
-H 'Authorization: Bearer 6Ivp...LiM4'
...
> GET /api/country/JP HTTP/1.1
> Host: localhost:8081
> User-Agent: curl/7.64.1
> Accept: */*
> Authorization: Bearer 6Ivp...LiM4
>
< HTTP/1.1 401 Unauthorized
< Date: Mon, 18 May 2020 02:22:32 GMT
< Cache-Control: no-store, no-transform
< Pragma: no-cache
< WWW-Authenticate: Bearer error="invalid_token",
error_description="[A065304] The client failed to present
a certificate and the access token is MTLS bound.",
error_uri="https://docs.authlete.com/#A065304"
< Content-Length: 0
< Server: Jetty(9.3.7.v20160115)
...
```
That response means:
* java-resource-server was unable to extract any client certificates from the token request as no mutual TLS connection has been established between the client (`curl` command) and java-resource-server
* Thus, java-resource-server didn't include any client certificates in a request to Authlete's [/auth/introspection API](http://docs.authlete.com/#auth-introspection-api)
* So, Authlete couldn't check the binding between the access token and its corresponding client certificate and made a response with [A065304 error](https://docs.authlete.com/#A065304)
In the next section, we will configure additional settings for the reverse proxy.
# Enabling TLS for the resource server
In this section, we will cover the following tasks that are basically the same as the settings for java-oauth-server done in the former section:
* Additional settings for the reverse proxy
The diagram below illustrates components configured in this section.
curl will attempt to connect to Apache ([https://rs.example.com:8443](https://rs.example.com:8443)) using a client certificate to get authenticated.
## Executing an API request (1)
Let's try to make an API request with an access token to "[Country Endpoint](https://github.com/authlete/java-resource-server/blob/master/README.md#country-endpoint)" of java-resource-server, using `curl` command.
The access token can be obtained by doing the flow described in [Executing FAPI authorization flow (2)](#executing-fapi-authorization-flow-2). In this tutorial, the
following value is used.
```text theme={null}
6Ivp...LiM4
```
Make a request with the access token specified in `Authorization` header.
The examples below show the request and the subsequent response.
`-v` option is added to `curl` command so that it can enable verbose output especially header information.
```shell theme={null}
$ curl -v -X GET http://localhost:8081/api/country/JP \
-H 'Authorization: Bearer 6Ivp...LiM4'
...
> GET /api/country/JP HTTP/1.1
> Host: localhost:8081
> User-Agent: curl/7.64.1
> Accept: */*
> Authorization: Bearer 6Ivp...LiM4
>
< HTTP/1.1 401 Unauthorized
< Date: Mon, 18 May 2020 02:22:32 GMT
< Cache-Control: no-store, no-transform
< Pragma: no-cache
< WWW-Authenticate: Bearer error="invalid_token",
error_description="[A065304] The client failed to present
a certificate and the access token is MTLS bound.",
error_uri="https://docs.authlete.com/#A065304"
< Content-Length: 0
< Server: Jetty(9.3.7.v20160115)
...
```
That response means:
* java-resource-server was unable to extract any client certificates from the token request as no mutual TLS connection has been established between the client (`curl` command) and java-resource-server
* Thus, java-resource-server didn't include any client certificates in a request to Authlete's [/auth/introspection API](http://docs.authlete.com/#auth-introspection-api)
* So, Authlete couldn't check the binding between the access token and its corresponding client certificate and made a response with [A065304 error](https://docs.authlete.com/#A065304)
In the next section, we will configure additional settings for the reverse proxy.
# Enabling TLS for the resource server
In this section, we will cover the following tasks that are basically the same as the settings for java-oauth-server done in the former section:
* Additional settings for the reverse proxy
The diagram below illustrates components configured in this section.
curl will attempt to connect to Apache ([https://rs.example.com:8443](https://rs.example.com:8443)) using a client certificate to get authenticated.
 ## Configuring a reverse proxy (2)
### FQDN settings
Modify the entry that has been added to `/etc/hosts` during [Configuring a reverse proxy (1)](#configuring-a-reverse-proxy-1) so that curl can connect to Apache using `rs.example.com`.
```text theme={null}
127.0.0.1 as.example.com rs.example.com
```
### Configuring TLS for Apache
## Configuring a reverse proxy (2)
### FQDN settings
Modify the entry that has been added to `/etc/hosts` during [Configuring a reverse proxy (1)](#configuring-a-reverse-proxy-1) so that curl can connect to Apache using `rs.example.com`.
```text theme={null}
127.0.0.1 as.example.com rs.example.com
```
### Configuring TLS for Apache
extra/httpd-ssl.conf
Add the following entries to the `extra/httpd-ssl.conf` file. These settings, the same as [Configuring a reverse proxy (1)](#configuring-a-reverse-proxy-1) except the server name and destinations of the reverse proxy, are to: * Declare these settings are applied to rs.example.com:8443 * Meet the FAPI provisions (by using TLS 1.2 and limited sets of cypher suites) * Include a client certificate in X-Ssl-Cert header (so that /api/country endpoint of java-resource-server can extract the value and include it in a request to Authlete API (/auth/introspection API), if it is set in the request from the reverse proxy) * Work as a reverse proxy that forwards requests accepted at [https://rs.example.com:8443/](https://rs.example.com:8443/) to [http://localhost:8081/](http://localhost:8081/) (java-resource-server) The additional entries to the configuration file, `extra/httpd-ssl.conf` are as follows. ```apache theme={null}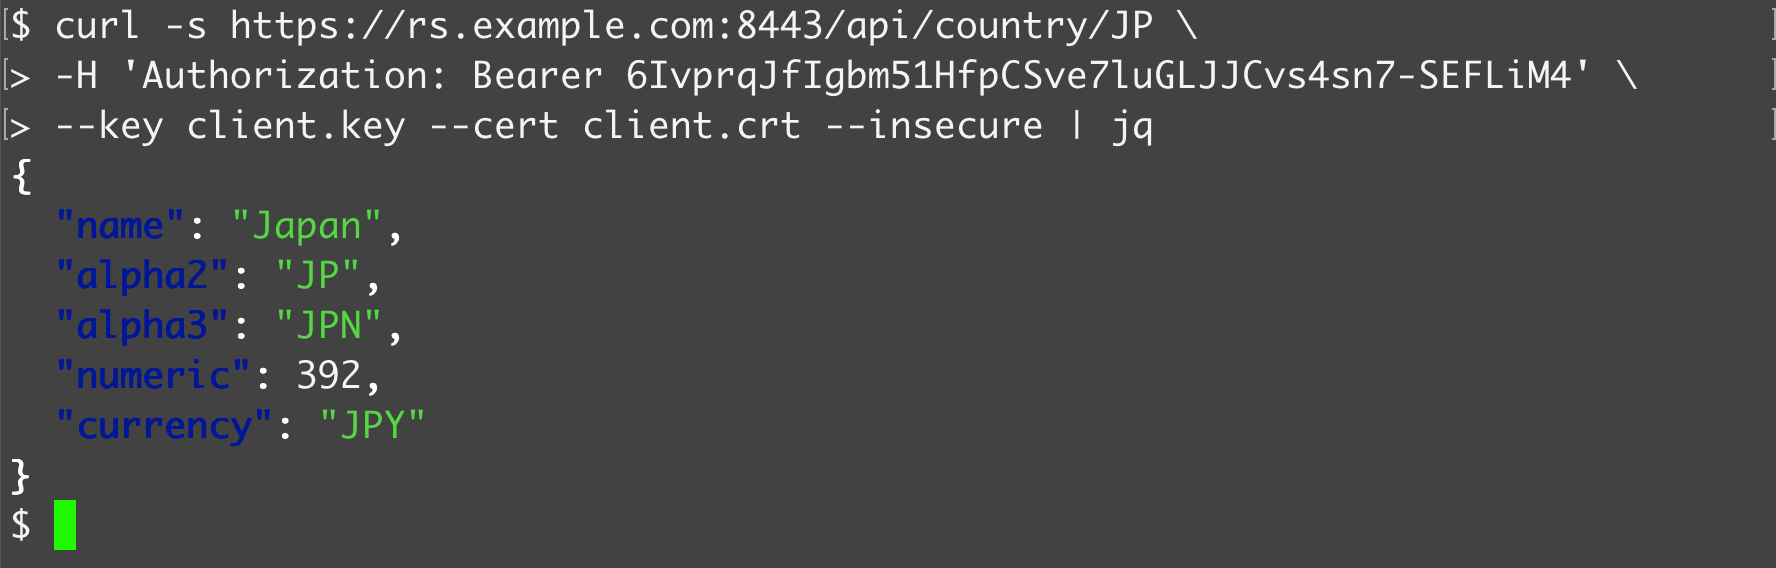 It means that:
* java-resource-server extracted the client certificate from the mutual TLS connection and sent it to Authlete,
* Authlete validated the binding between the client certificate and the access token, and
* java-resource-server has processed the API request as expected.
# Conclusion
In this tutorial, we confirmed FAPI-compliant authorization flow and API request
using a FAPI-enabled Authlete service,
reference implementations (java-oauth-server and java-resource-server)
and a reverse proxy.
It means that:
* java-resource-server extracted the client certificate from the mutual TLS connection and sent it to Authlete,
* Authlete validated the binding between the client certificate and the access token, and
* java-resource-server has processed the API request as expected.
# Conclusion
In this tutorial, we confirmed FAPI-compliant authorization flow and API request
using a FAPI-enabled Authlete service,
reference implementations (java-oauth-server and java-resource-server)
and a reverse proxy.