> ## Documentation Index
> Fetch the complete documentation index at: https://developers.authlete.com/llms.txt
> Use this file to discover all available pages before exploring further.
# API を使ってみる 🚀
> Authlete アカウントの設定から API 呼び出しまで、数分で試してみましょう。
このページは Authlete 3.0 用です。2.x の場合は [クイックスタート(2.x)](/ja/v2/get-started/quickstarts/getting-started) をご覧ください。
1. Authlete アカウントを作成する
Authlete を使用するにはアカウントが必要です。登録後、管理コンソールを通じてすべての機能を設定できます。
[Authlete の Web サイトにアクセス](https://www.authlete.com/ja/home)し、右上の [Free Trial (無料トライアル)](https://console.authlete.com/register) をクリックします。
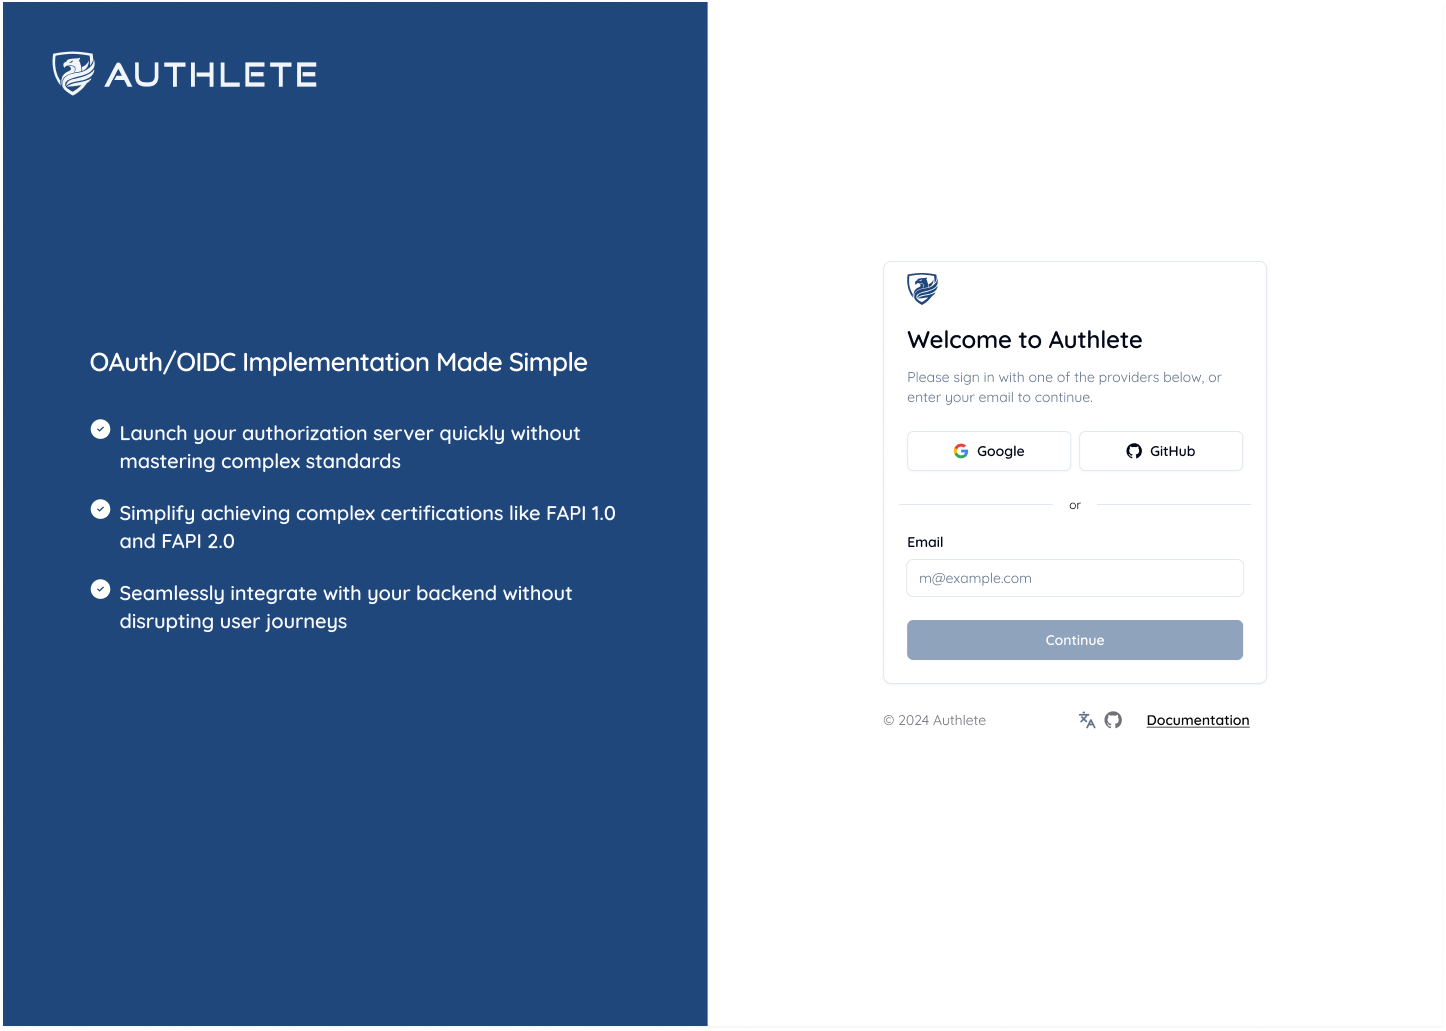
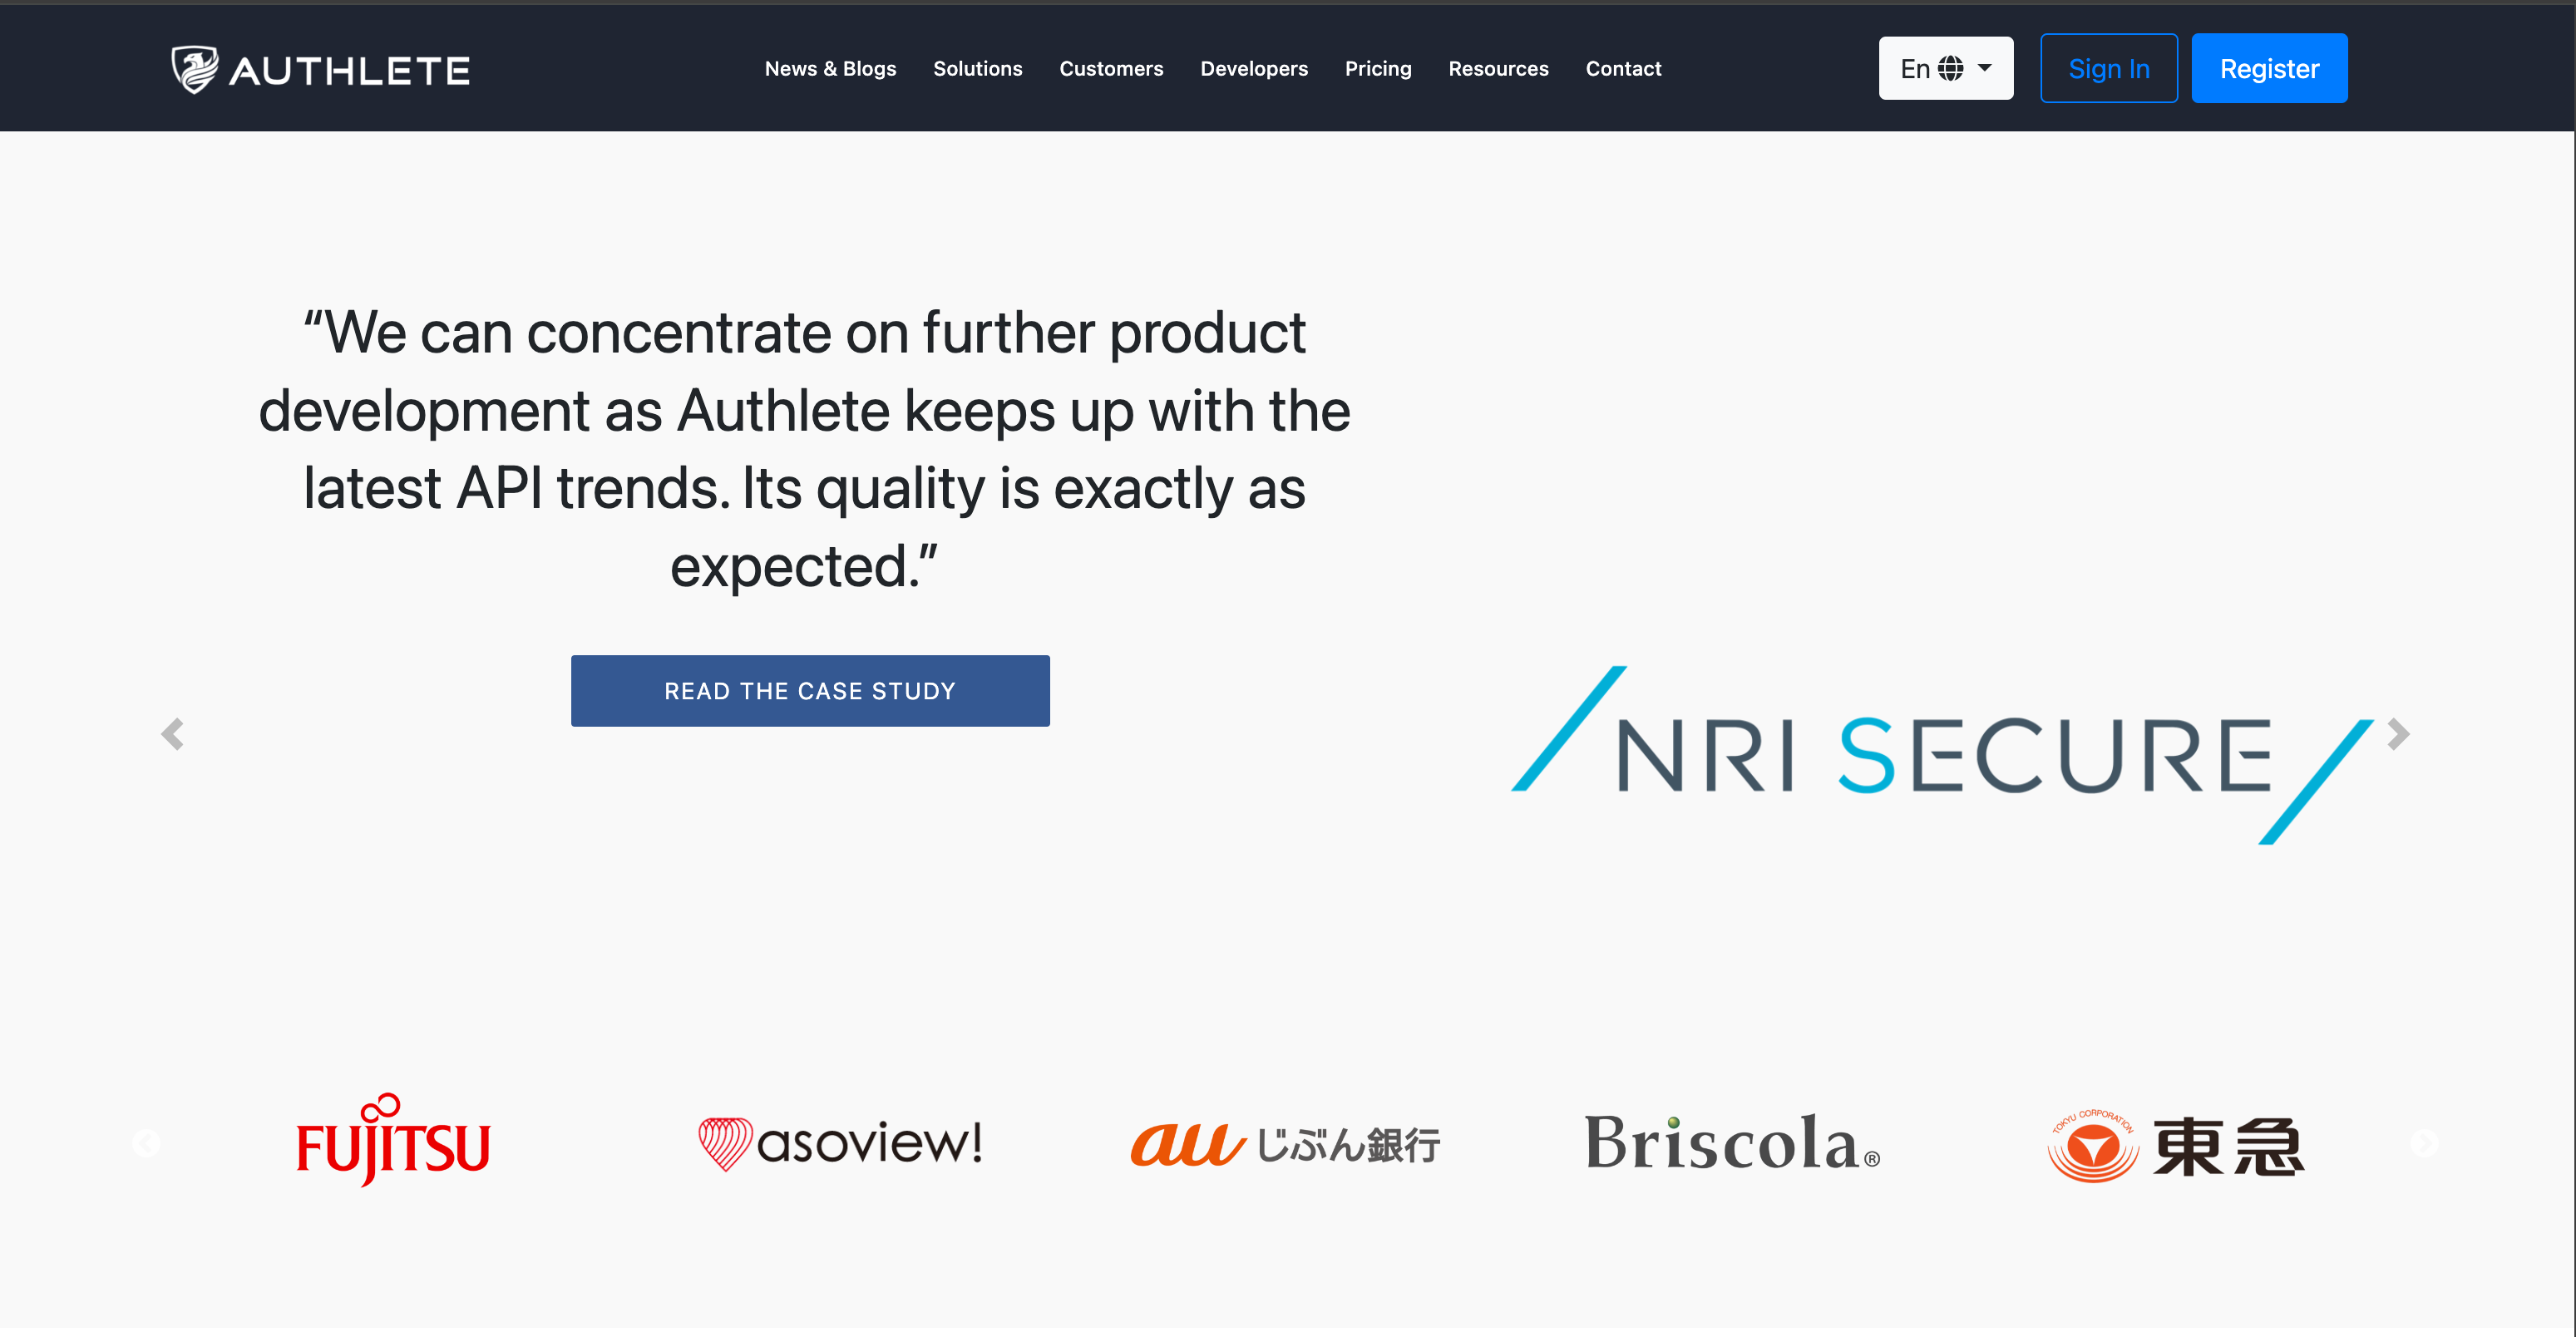 お好みの登録方法を選択します。**ソーシャルログイン (Google またはGitHub)** または**メールアドレス**でサインアップできます。
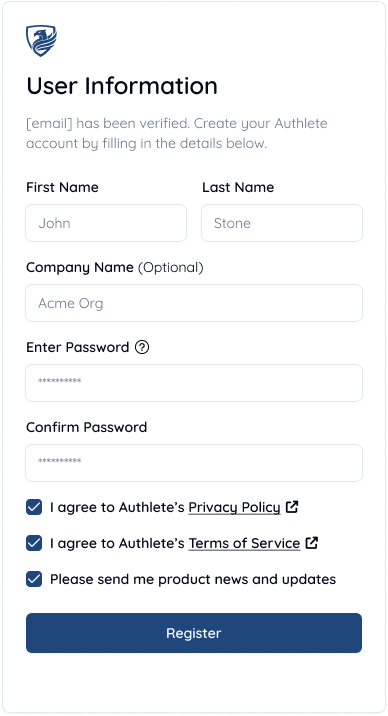
 ソーシャルログインまたはメールアドレスの確認後、**First Name**、**Last Name**、**Organization Name** の入力と(メールアドレス登録の場合には **Password** も)、プライバシーポリシーと利用規約の確認を行い、**Register** をクリックしてサインアップを完了します。
 ***
***
2. サービスを作成する
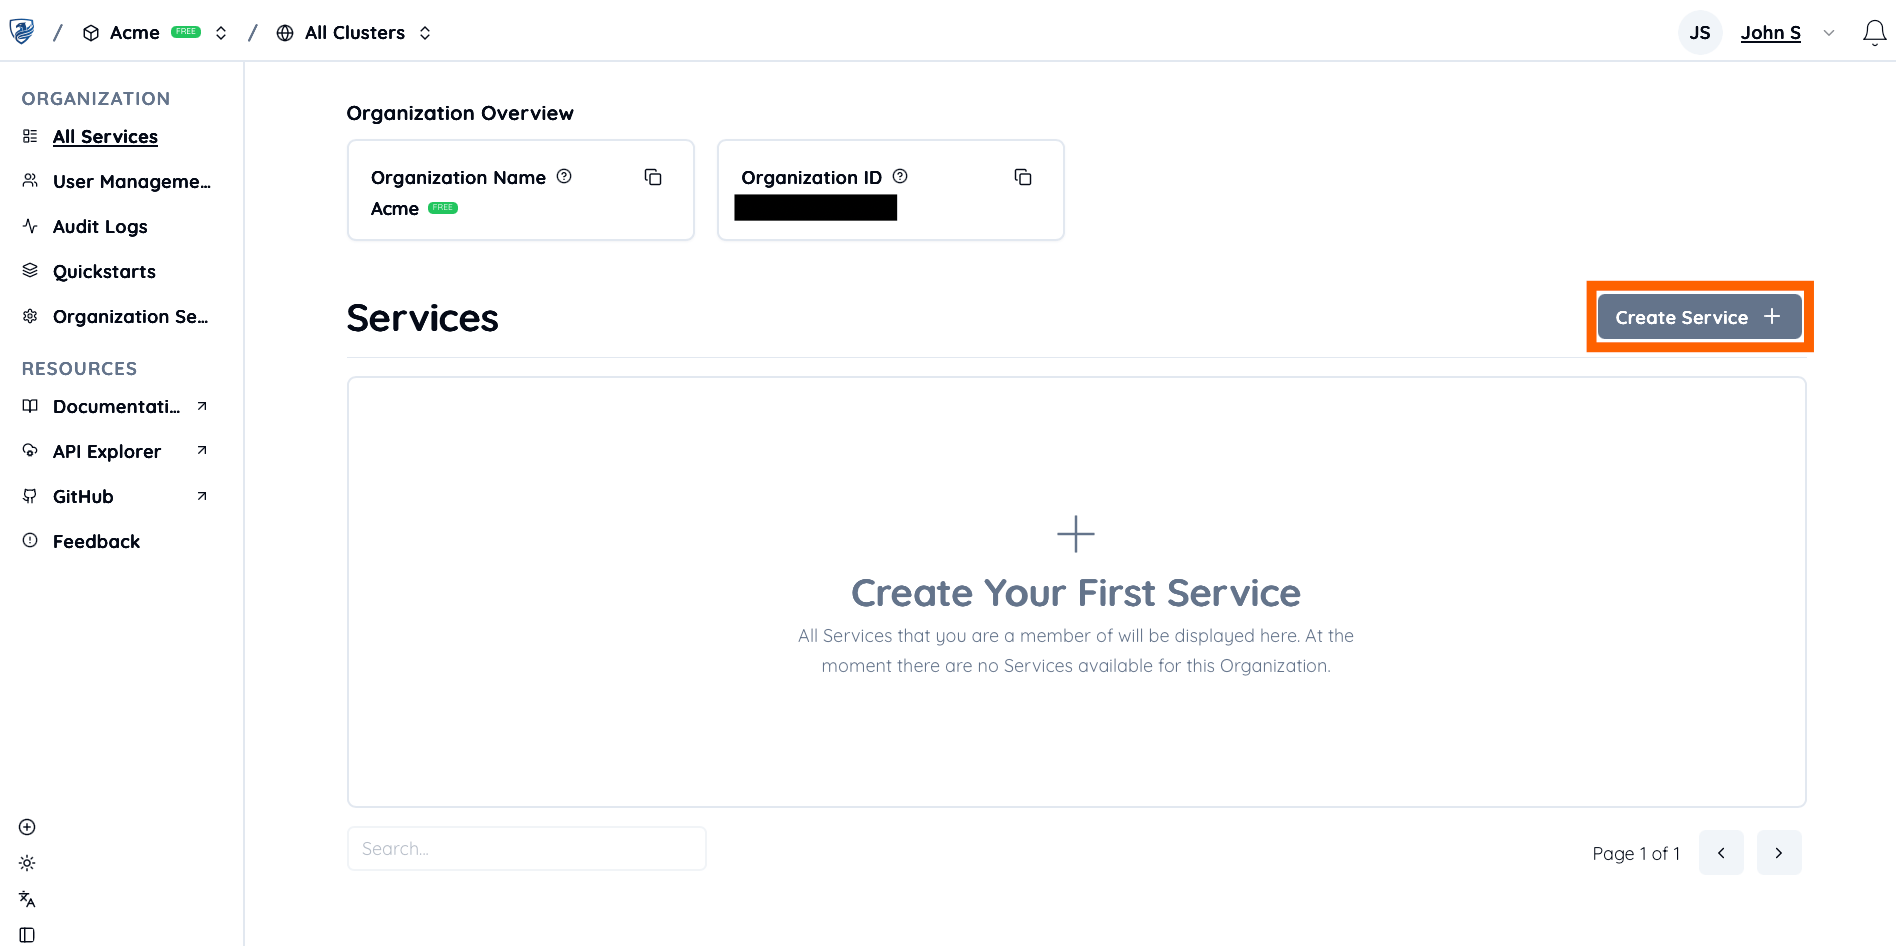
サインアップ直後、**Services** ページにリダイレクトされます。このページには **Organization** (サインアップ時に作成) のすべての Service が表示されます。
**Service** はあなたの認可サーバーのバックエンドです。Service には、認可サーバーを本番運用するために必要なすべての設定 (OAuth/OIDC 設定、トークン管理、セキュリティポリシーなど) が含まれます。
新しい Service を Organization に追加するには、**Create Service** をクリックします。
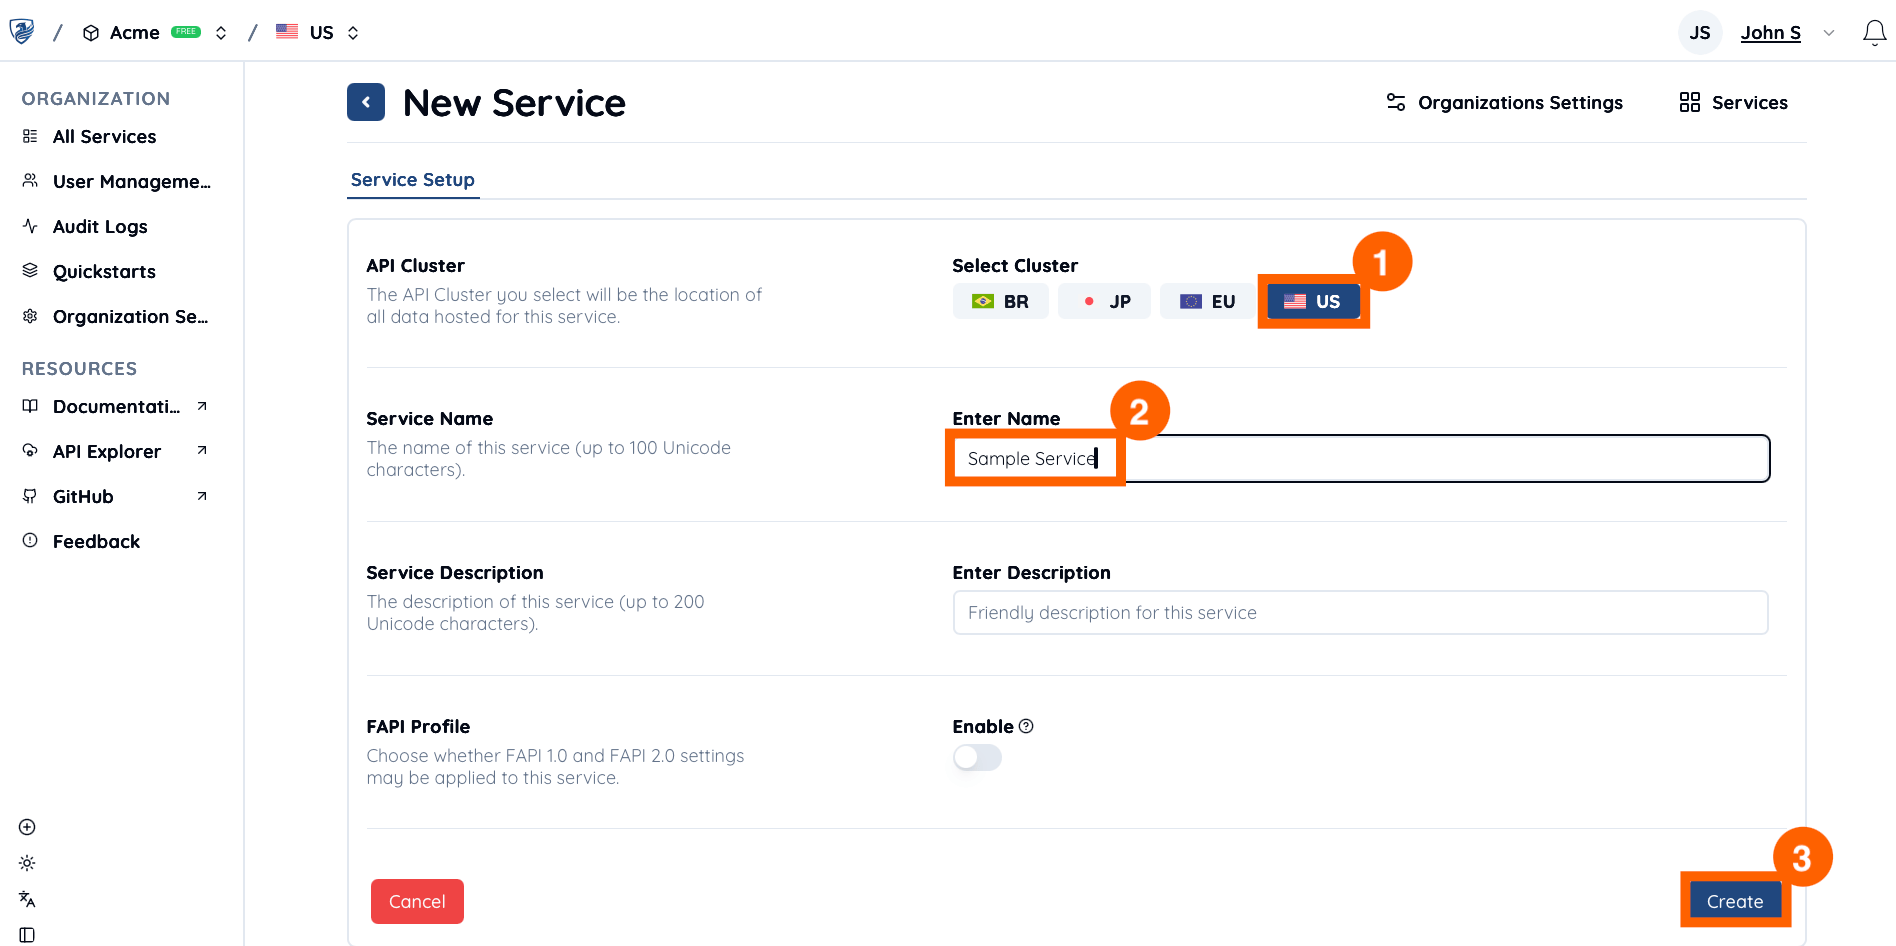
 1. お好みの **API Cluster** の場所 (例: `US`) を選択します。Service のすべてのデータが、ここで選択した Cluster に保存されます。データレジデンシーと環境分離の要件に基づいて Cluster を選択してください。
2. **Service Name** (例: `Sample Service`) を入力します。
3. **Create** をクリックして、セットアップを完了します。
1. お好みの **API Cluster** の場所 (例: `US`) を選択します。Service のすべてのデータが、ここで選択した Cluster に保存されます。データレジデンシーと環境分離の要件に基づいて Cluster を選択してください。
2. **Service Name** (例: `Sample Service`) を入力します。
3. **Create** をクリックして、セットアップを完了します。
 これで新しい Service の作成が完了しました。
***
これで新しい Service の作成が完了しました。
***
3. サービスアクセストークンを作成する
Authlete API を呼び出すには、**Service Access Token** による認証が必要です。
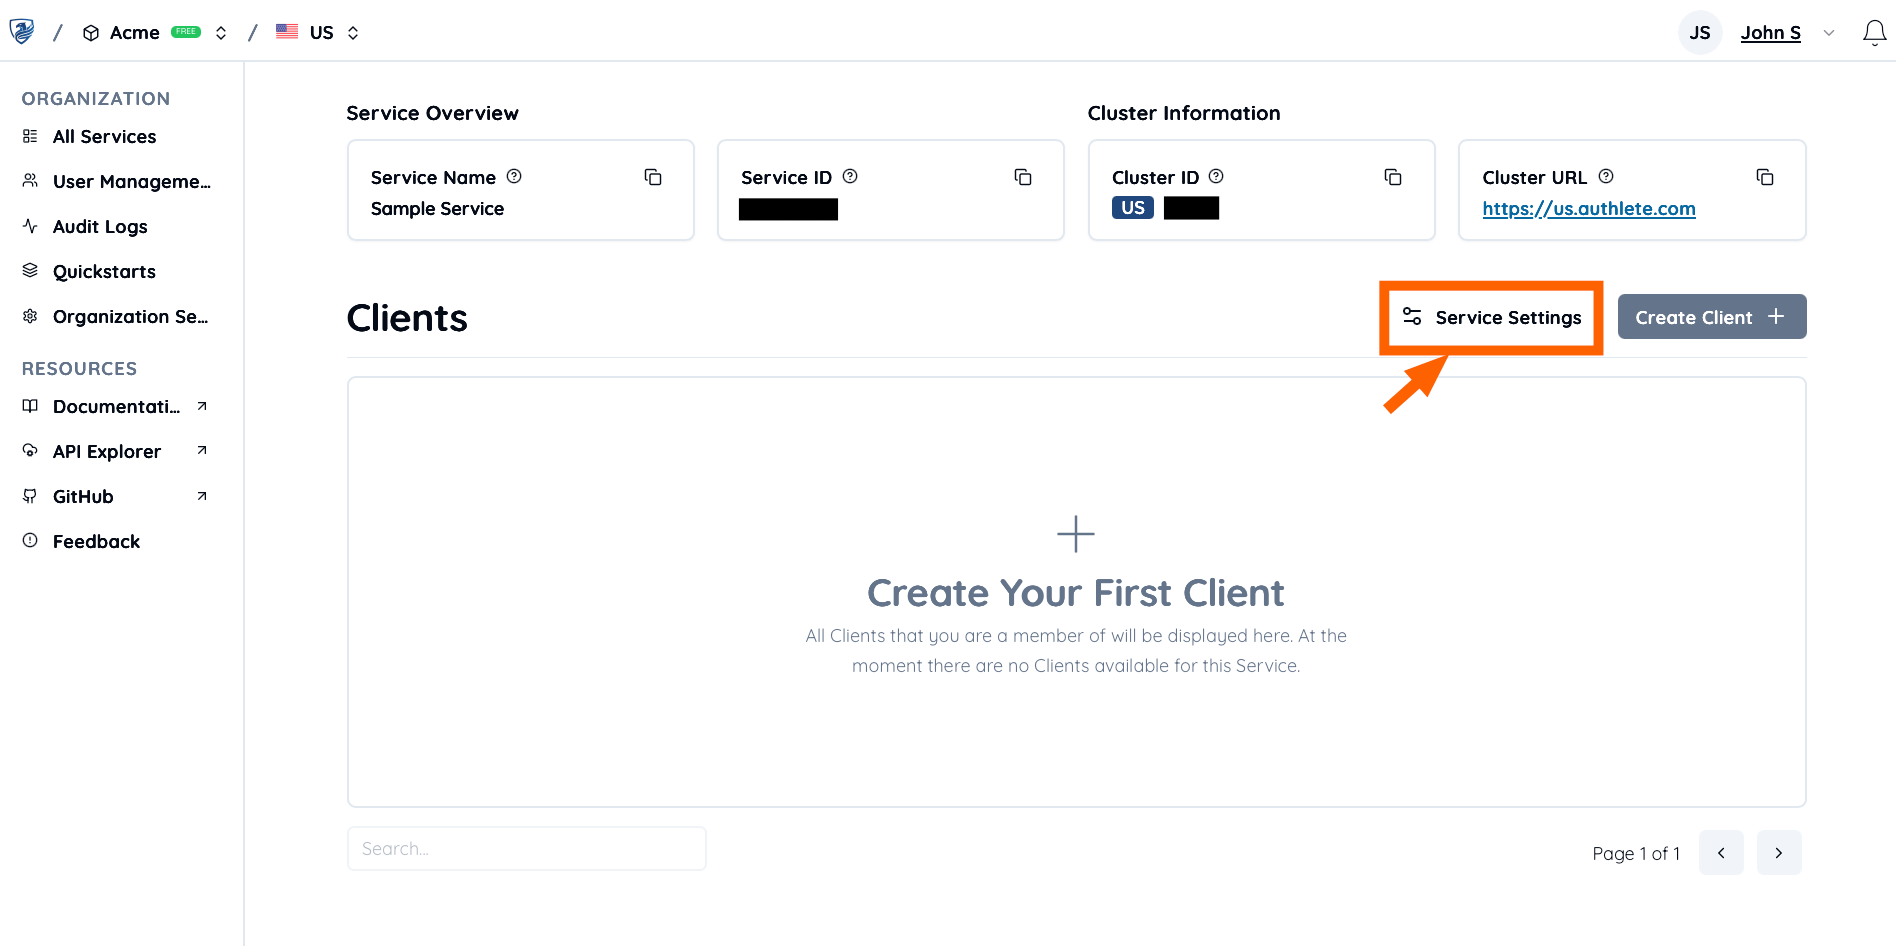
新しく作成した Service の **Service Settings** をクリックします。
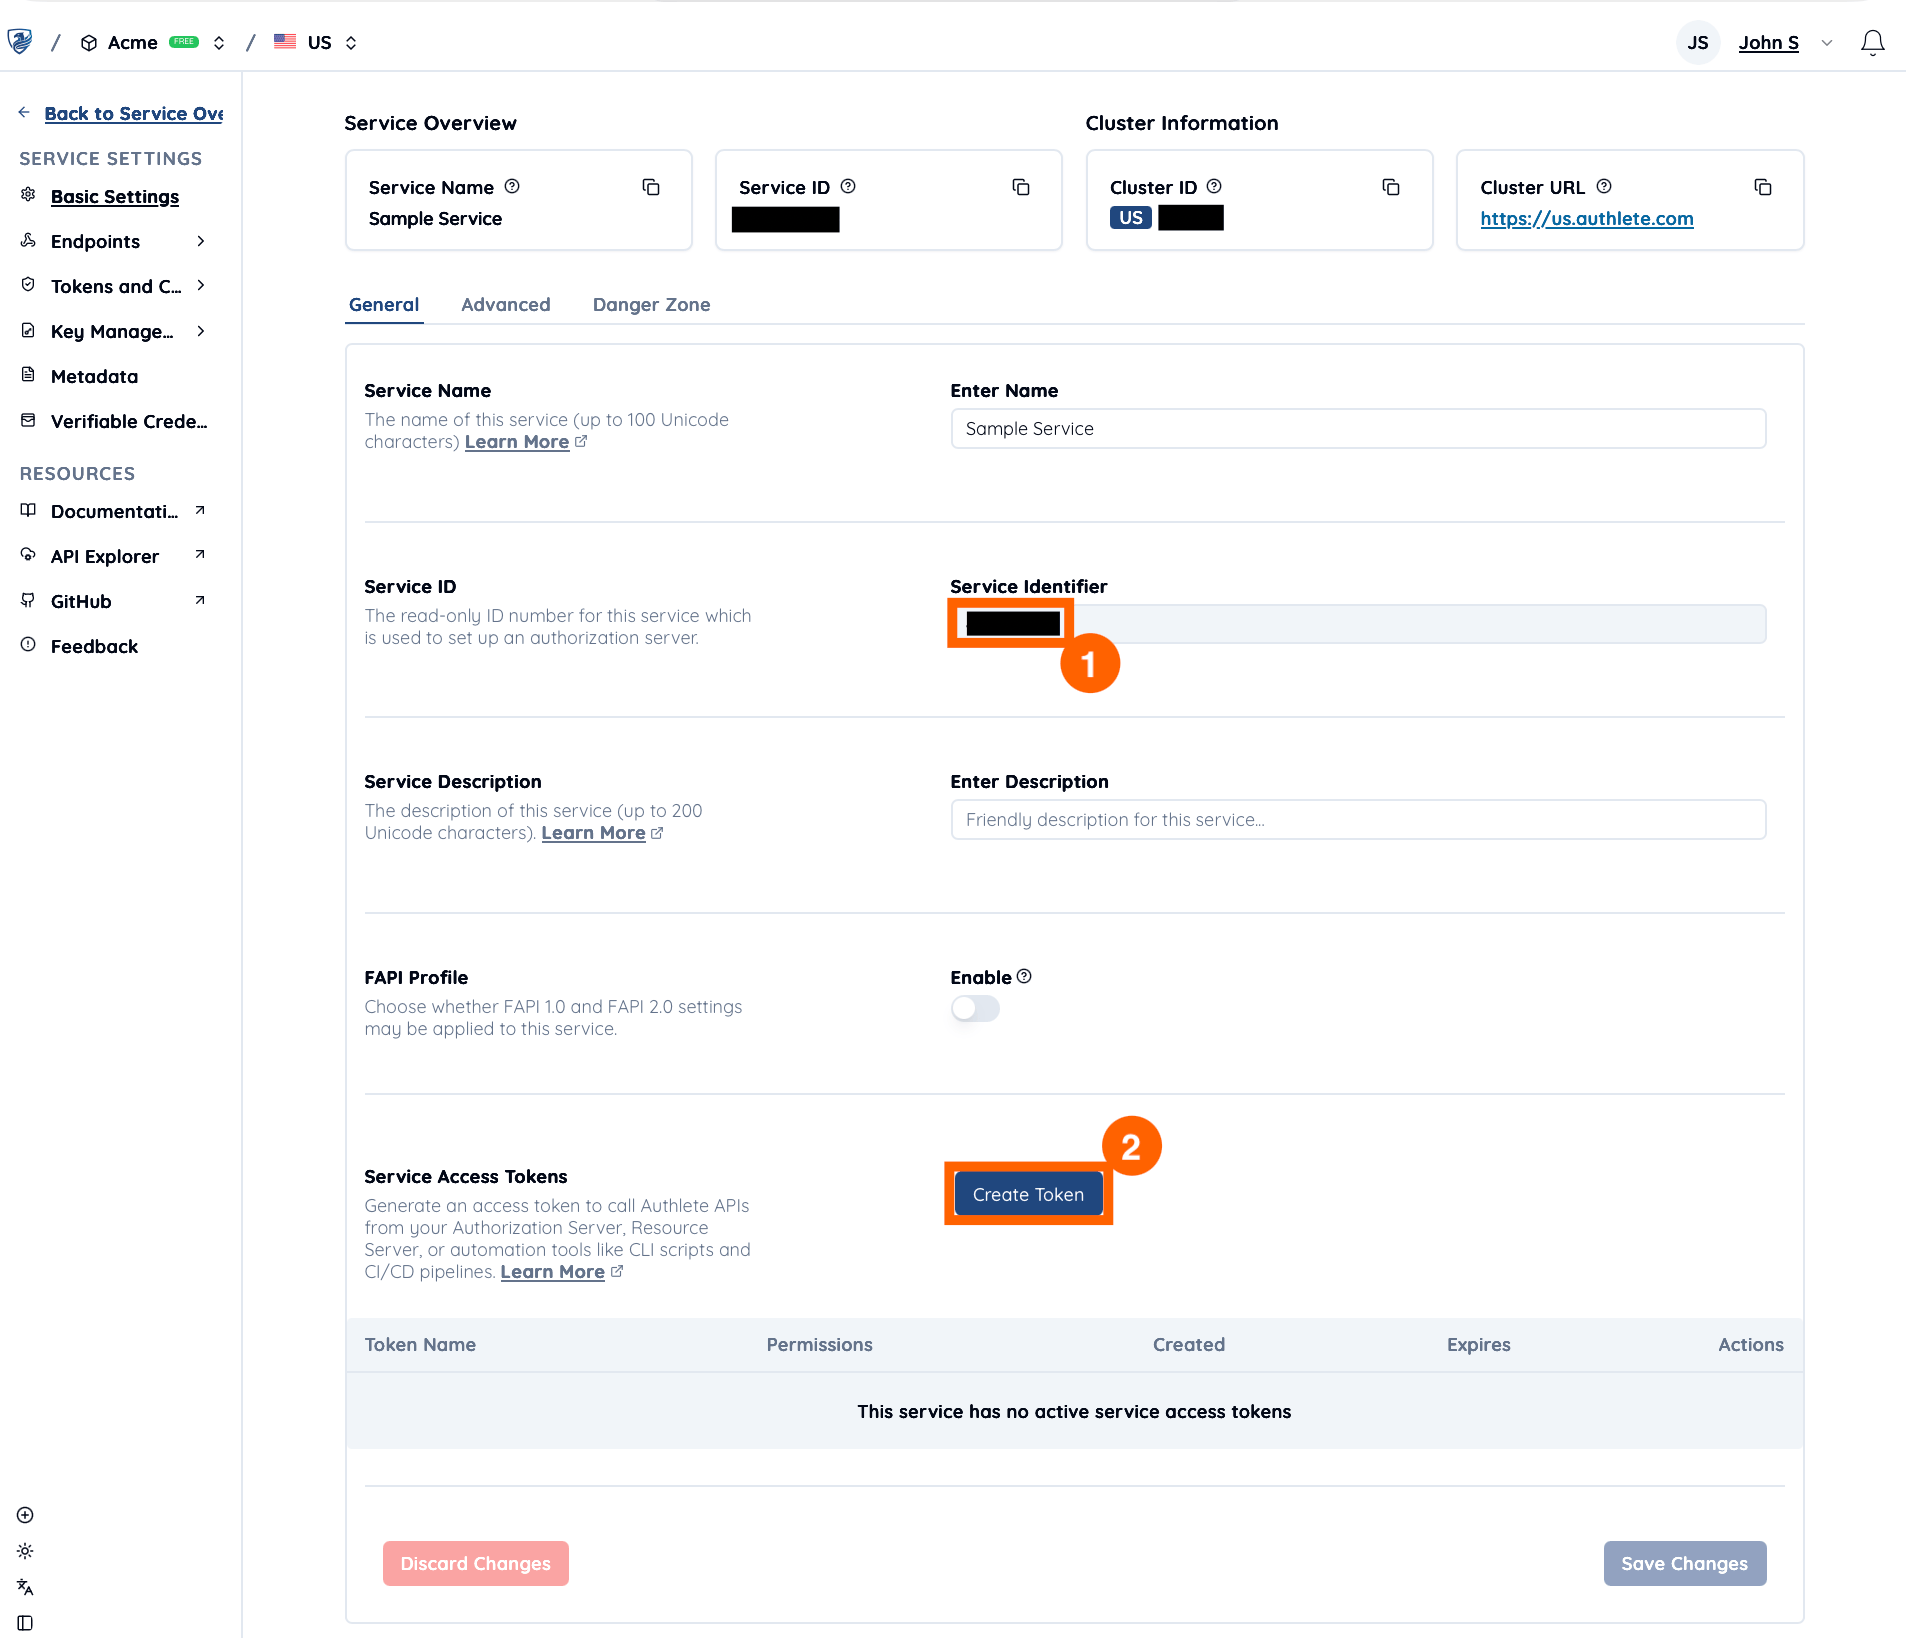
 1. **Service Identifier** の値 (例: `3615784225`) をメモします (Authlete API の多くが、リクエスト時にこの値を必要とします)。
2. **Create Token** をクリックして、新しい Service Access Token を作成します。
1. **Service Identifier** の値 (例: `3615784225`) をメモします (Authlete API の多くが、リクエスト時にこの値を必要とします)。
2. **Create Token** をクリックして、新しい Service Access Token を作成します。
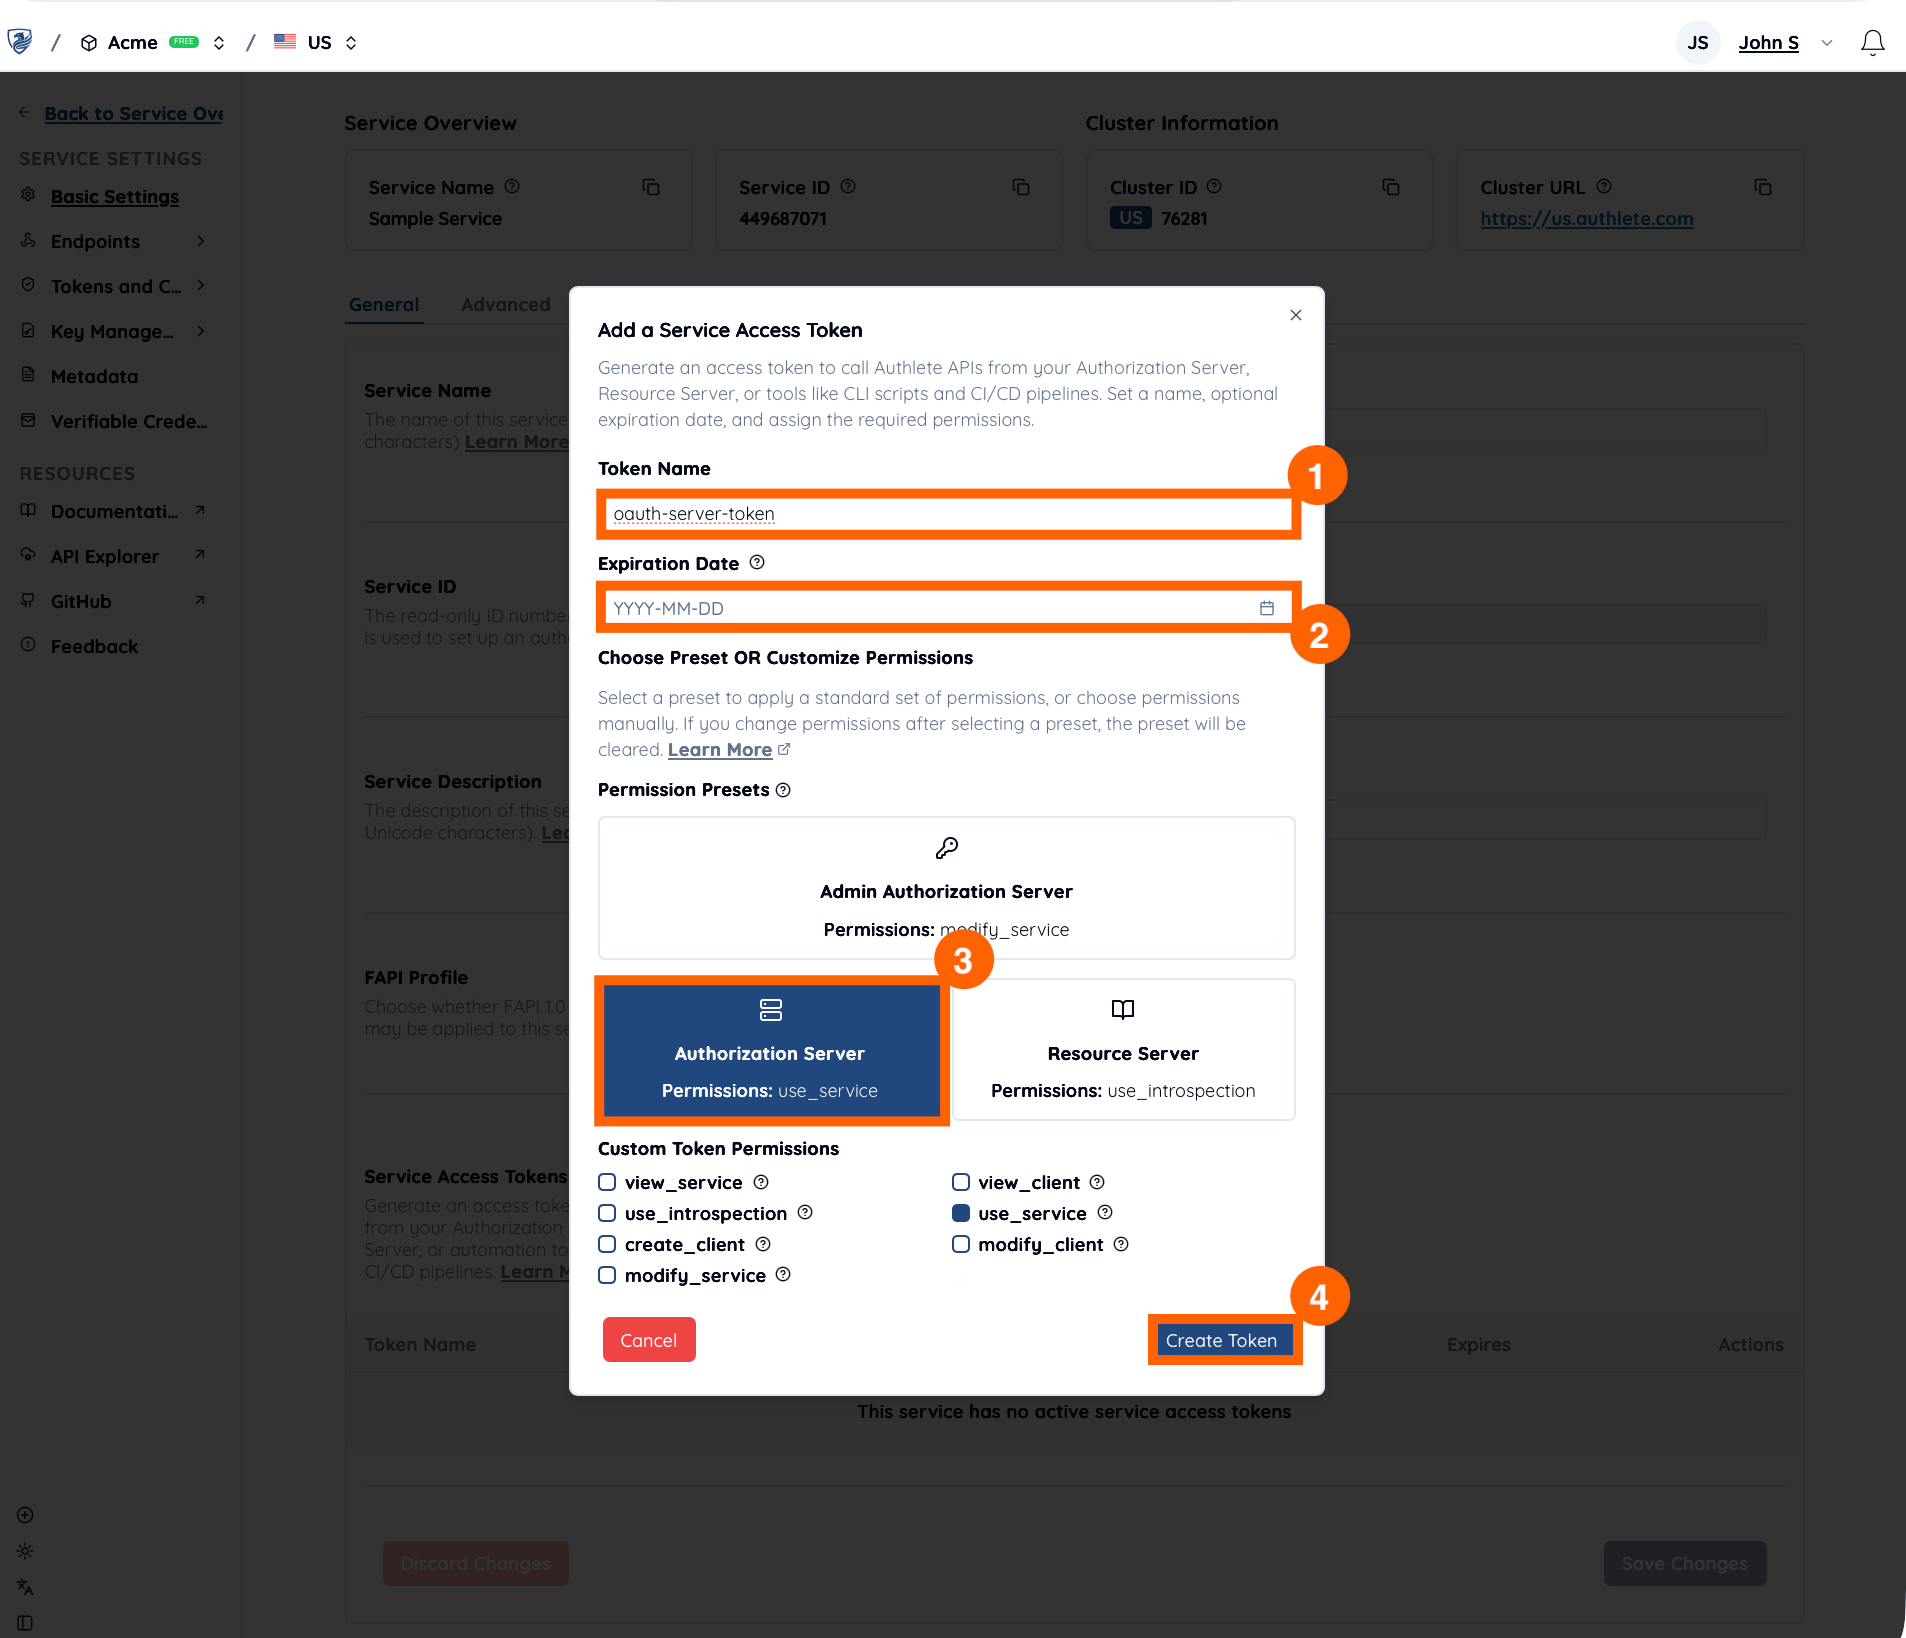
 1. **Token Name** (例: `oauth-server-token`) を入力します。
2. **Expiration Date** を指定します。
3. 適切な **Permission** (例: **Authorization Server** プリセット) を選択します。
4. **Create Token** をクリックします。
1. **Token Name** (例: `oauth-server-token`) を入力します。
2. **Expiration Date** を指定します。
3. 適切な **Permission** (例: **Authorization Server** プリセット) を選択します。
4. **Create Token** をクリックします。
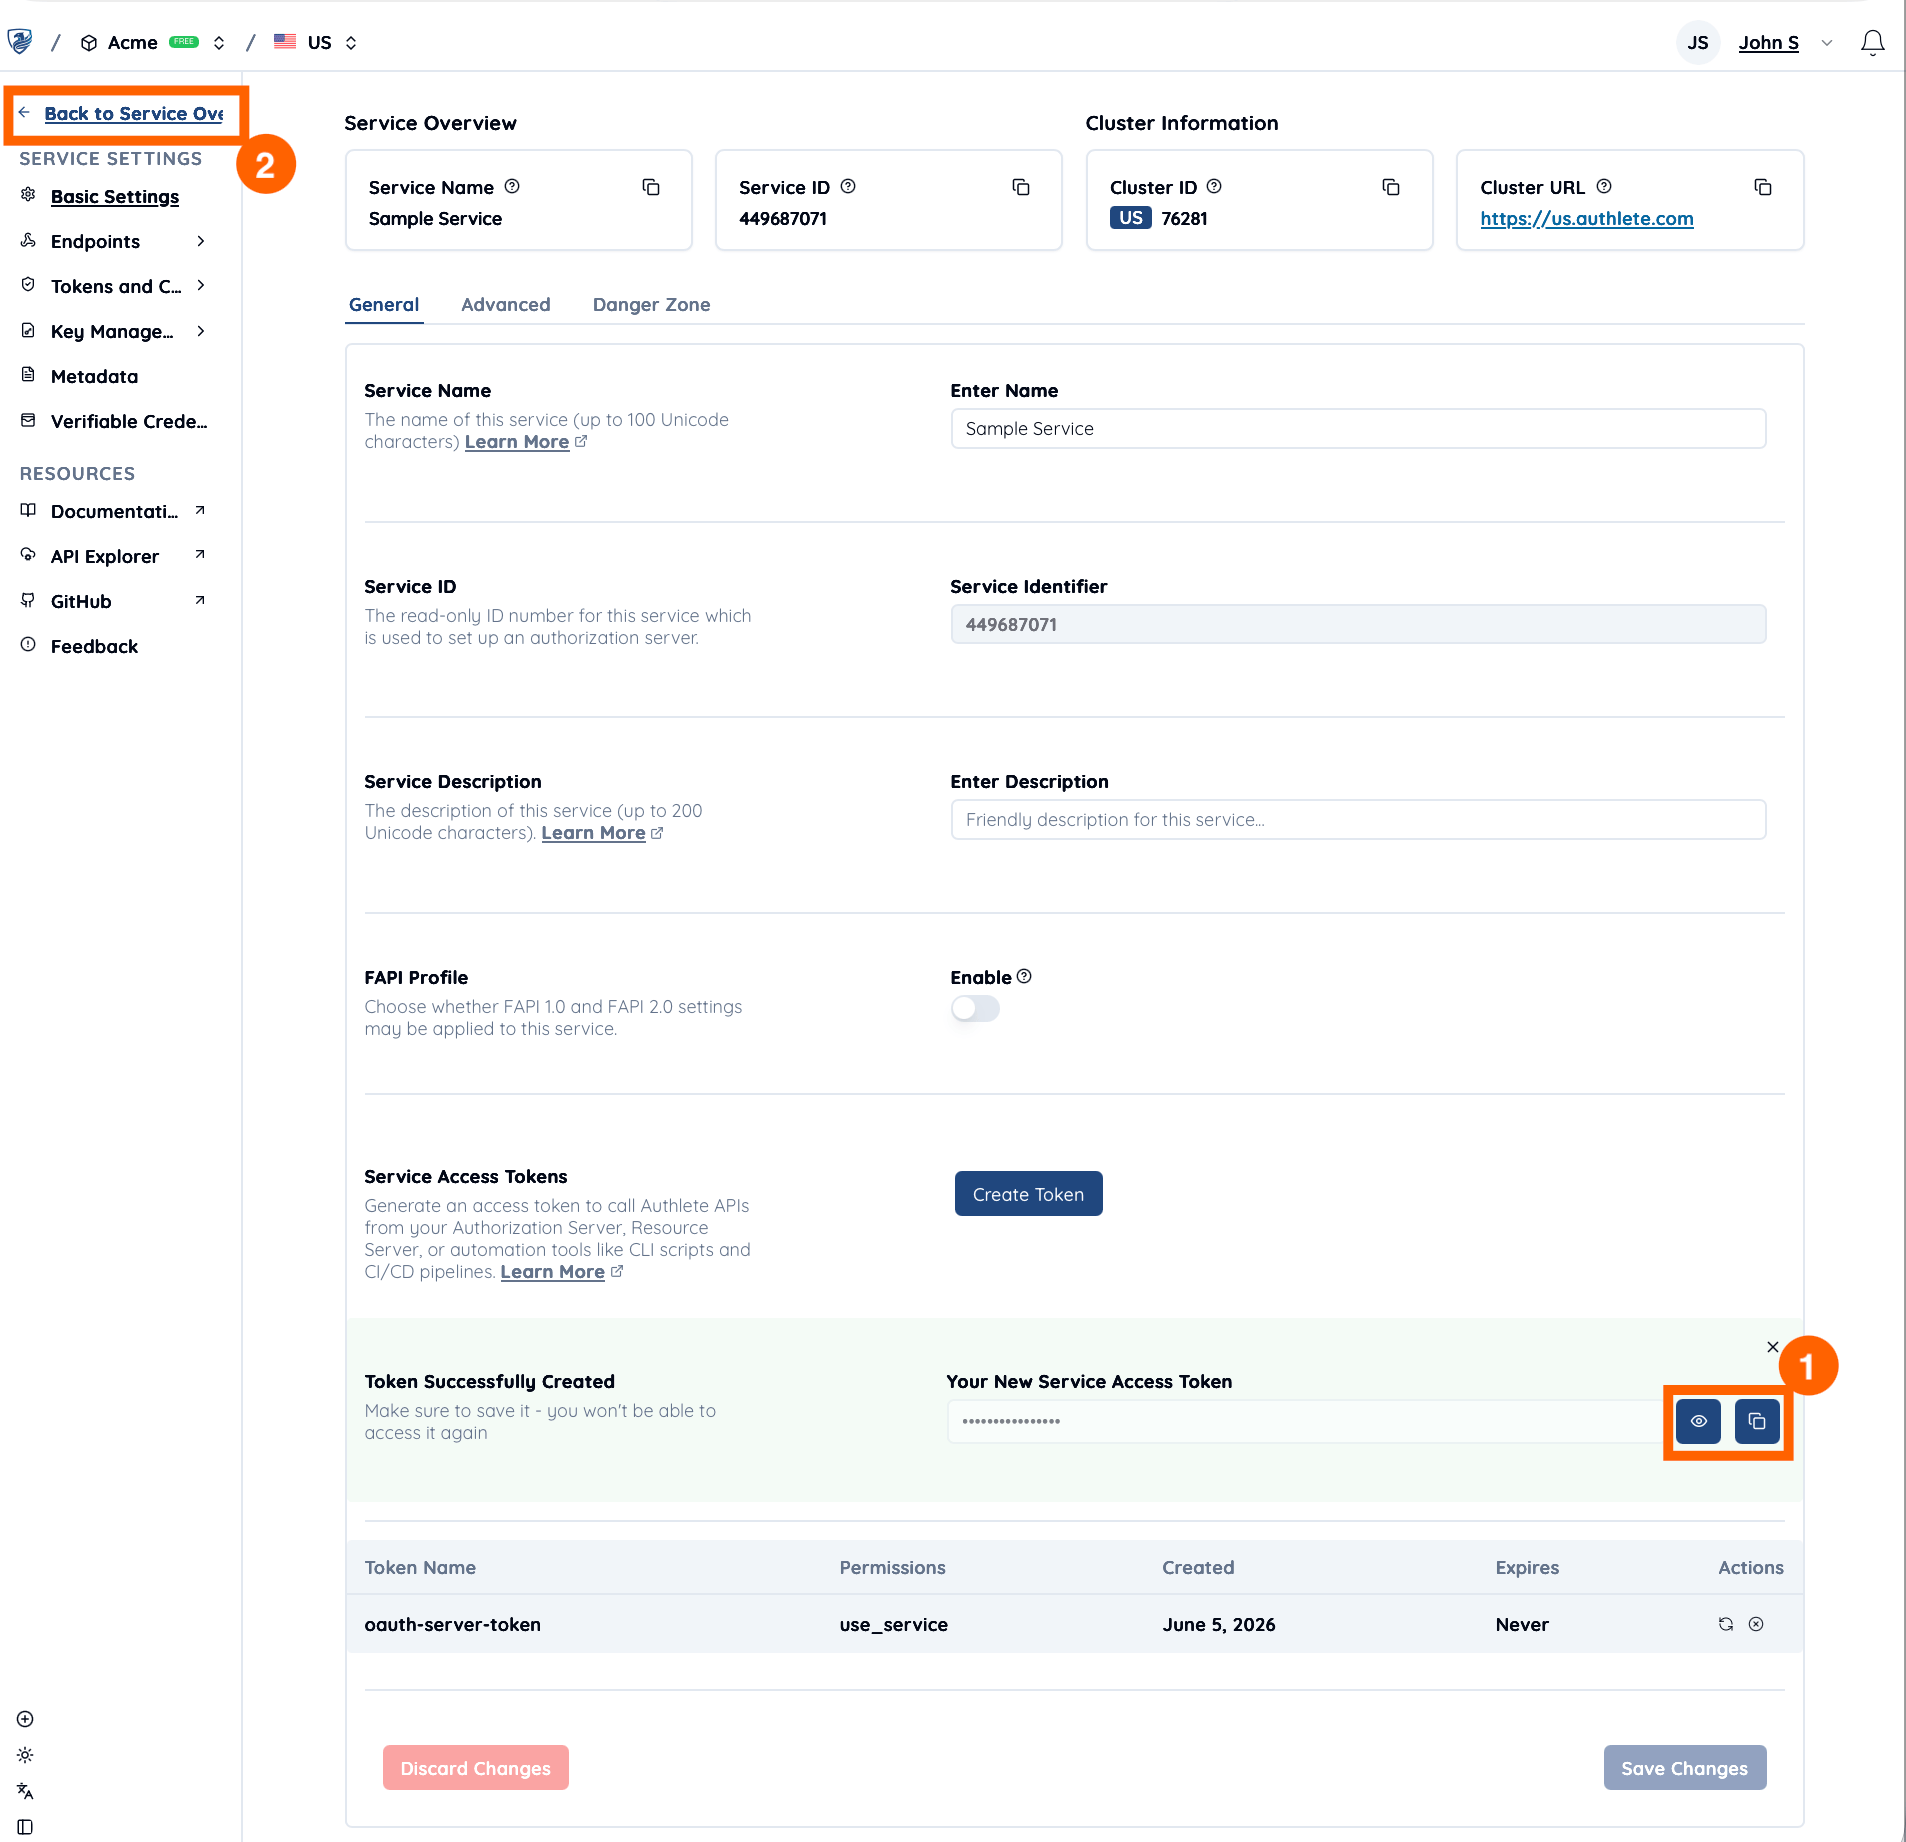
 新しい Service Access Token がリストに表示されます。
1. **Copy** または **Show** をクリックしてトークン値を取得します。この値を、以降の API リクエスト時の認証に用います。また、この値は作成時のみ表示されることにご注意ください。
2. **Back to Service Overview** をクリックして、Service のメインページに戻ります。
新しい Service Access Token がリストに表示されます。
1. **Copy** または **Show** をクリックしてトークン値を取得します。この値を、以降の API リクエスト時の認証に用います。また、この値は作成時のみ表示されることにご注意ください。
2. **Back to Service Overview** をクリックして、Service のメインページに戻ります。
 *これでAuthlete APIをテストする準備ができました!*
***
*これでAuthlete APIをテストする準備ができました!*
***
4. Authlete API を呼び出す
最初の API リクエストを、[/service/configuration](/api-reference/service-management/get-service-configuration) API に送信してみましょう。この API は OIDC ディスカバリーエンドポイントのバックエンドとして機能し、同エンドポイントがクライアント (OIDC リライングパーティー) からのリクエストに応じて返却する OpenID プロバイダーメタデータを生成します。
```mermaid placement="top-right" theme={null}
%%{init: {
'themeVariables': {
'fontSize': '20px',
'nodeTextMargin': 40
},
'flowchart': {
'nodeSpacing': 40,
'rankSpacing': 40,
'padding': 5
}
}}%%
graph LR
client[OIDC RP]
subgraph as[OIDC IdP]
direction TB
disco[Discovery
Endpoint]
end
subgraph authlete[Authlete]
direction TB
config["/service/configuration
API"]
end
client -- Metadata
Request --> disco
disco -- Service
Configuration
Request
--> config
```
以下は **curl** と **API エクスプローラー** を用いる例です。プレースホルダーを実環境の値に置き換えてください。
| 項目 | 値 |
| :----------------------- | :-------------------------------------------- |
| **API Cluster のホスト名** | `https://us.authlete.com` |
| **Service Access Token** | `qwEF2t8gxW9MerraRyVtscDTKVPa66kjBBPUpBduvXw` |
| **Service ID** | `3615784225` |
curl を使用する
ターミナルで以下のコマンドを実行して、HTTP GET リクエストを送信します:
```bash For Linux/MacOS theme={null}
curl -X GET "https://us.authlete.com/api/3615784225/service/configuration" \
-H "Authorization: Bearer qwEF2t8gxW9MerraRyVtscDTKVPa66kjBBPUpBduvXw"
```
```powershell For Windows theme={null}
curl.exe -X GET "https://us.authlete.com/api/3615784225/service/configuration" `
-H "Authorization: Bearer qwEF2t8gxW9MerraRyVtscDTKVPa66kjBBPUpBduvXw" | ConvertFrom-Json
```
成功した場合、API は以下のような OpenID プロバイダーメタデータを返します:
```json theme={null}
{
"issuer": "https://authlete.com",
[...]
"scopes_supported": [
"address",
"email",
"openid",
"offline_access",
"phone",
"profile",
"grant_management_query",
"grant_management_revoke"
],
"response_types_supported": [
"none",
"code",
"id_token",
"code id_token"
],
[...]
}
```
API エクスプローラーを使用する
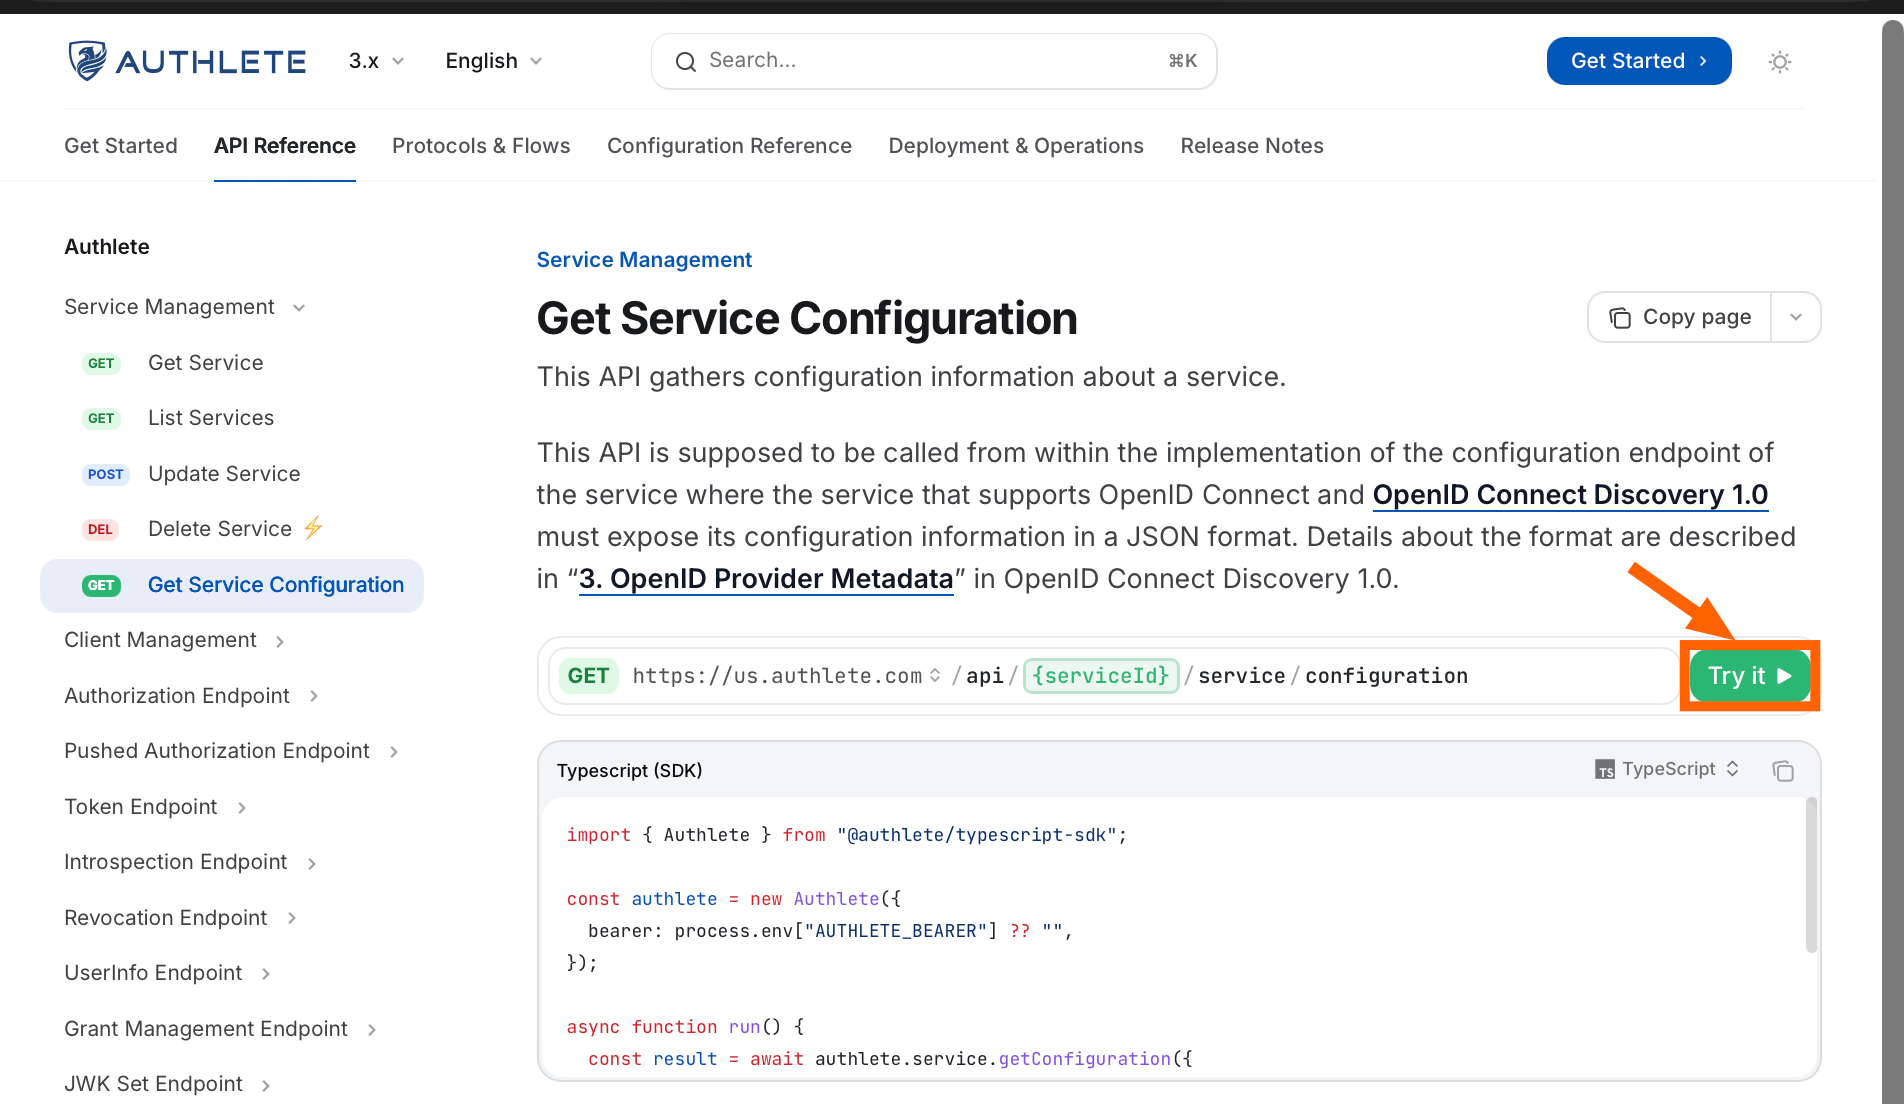
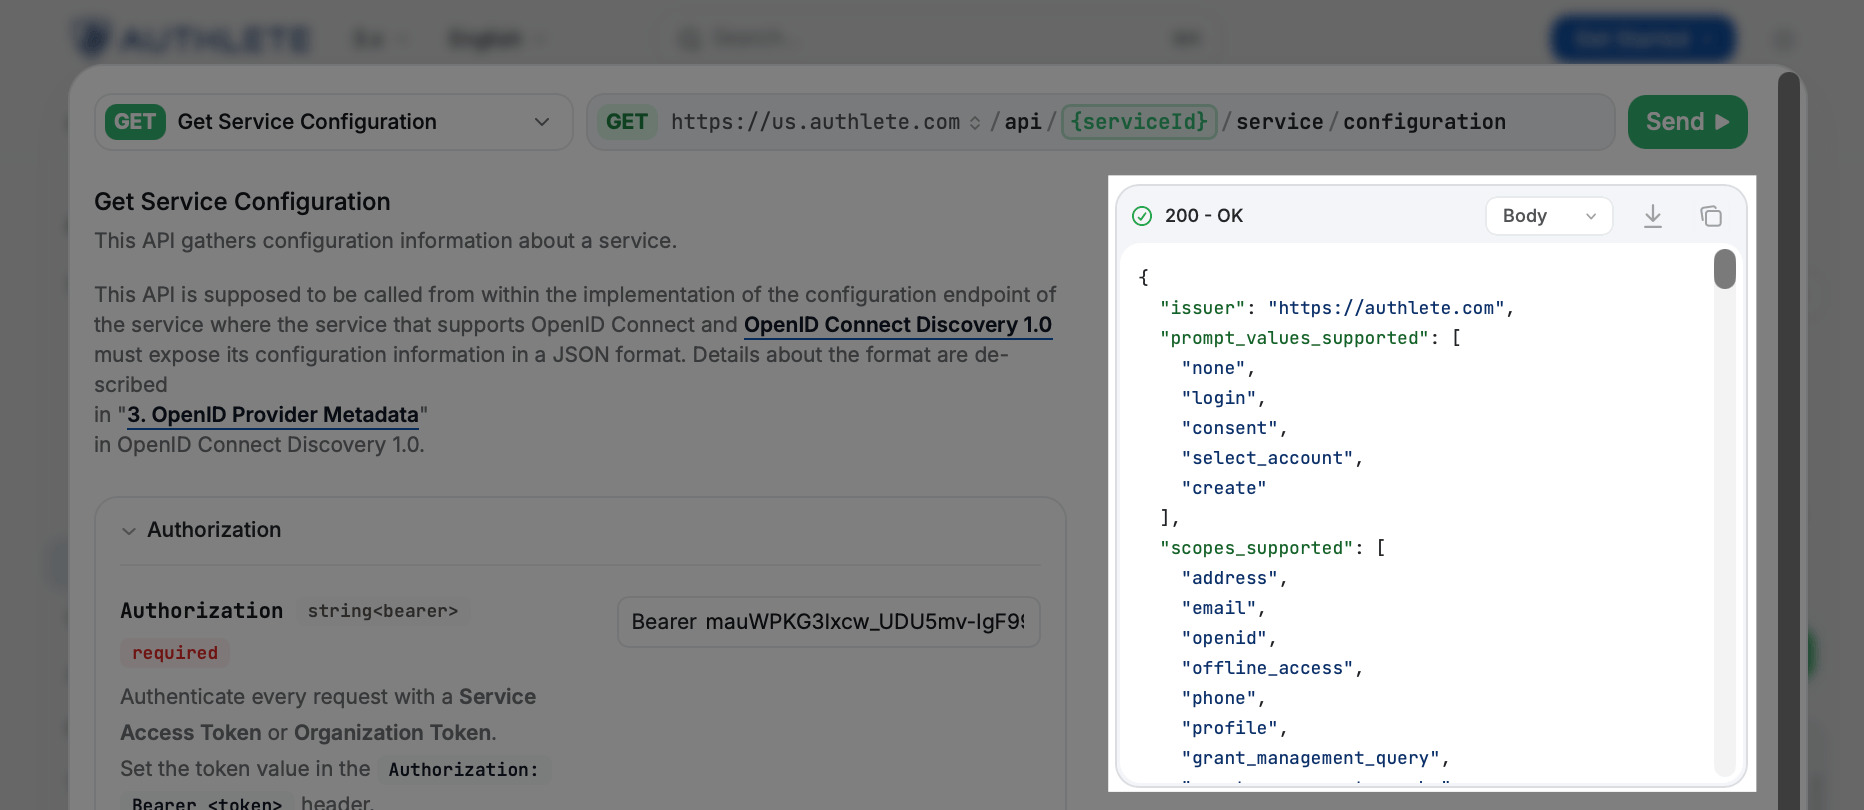
[/service/configuration API リファレンスページ](/api-reference/service-management/get-service-configuration)を開き、**Try it** ボタンをクリックします。
 1. **API Cluster のホスト名**を選択します。
2. **Service Access Token** を入力します。
3. **Service ID** を入力します。
4. **Send** をクリックします。
1. **API Cluster のホスト名**を選択します。
2. **Service Access Token** を入力します。
3. **Service ID** を入力します。
4. **Send** をクリックします。
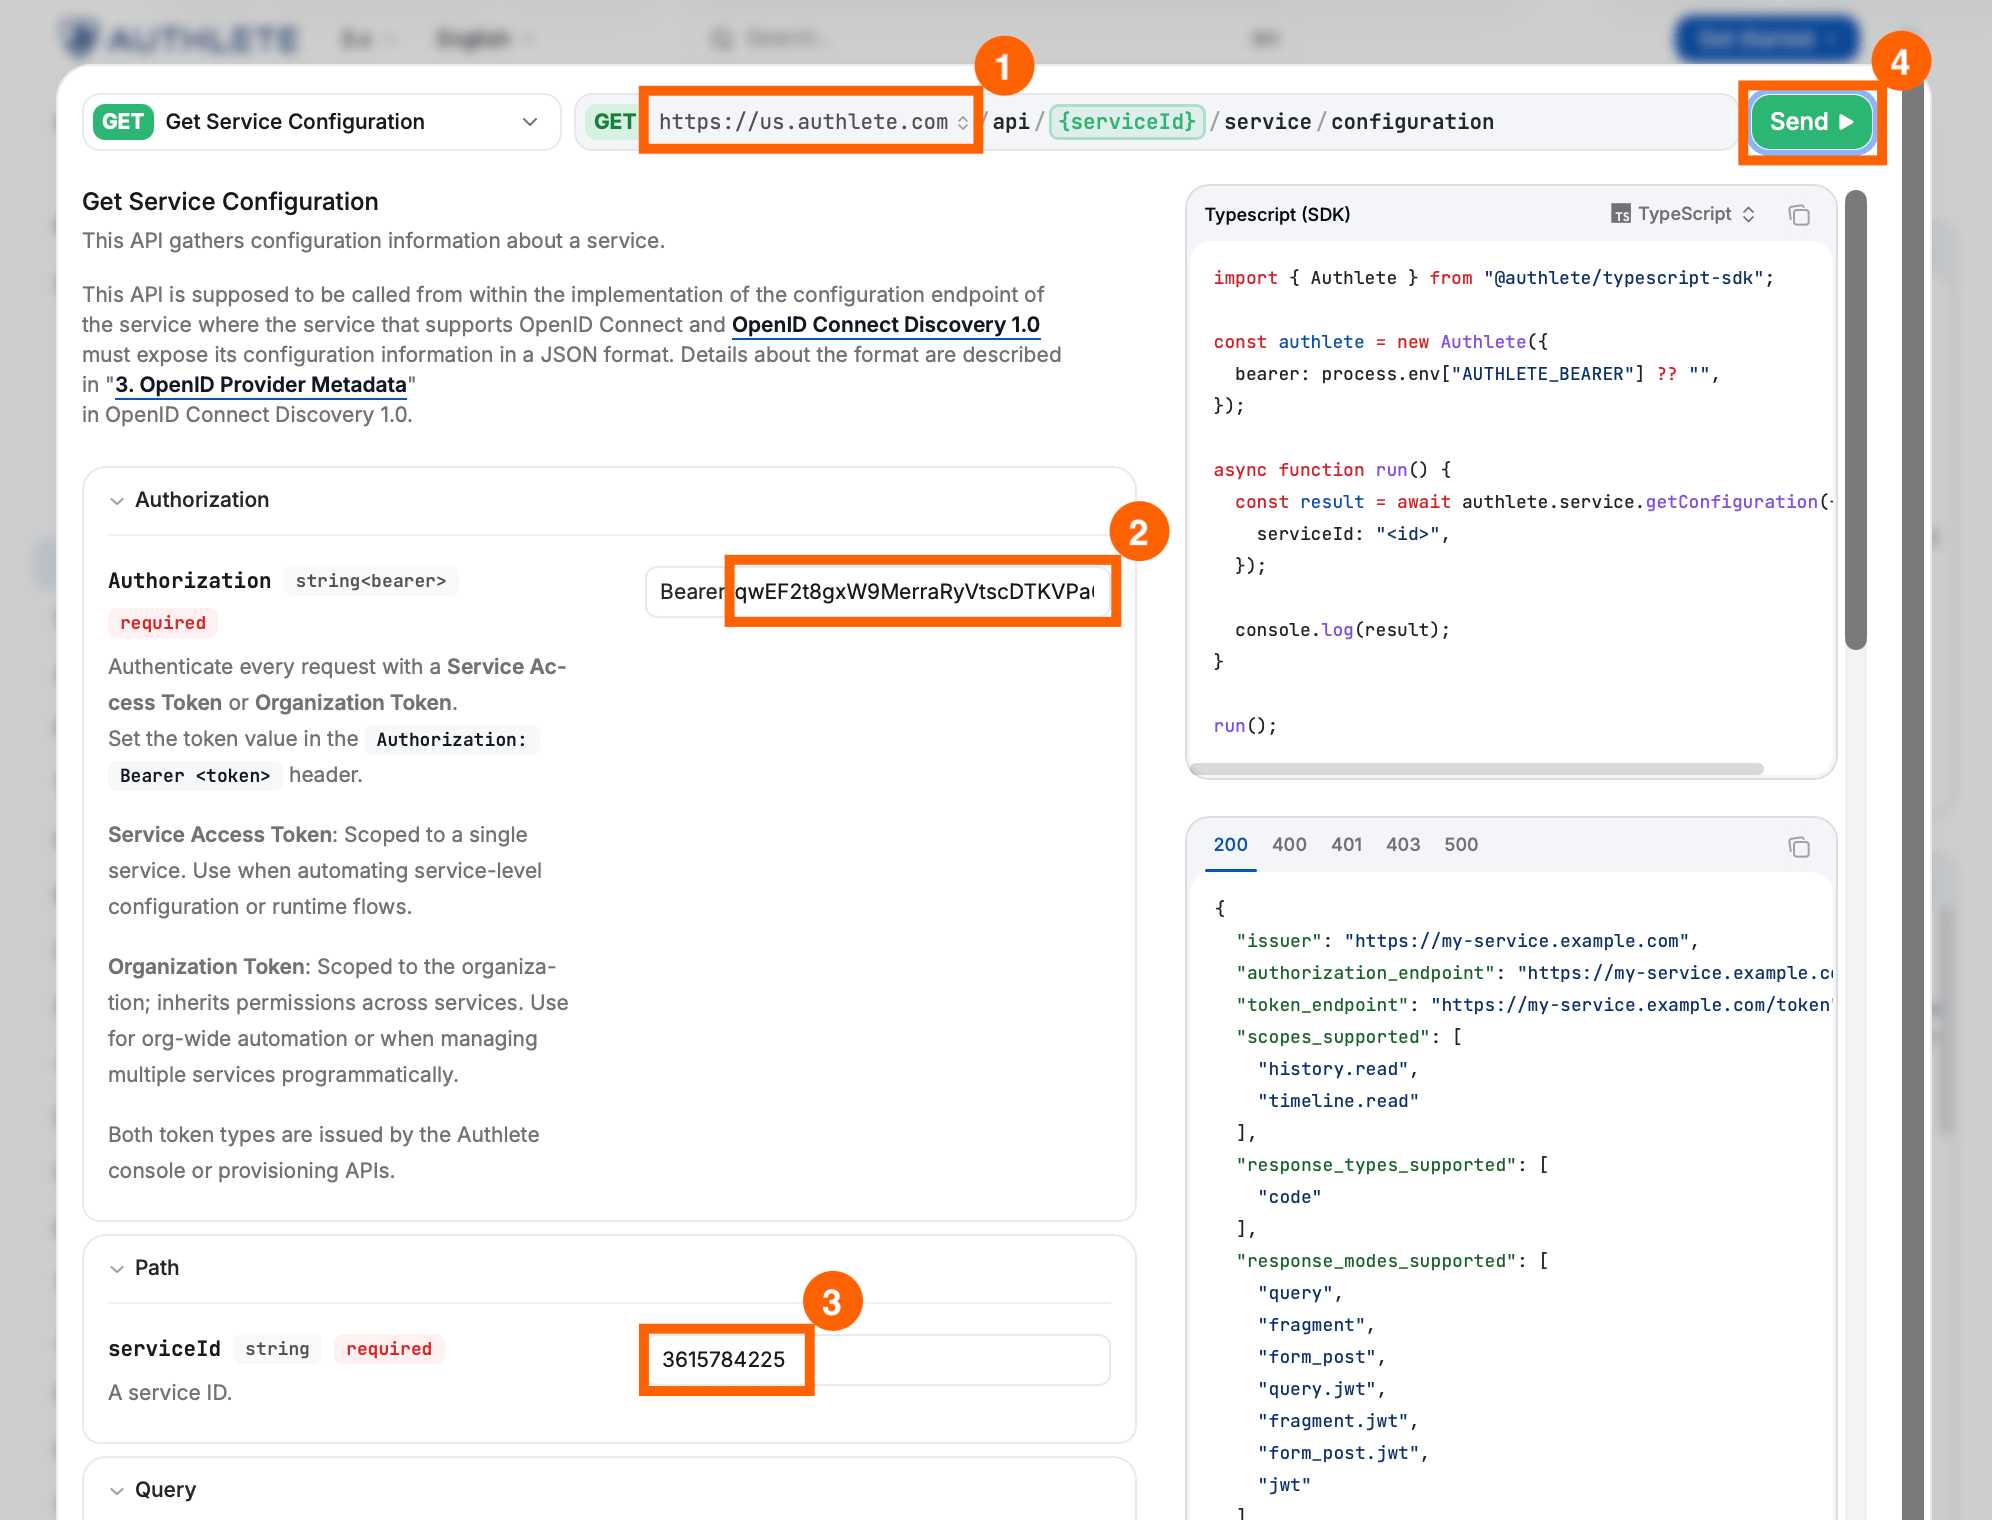 API レスポンスはレスポンスセクションに表示されます。
 ***
***
次のステップ
これで Authlete アカウントのセットアップとサービス設定が完了しました。さらに詳しく探索してみましょう。
* [**OAuth 2.0 Basics - API Tutorials**](/ja/get-started/quickstarts/oauth-2-0-basics): curl や他のツールを使用して API を直接呼び出して、Authlete がどのように機能するかを学びます。
* [**Using Demo Authorization Server**](/ja/get-started/quickstarts/using-demo-authorization-server): Authlete API を用いて実装された、オープンソースの認可サーバーフロントエンドをデプロイして、実際の OAuth/OIDC フローをテストします。
***
Authlete API による、OAuth/OIDC フローの処理を、認可リクエストのサンプルをもとに確認してみましょう。
クライアントを作成する
**Client** は、認可サーバーに対してトークン発行をリクエストしたり、リソースサーバーの保護されたリソースにアクセスするアプリケーションを表しています。Client は特定の Service のコンテキスト内で管理されます。
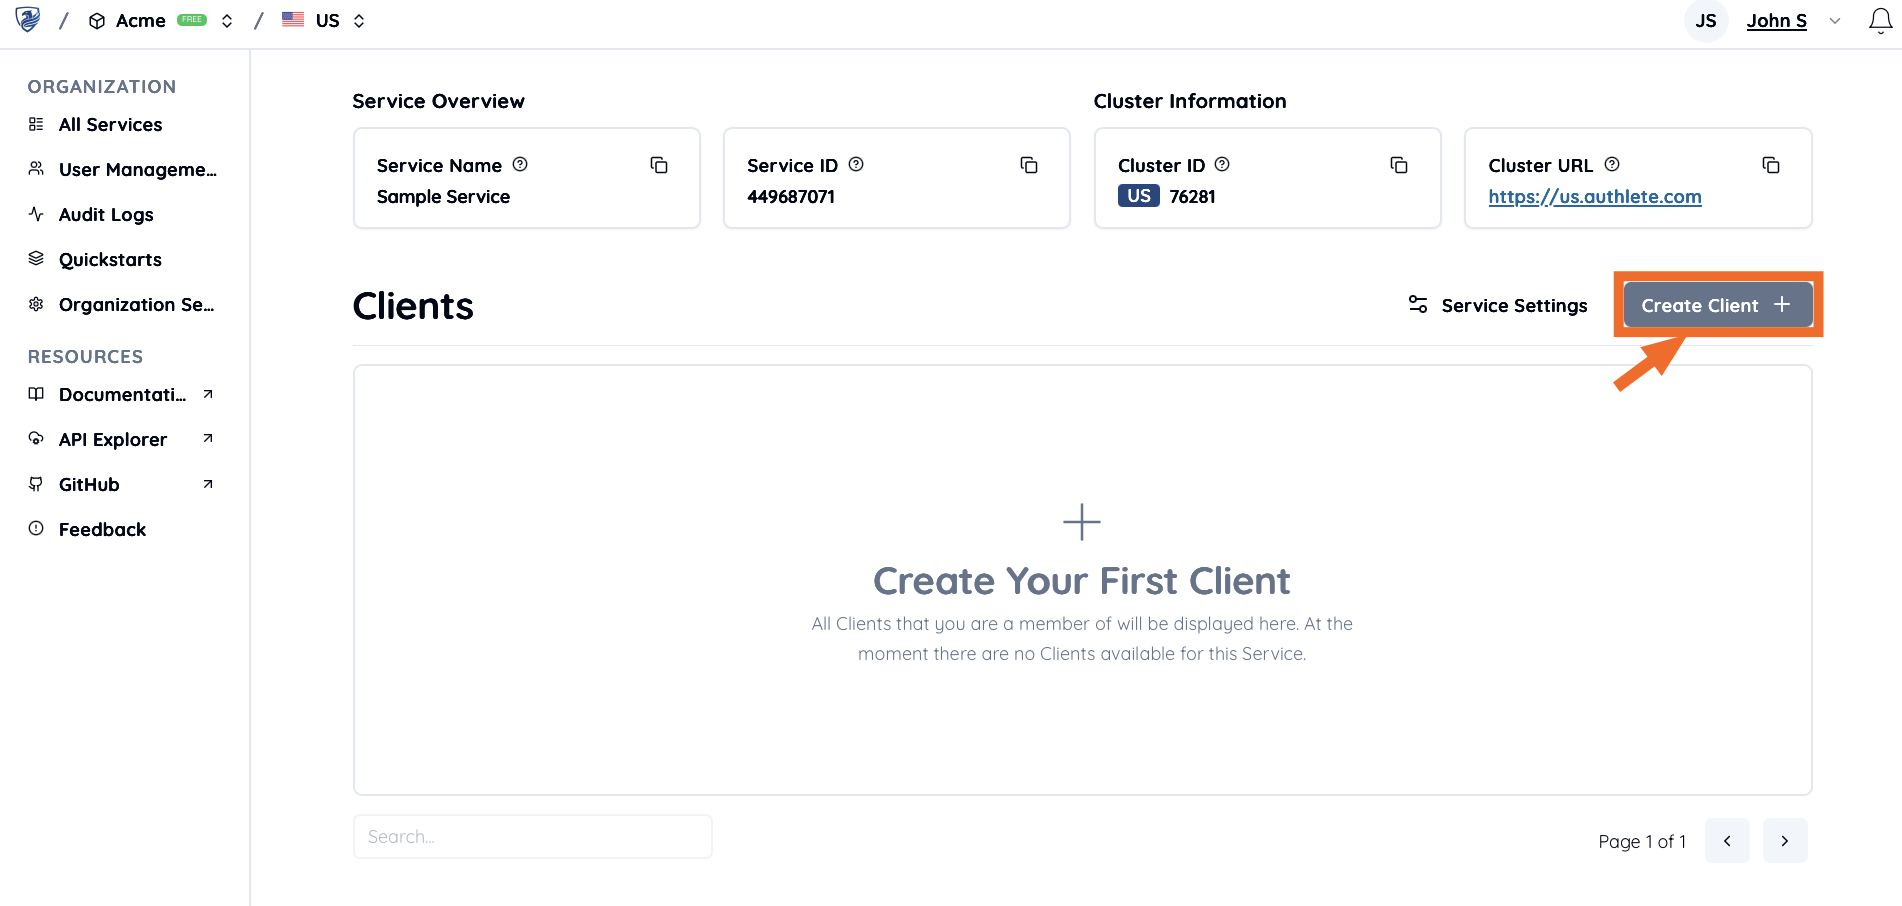
Services ページで、画面の右上にある **Create Client** ボタンをクリックします。
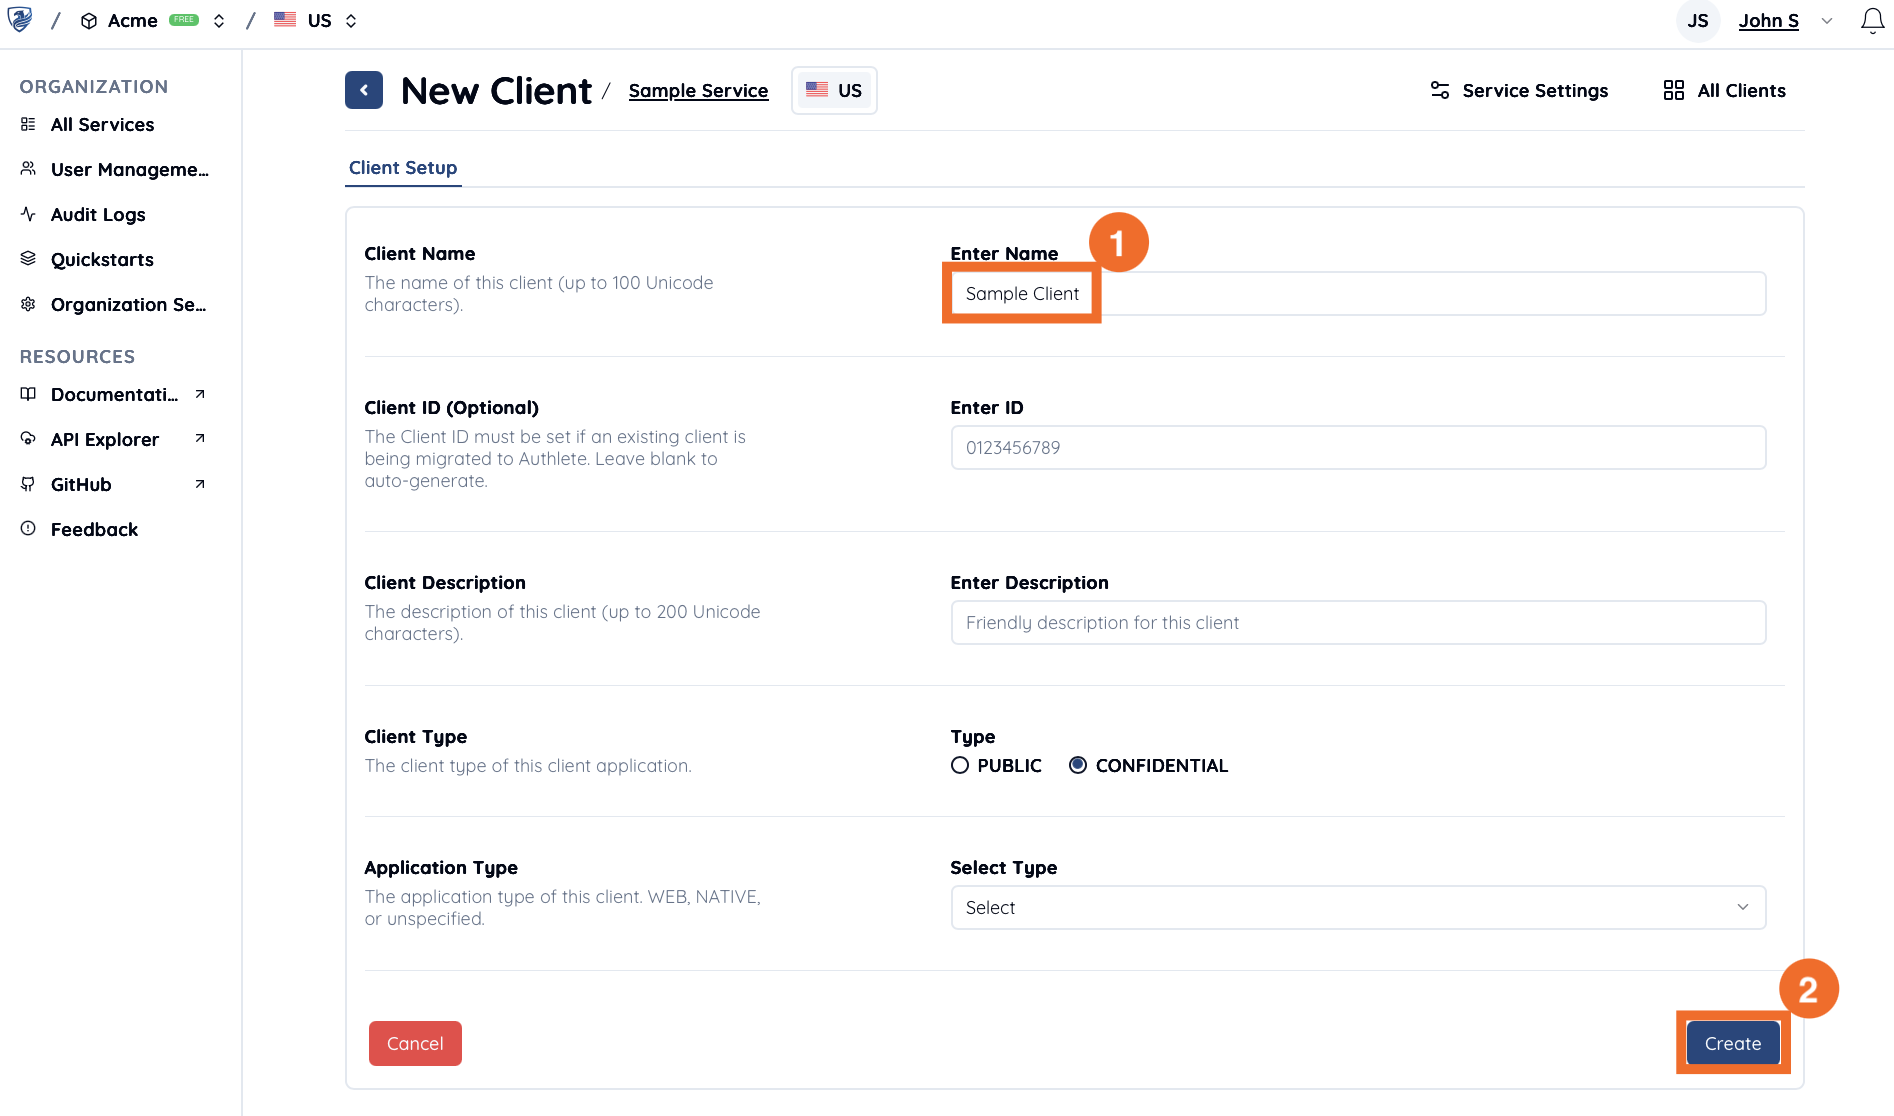
 **Client Name** を入力して、**Create** をクリックします。
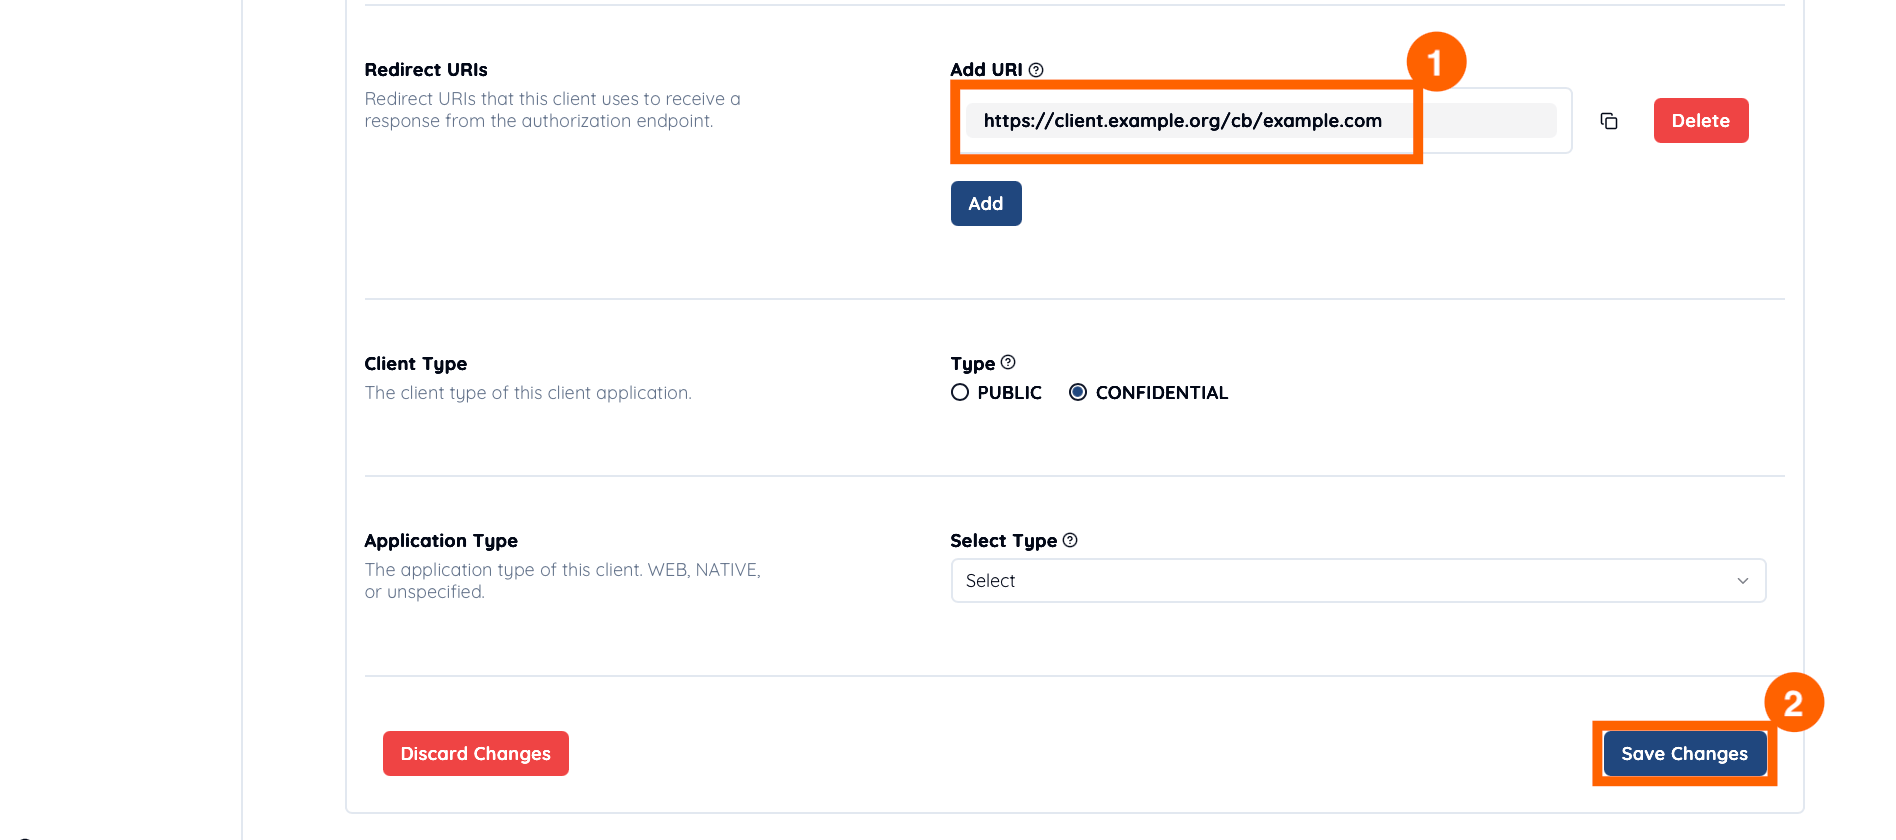
 Client の詳細が表示されます。必要に応じて **Client ID** と **Client Secret** をメモします。アプリケーションのリダイレクト URI を登録するために、**Redirect URIs** セクションの **Add** をクリックします。
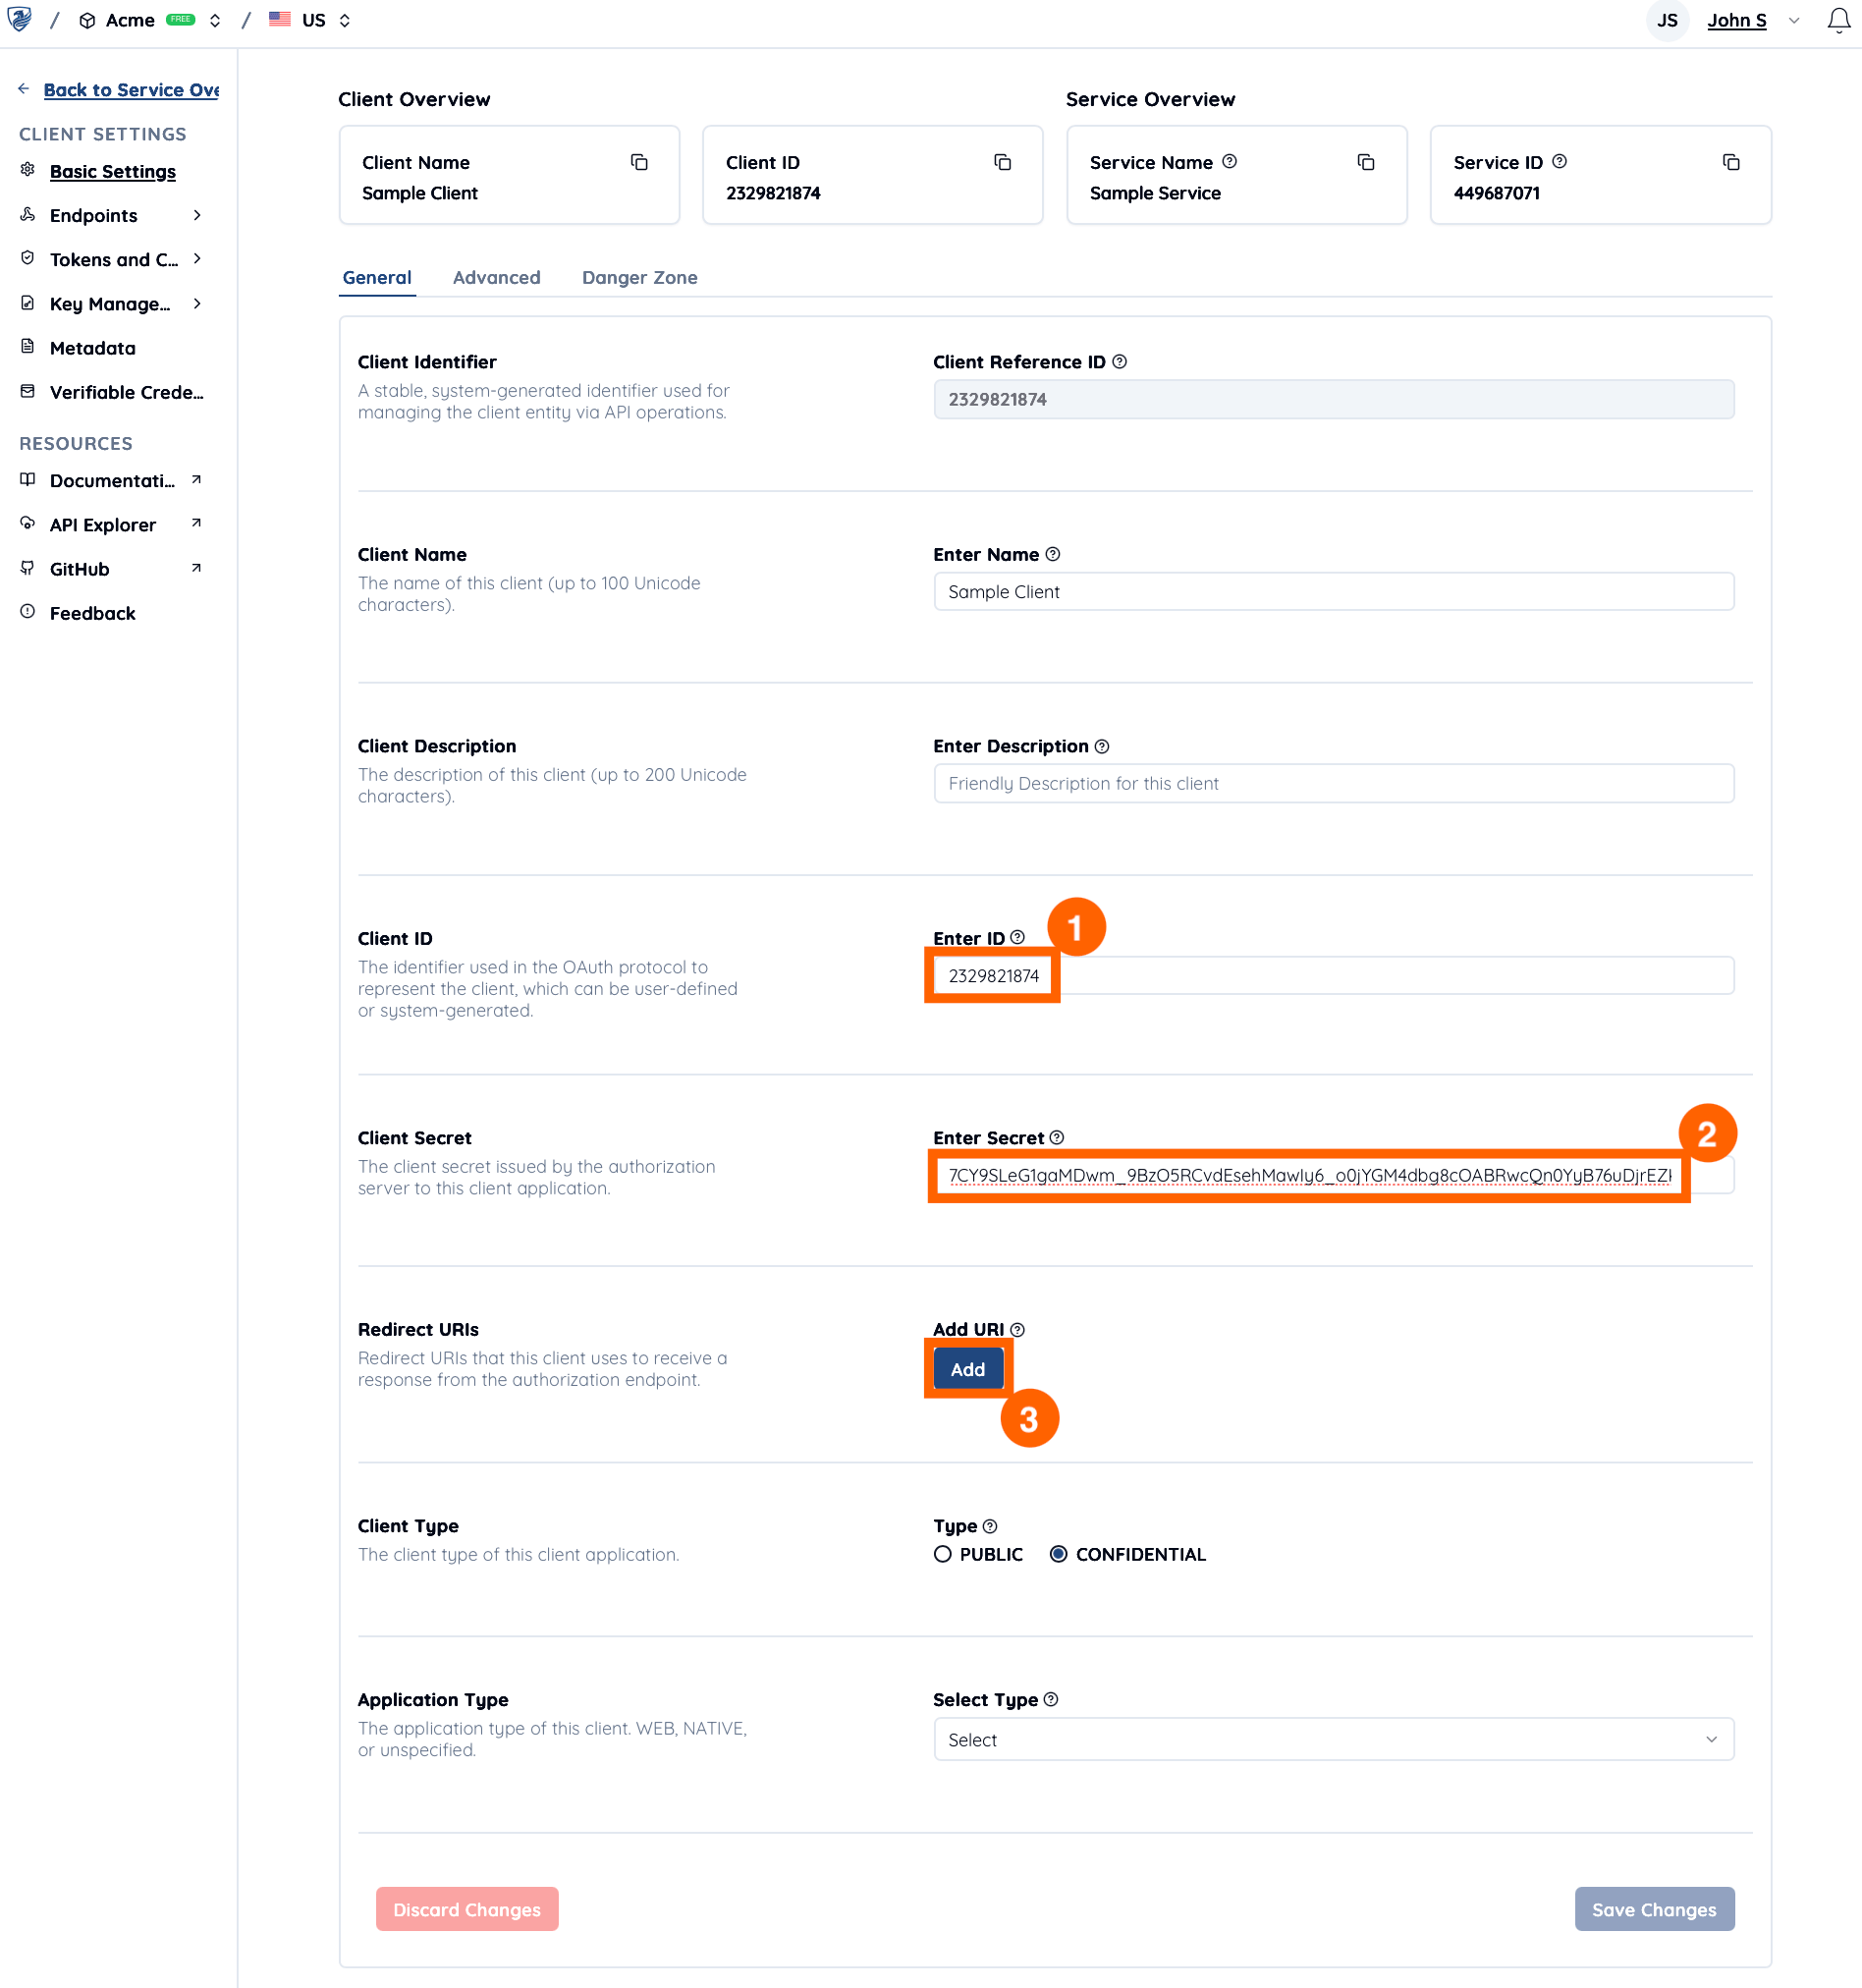 例として、`https://client.example.org/cb/example.com` を入力して **Save Changes** をクリックします。
「認可リクエスト処理」API を呼び出す
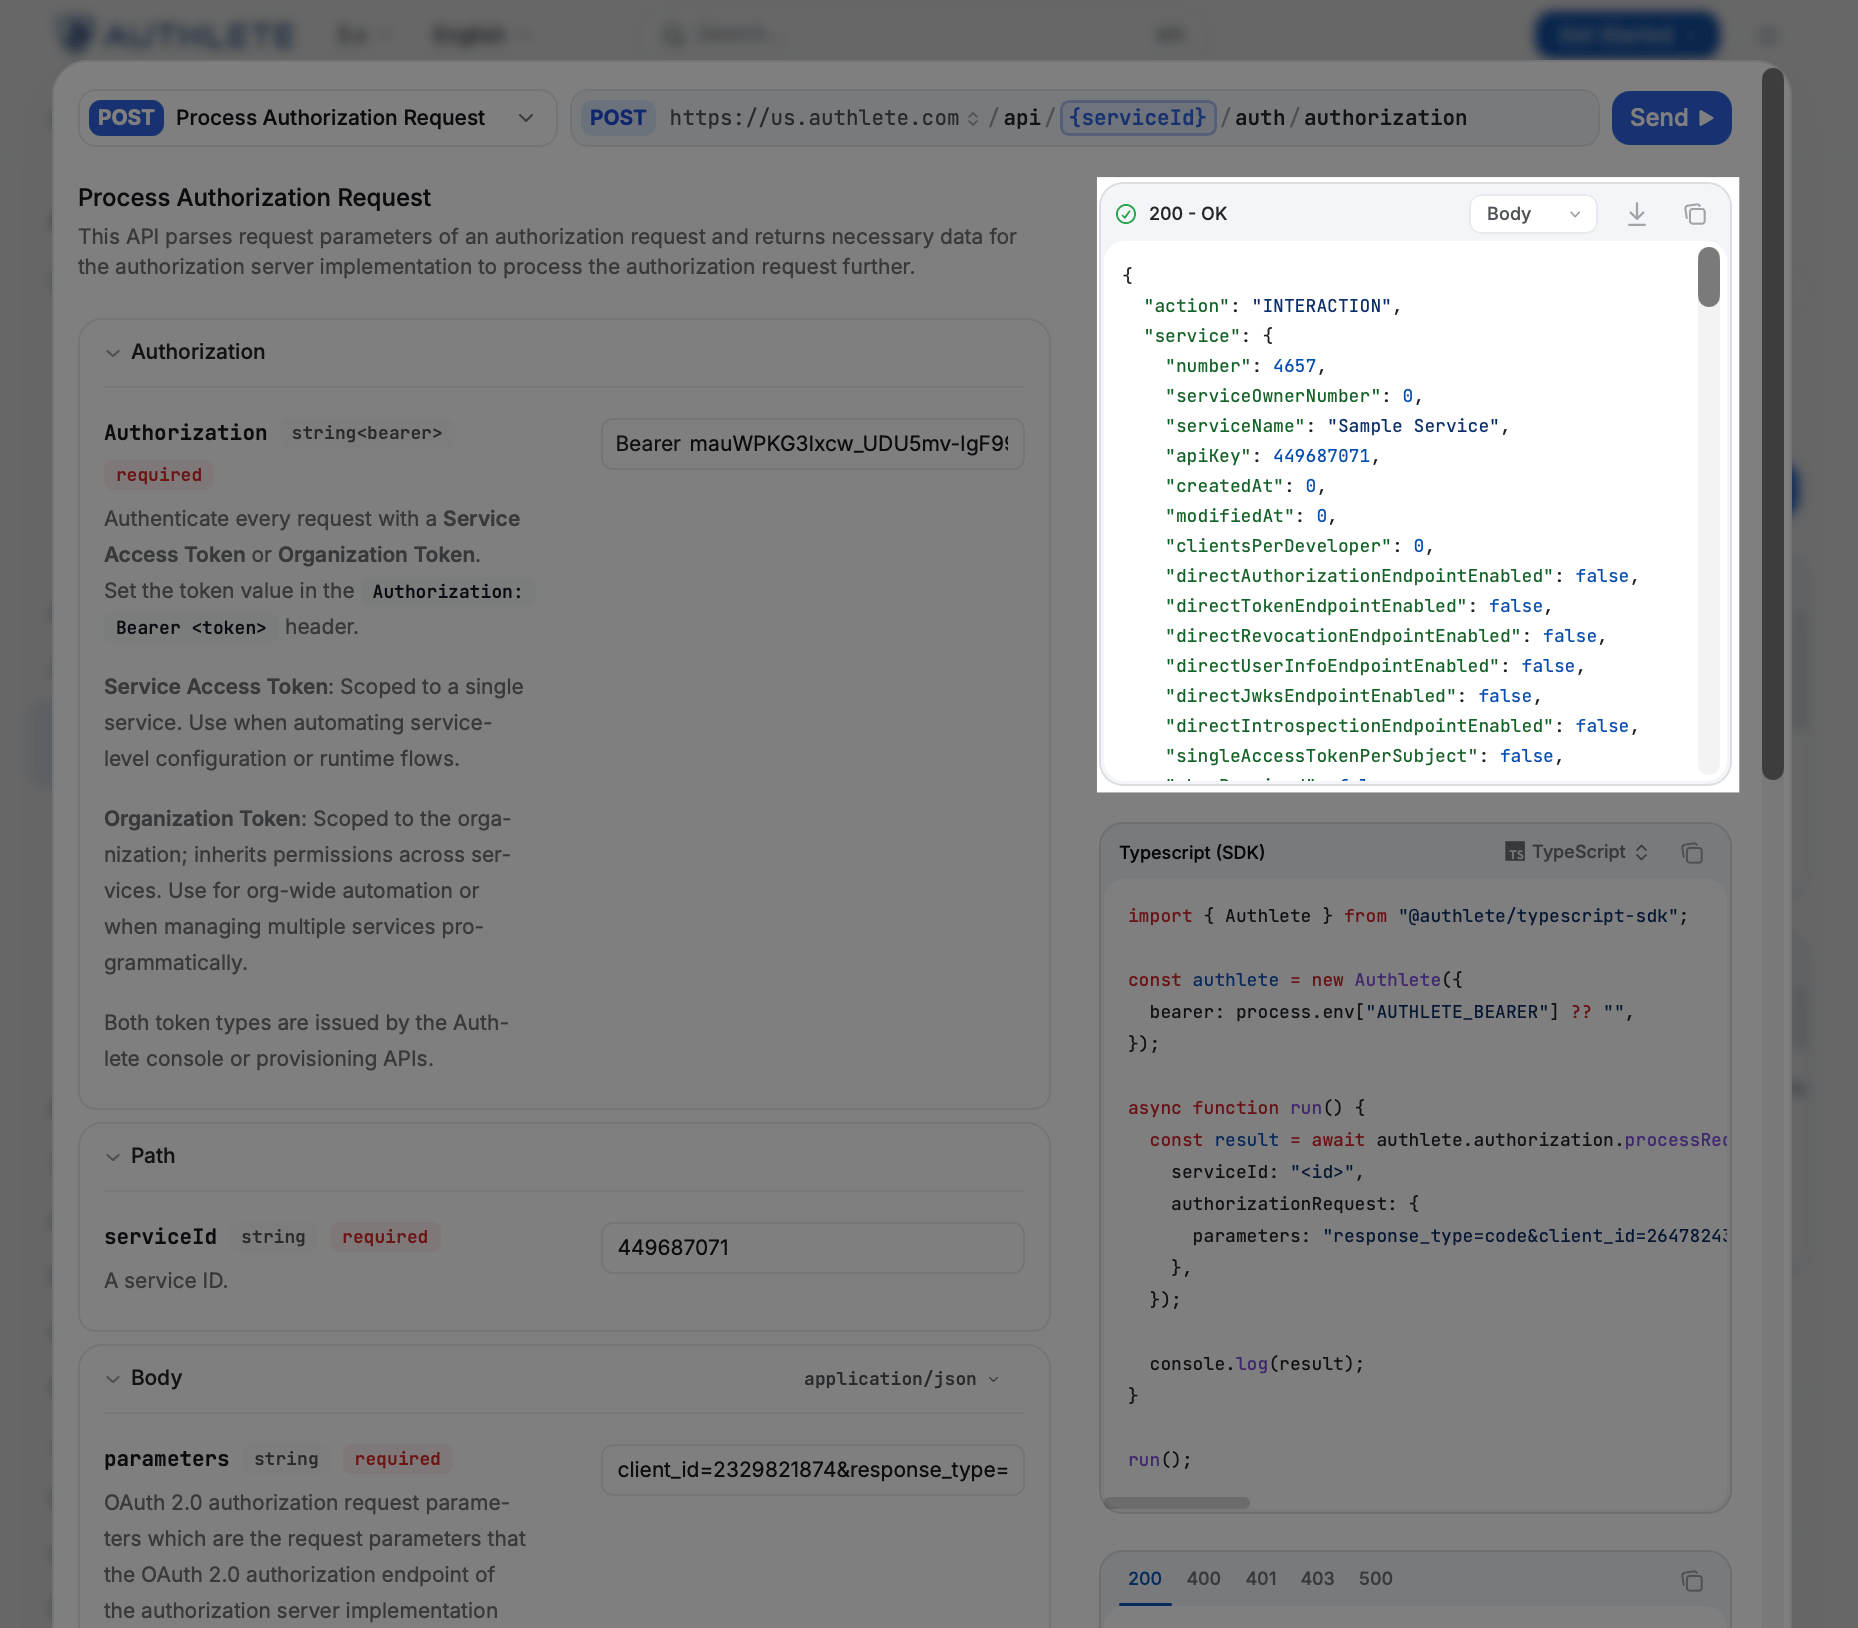
[Try /auth/authorization API](/api-reference/authorization-endpoint/process-authorization-request?playground=open) ツールに移動します。
1. **API Cluster のホスト名**を選択します。
2. **Service Access Token** を入力します。
3. **Service ID** を入力します。
4. 以下の文字列 (認可リクエストの内容) を **parameters** フィールドに入力します。なお、
`client_id` の値 (`2329821874`) は、前の手順で作成した実際の値に変更してください。
5. **Send** をクリックします。
| パラメーター | 値 |
| :------------- | ------------------------------------------------------------------------------------------------ |
| **parameters** | `redirect_uri=https://client.example.org/cb/example.com&client_id=2329821874&response_type=code` |
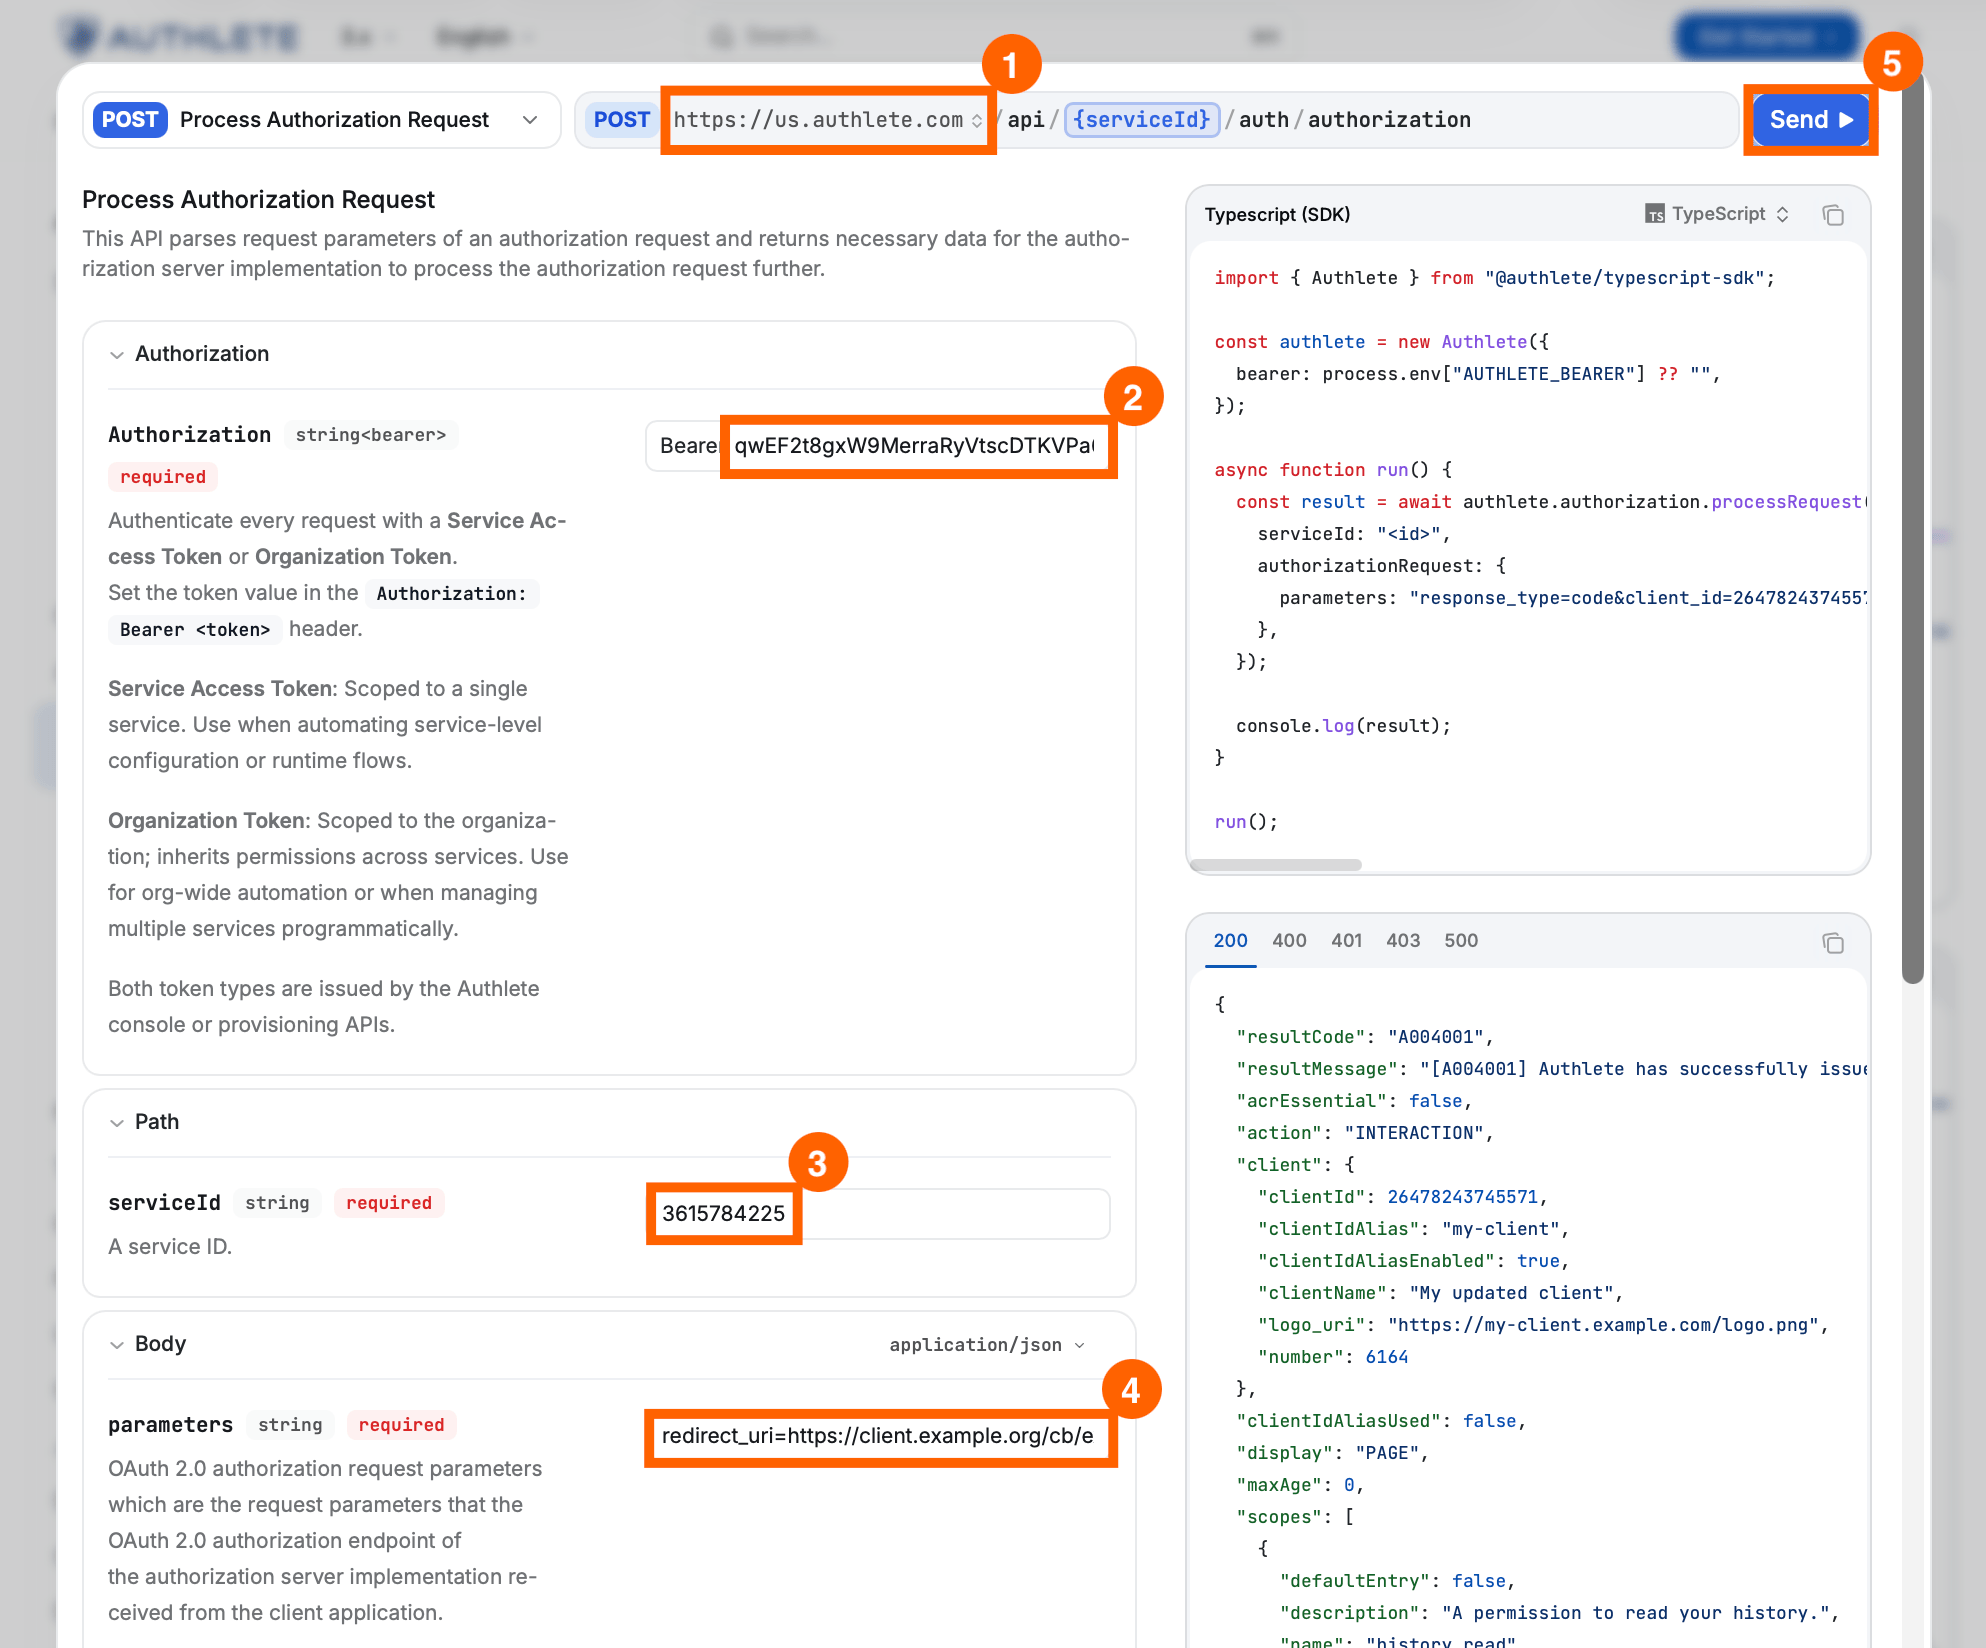 API レスポンスがレスポンスセクションに表示されます。